Posted by Dave Bull at 9:40 AM, September 17, 2015 [Permalink]
I've been getting emails recently from people who have been following this blog asking 'Dave, are you OK?' …
Yes, indeed! There is a ton of stuff going on here these days, but not much of it finds its way to this little corner. To keep up with what we are doing, it would be better to follow our Mokuhankan Conversations blog, or - for the most active update feed - our Facebook page.
Thanks!
Discussion [0]
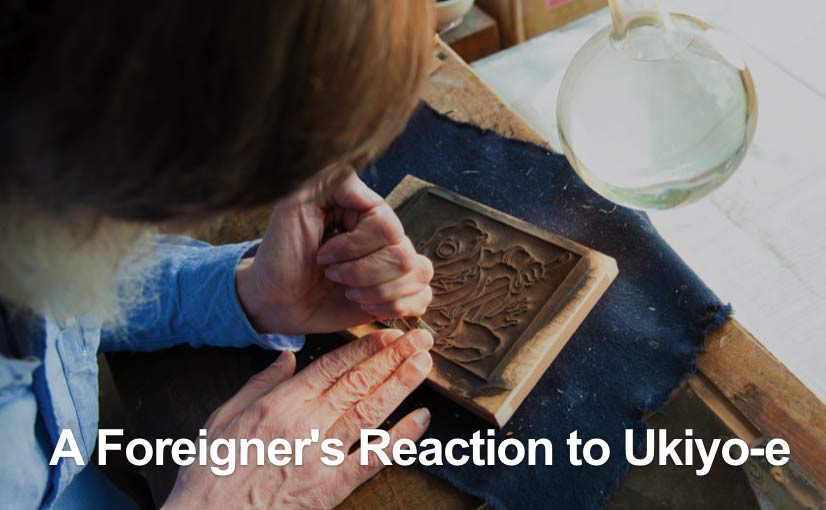
A Foreigner's Reaction ...
Posted by Dave Bull at 8:23 PM, July 1, 2014 [Permalink]
I had a visit from a trio of 'editor/writer/photographer' a couple of months ago, and the story that they produced arrived today. Luckily, it's an online publication, so everybody can read it easily ...
The interview was all in Japanese, and it seems as though that's the language in which the story was originally written as well, so some of the sentences are a bit 'funny', but in any case, it should prove interesting; please give it a try!
Discussion [0]
Arts of Japan series : print #8 : shipped!
Posted by Dave Bull at 8:20 AM, May 19, 2014 [Permalink]
So, after all the delays caused by the decision to 'mulligan' it and start over with a fresh piece of wood and re-cut the key block, we're done. The prints flew out of here late last week, and will be in the hands of the collectors 'any minute now'.
Was it necessary/worthwhile?
Yep.
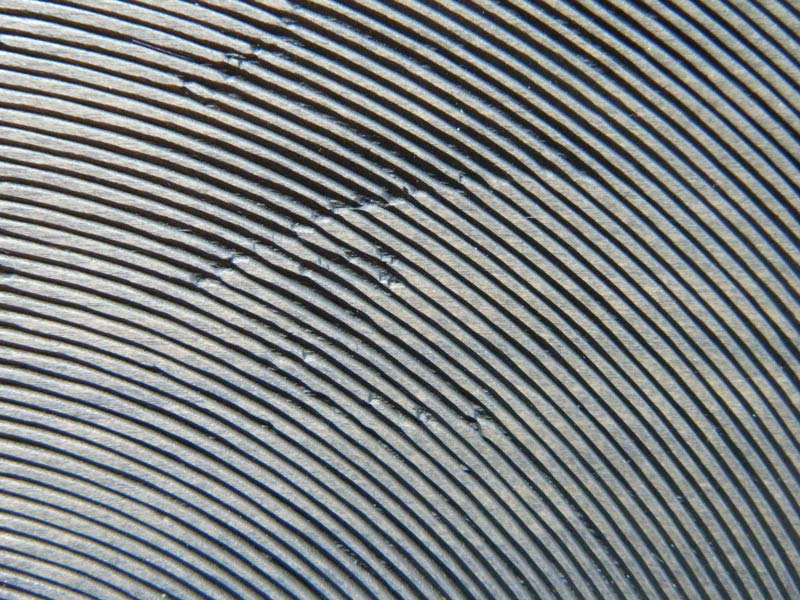
Here's the image I showed last week, a closeup of a proof copy from Keyblock Mark I:
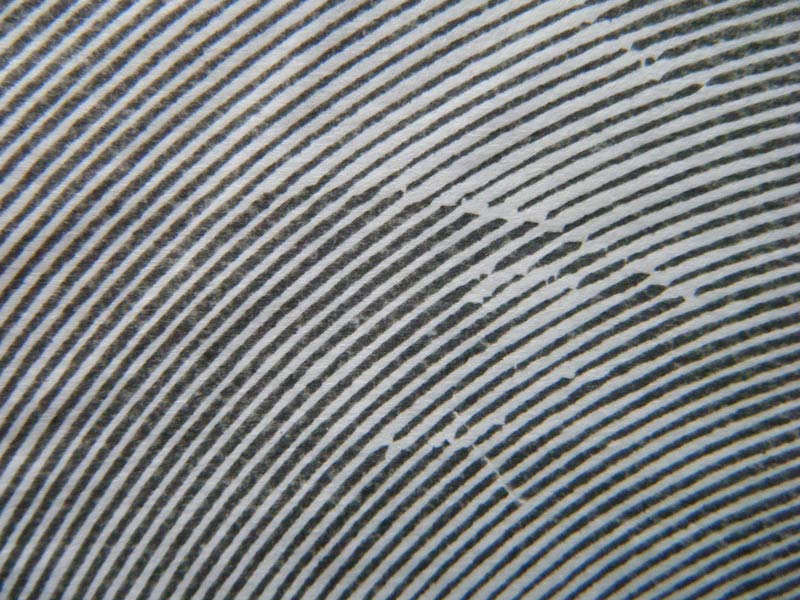
Here's the similar area from Mark II:
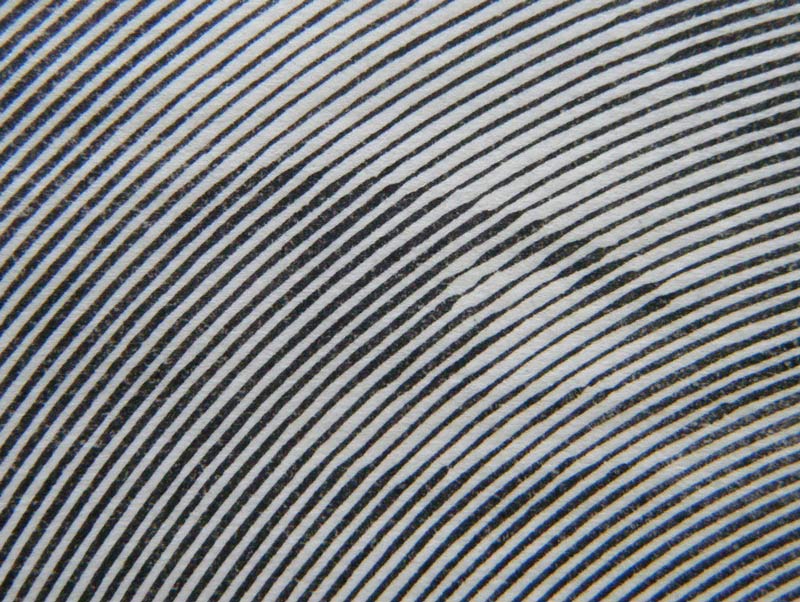
The actual lines don't 'line up' because as I mentioned earlier, I re-worked the spiral pattern so that it had a slightly higher definition - more lines per inch. That helped give a smoother appearance to the tones overall, but the main difference in the new version is the carving. As you can see, it is much less disjointed, with fewer 'corners' and gaps to jar the eye.
The final version is now on the website here.
Unlike most of my work, this one is not the kind of print that is best enjoyed in the hand closeup, but should really be viewed from some distance. And if you take your glasses off, it looks even better! :-)
Discussion [4]
Arts of Japan series : print #8 : setback
Posted by Dave Bull at 10:22 PM, April 29, 2014 [Permalink]
Somewhere just about a month back, I brought you a report on the progress of the current print. In one of the comments on that page, I mentioned that I was 'running into trouble', and so it has turned out. (If you haven't read that page yet, it might be a good idea to do so, as my next comments here only make sense if you understand the concept behind this image ...)
I can partly blame the wood, and partly myself. I used a boxwood block, intending to take advantage of that material's typically hard and dense structure, but it turned out to be quite soft and spongy instead. After carving was complete, the lines expanded a fraction ... a barely measurable amount, but enough to have a huge effect on the appearance of the finished print, and as this particular image totally depends on delicate differences in line thickness for the overall effect, this is a very big problem.
In addition to the block condition, I myself made a rather large error in my carving procedure. The Mellan print that I used as my inspiration for this effort creates tonal variation partly by varying the thickness of the line as it passes over deeper and lighter parts of the image, and partly by cutting the lines farther apart or closer together as required. His lines thus do not form a perfect spiral, but one that is distorted. I say 'distorted' not as a criticism but as a description. The combination of the two techniques results in an absolutely stunning effect.
I wasn't completely confident of being able to control both of those factors, so I thought I would try making my print by leaving the spiral alone and letting the line width variations create the tones. This works just fine, but I also did something else - in places where the image was the brightest, I cut pieces out of my line to create the highlights.
This was a big mistake, as it spoils the 'flow' of the line (Mellan didn't break his at all).
Let's see some images to show you how this has worked in practice ...
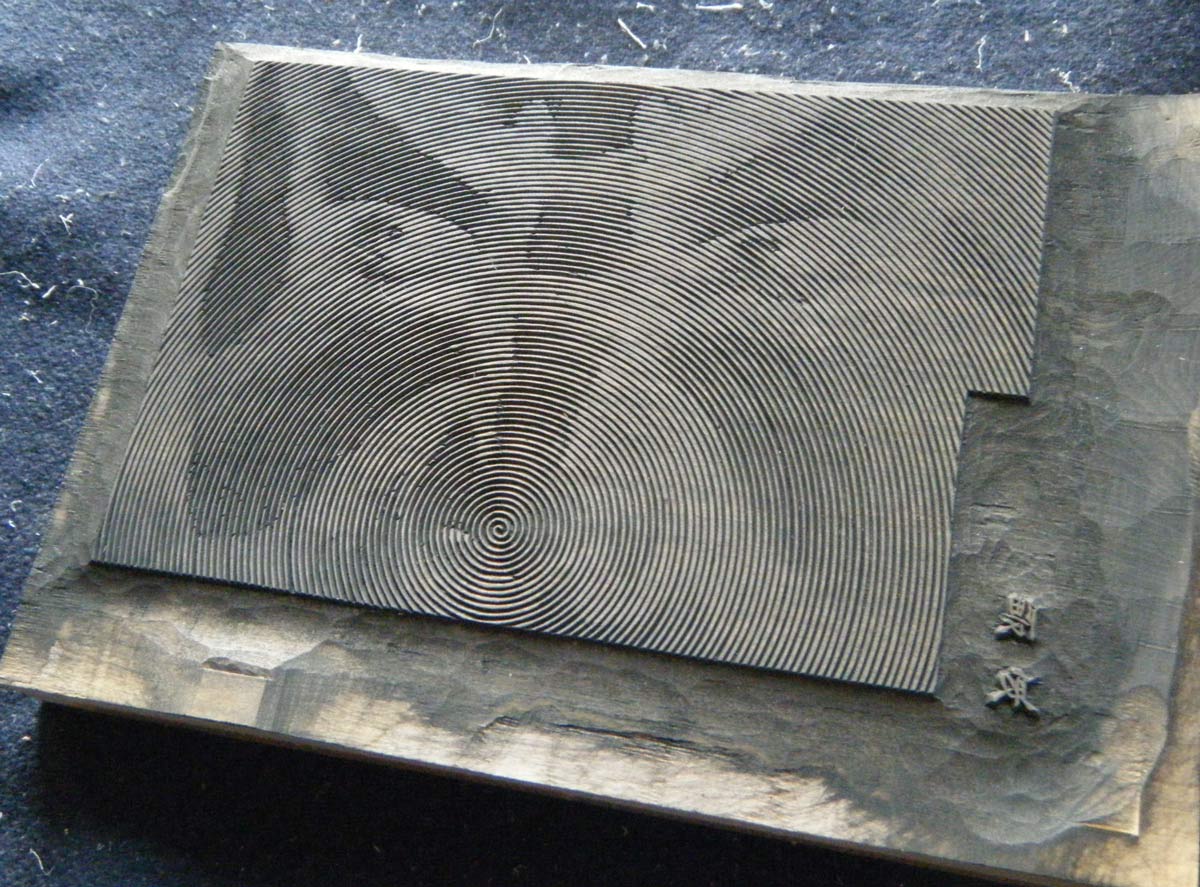
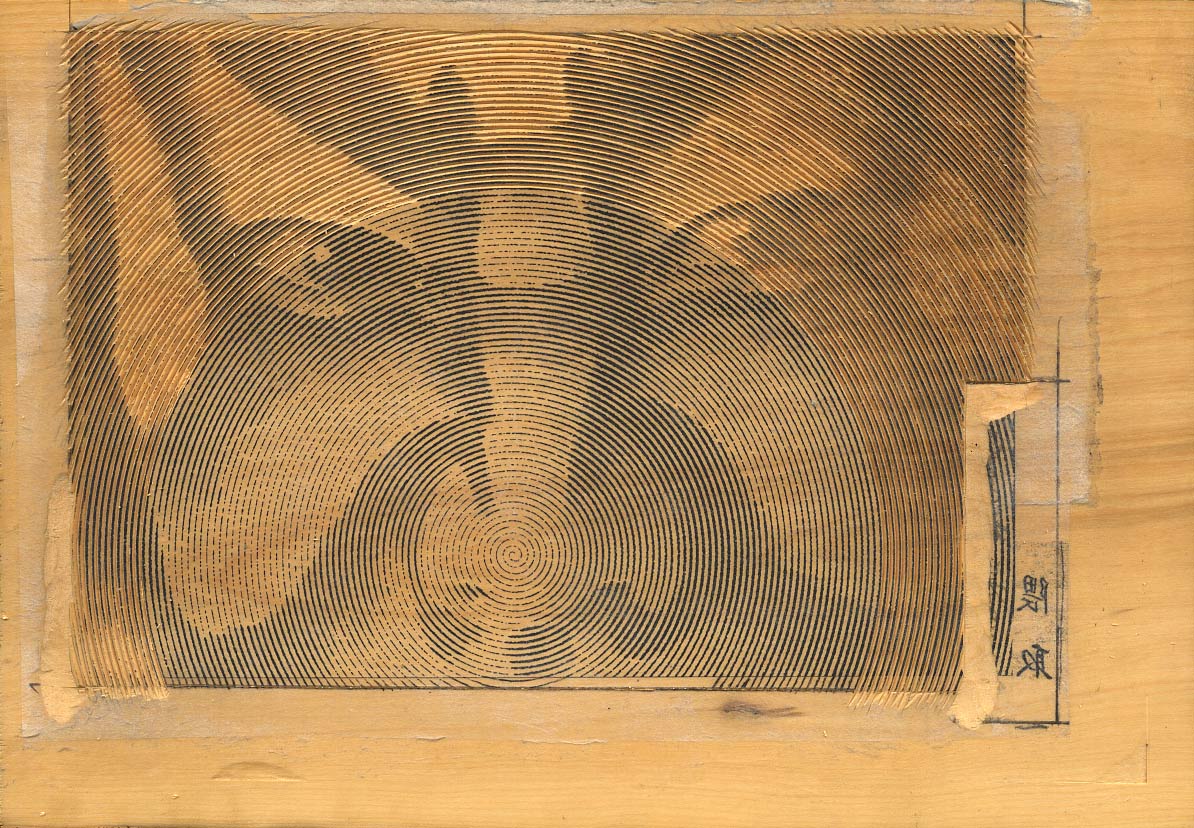
Here's the finished block:
Let's zoom in on one of the eyes:
And here's the corresponding place on a trial proof- there's no delicacy at all in the thin lines, and the ' highlight' breaks just look awful:
Here's the entire proof:
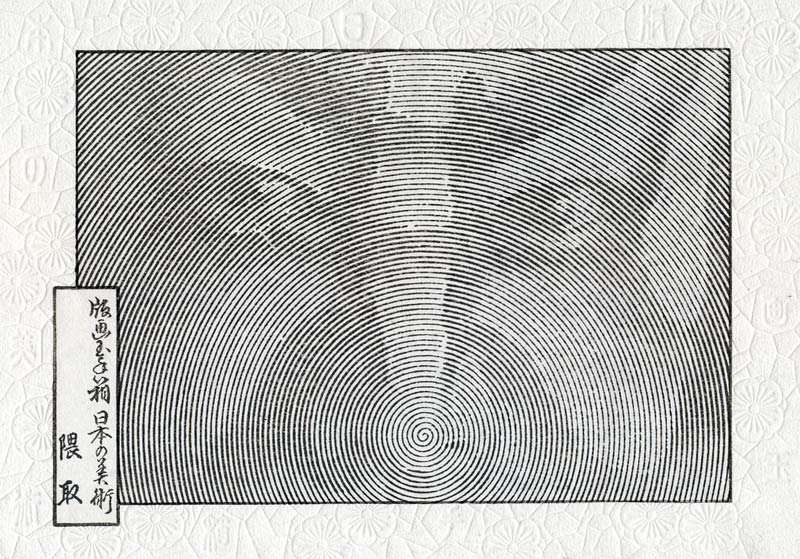
No way am I going to send this out to collectors - especially not after they've been waiting half a year!
So ... back to the cutting board. I dug out another piece of boxwood, one that seems a bit denser (but which will probably be no different), and I re-formatted the tracing with a higher 'lines per inch' density, to force me to cut finer lines on the bright parts of the image.
Here it is, after a day of carving:
And this time around ('around' ... that's a joke ...) I'm going to handle the highlights by simply letting the line get as thin as possible without breaking it. Hopefully, that will give me an image without those jagged breaks.
If all goes well, it'll be done in a couple of days, and I can get started printing and (finally) get something out to the waiting collectors!
'Shrink' back down ...
| Discussion [2]
Narita Airport exhibition
Posted by Dave Bull at 4:41 PM, April 1, 2014 [Permalink]
Yesterday was the setup for the exhibition at Narita Airport. We're in the Departure Hall of Terminal 2 ... right bang in the center of the action!
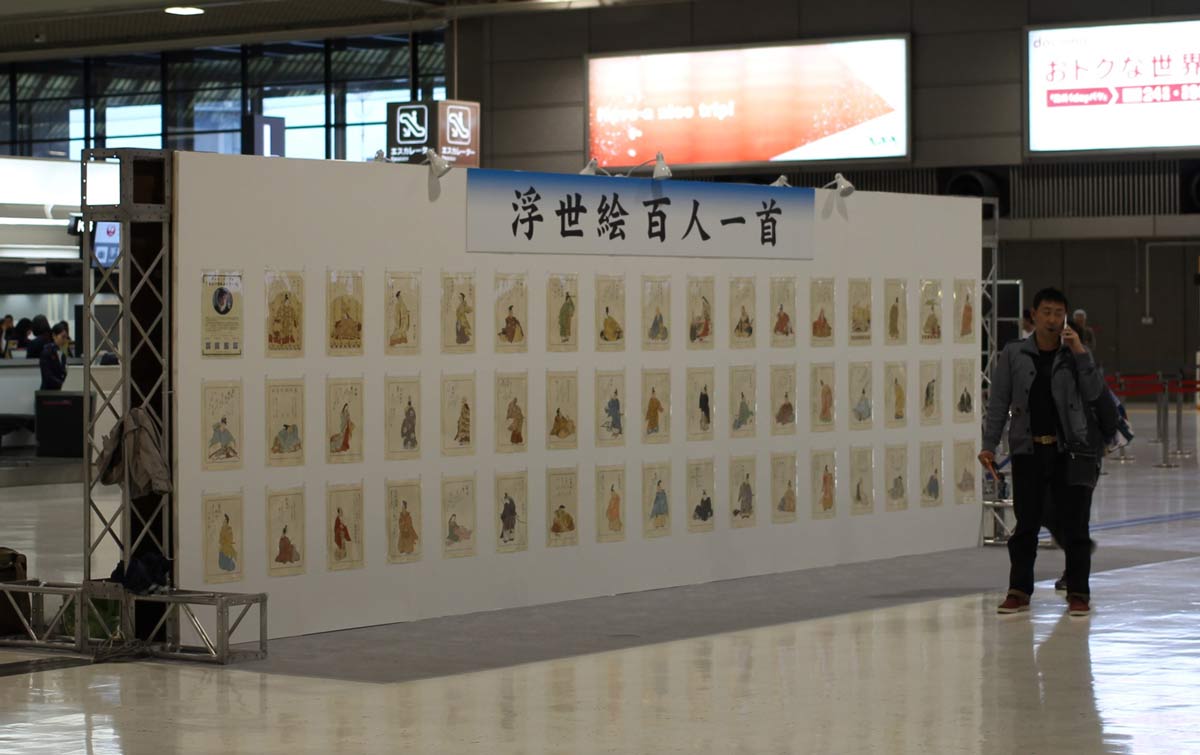
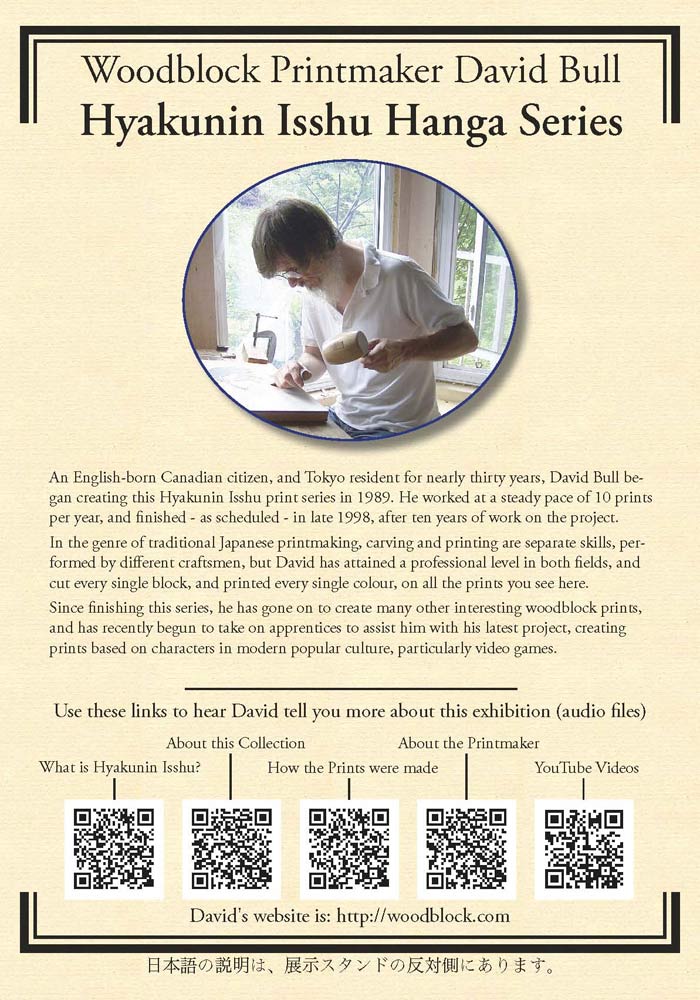
The prints are on both side of the panel you see there - 50 on each side, along with a small explanatory panel (English on one side, Japanese on the other):
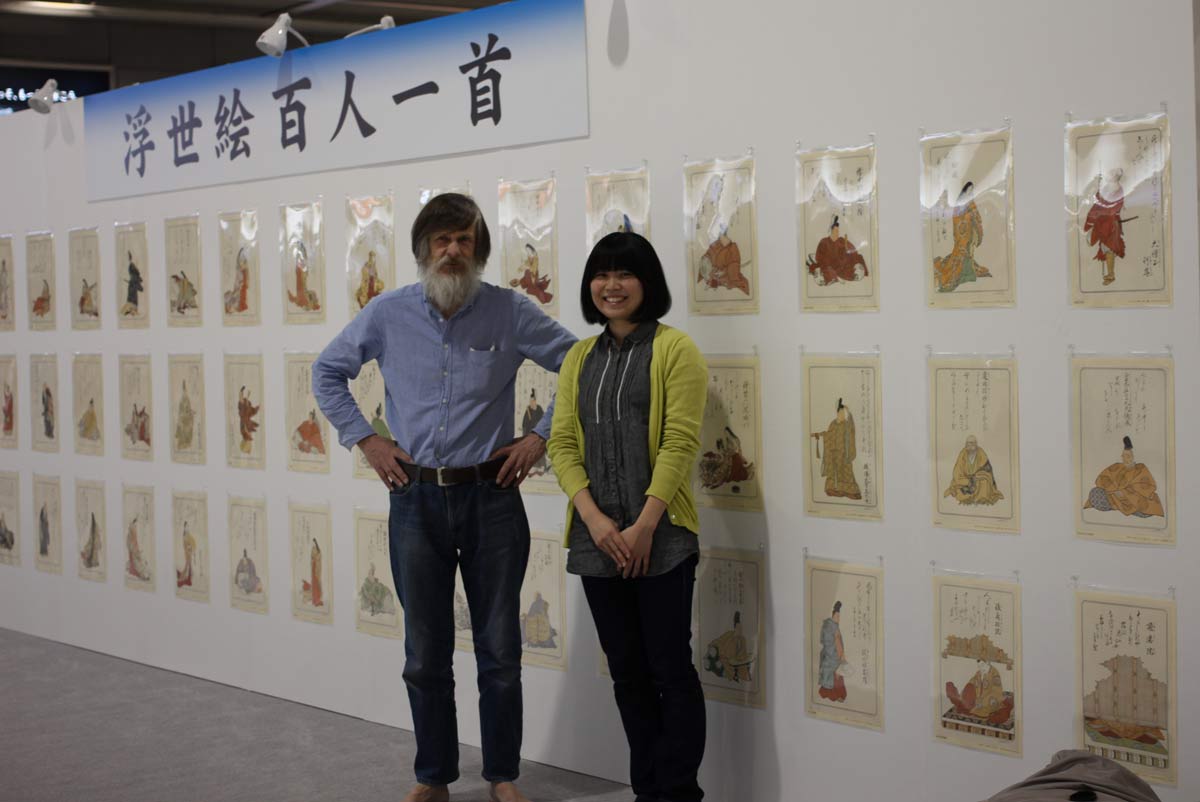
Young printer Ayumi-san and I spent nearly the entire day out there getting it all set up. The airport staff had promised us that the stand would have lines and measurements prepared for us, to show the hanging position of each print, but they had 'forgotten' to do that, so she and I had to measure and carefully align each one from scratch (and we hadn't taken the tools to do that properly ...)
Anyway, it did all get done:
As I mentioned in the previous post, we put up QR Codes for audio files explaining various aspects of the show - four of them in English and three in Japanese. Here are the linked audio files (mp3 format):
The show will be up for three whole months, and it's going to be interesting to see what might come from it - there will be an awful lot of people passing through that room in that time!
'Shrink' back down ...
| Discussion [6]
Posted by Dave Bull at 11:29 PM, March 21, 2014
Exhibition news? What's this? Dave hasn't had a 'real' exhibition in four years ... why think about such a thing now?
Well I didn't, actually; it's that a request to display some of my prints has come in from an interesting venue, and once all the details of the proposal were clear, I answered "Yes ... Yes .... Yes!"
The proposal is from the Narita Airport Authority Event Promotion Department. It seems they have a lot of open spaces in the various terminals and buildings at the airport, and need some help in filling them up!
Here's a snapshot they sent me of an area in the main Departure Lobby of Terminal 2, a couple of months ago, with an earlier display in place:
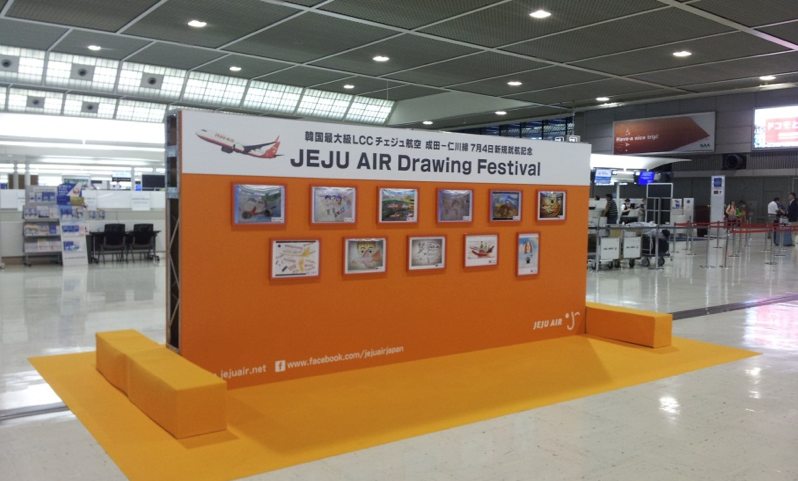
That's the space they need help filling, and their proposal is simple: some years back I created a set of 100 woodblock prints - the Hyakunin Isshu series - and they want to display them in their terminal on that same kind of panel (it'll have to be much longer) for the next three months, starting April 1st. All 100 ...
90 days, with an estimated 25,000 people per day flowing through that room ... Woot!
The event staff and myself have been batting around various ideas for the display over the past couple of days, and last night - while doing my current batch of sizing work - I had an inspiration. Dropping the sizing brush for a few minutes, I came back to my desk to make a quick note - not to forget - and then later on when the other work was done, followed up on the idea and made a sample.
Do you have a smartphone at hand? If so, then 'shoot' this QR Code ... (regular computer users can just click it ...)

What a great idea! I can prepare a nice little audio 'tour' of the exhibition, by using a scattering of these QR Codes here and there on the panels, that people can listen to at their own pace. And it gets better!

Video! This is such a hoot! Exhibitions will never be the same again!
But just where am I going to find the time to get this all together before the first of the month? That's only around ten days away, and I have such a ton of work on my desk right now I don't know where to begin. I'm carving three prints right now: the colour blocks for the next Portraits design have to be finished before Monday morning, which is when the ladies will begin printing it. I'm still chugging through the colour blocks for the next Ukiyoe Heroes design, which Numabe-san is scheduled to begin printing during the first week of April, and I'm also part-way through the next of the Arts of Japan prints, as I posted the other day.
On top of this, we are scheduled to have a Print Party this coming Sunday, this one for some guests arriving from Ohio. (This was scheduled back in the summer of 2012, during the Ukiyoe Heroes Kickstarter campaign ...)
And making things worse, I am being forced to take at least three days 'off' next week, beginning Monday, for a repeat of this episode. Last time was the right side, this time will be its mirror image, on the left! ...
Help!
'Shrink' back down ...
| Discussion [2]
Arts of Japan series : print #8 gets under way!
Posted by Dave Bull at 2:01 PM, March 15, 2014
Hard to believe it has been so many months since posting here on the RoundTable! Of course, there have been many blog posts in the meantime, but they have been over on the Mokuhankan Conversations blog; the new Portraits series has dominated our working life so much recently!
But finally I have managed to steal some time from those activities, and have begun carving on the next print in my own 'Arts of Japan' series. Here's a quick snapshot I took just before breaking for lunch today ...
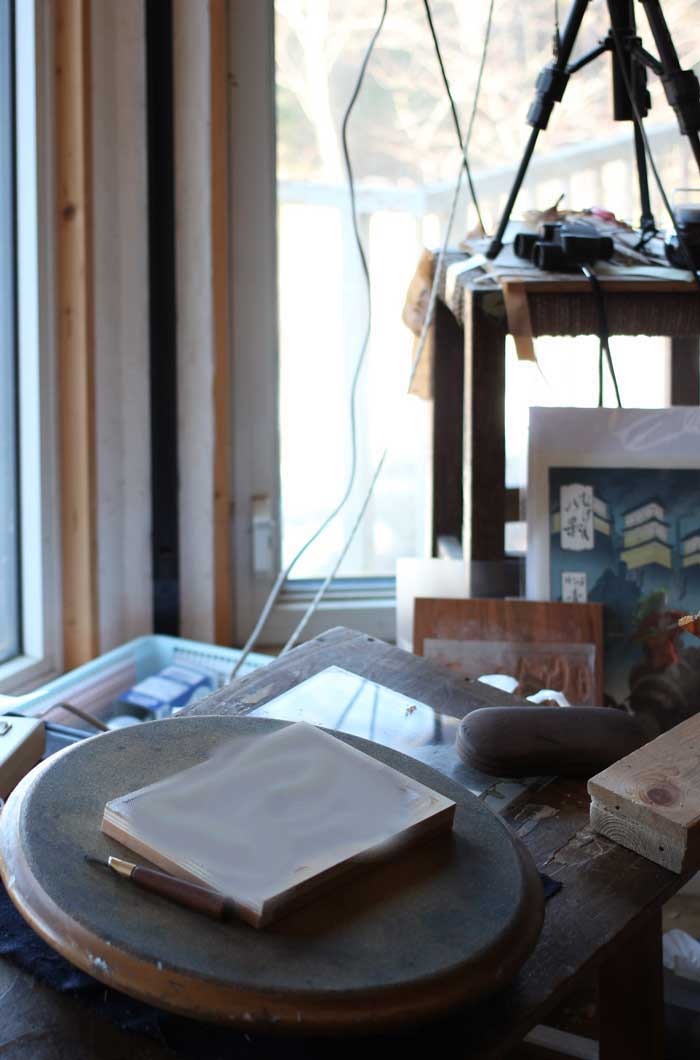
I'm not going to zoom in much closer on the block, because for this print, I'm going to keep it pretty much under wraps until it has been delivered. It's a bit of a 'different' design, and I want people to enjoy seeing it in person first, rather than via the 'net (which is why I have 'blurred' the block itself here ...)
But why would I be using a turntable?
'Shrink' back down ...
| Discussion [5]
Posted by Dave Bull at 2:56 PM, November 23, 2013
I made a quick trip downtown last week, visiting a few places: a printer doing some work for Mokuhankan, the Kappabashi restaurant supply street, the back streets around Sensoji temple in Asakusa, and the small shop of one of our tool suppliers ... I learned some very interesting things at all of those places, some of which will have major ramifications for our future.
But ... but? Restaurant supply street?
Sure! Perhaps you remember reading my 'vision' for the future of our business, the 'Mokuhankan in the Year 201x' piece that I posted a couple of years back? In the final section of the piece, I described the pleasant little café that we will have on the premises ...
Well, regular readers who know my habits - pushing forward little by little on as many fronts as possible - might be tempted to put those two things together. Would they be right? Here's a photo of the unit that I found at Kappabashi, and which was delivered to us yesterday afternoon, now installed in my kitchen, ready for its first test later this week:
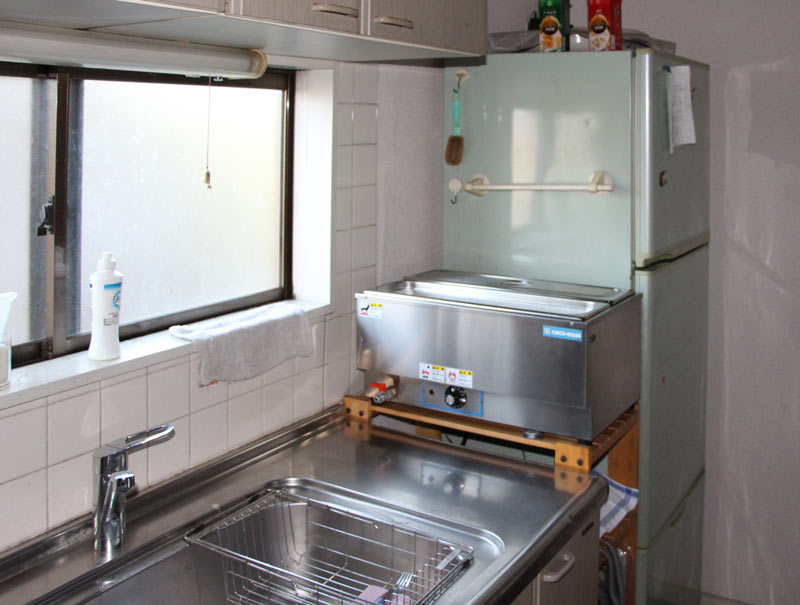
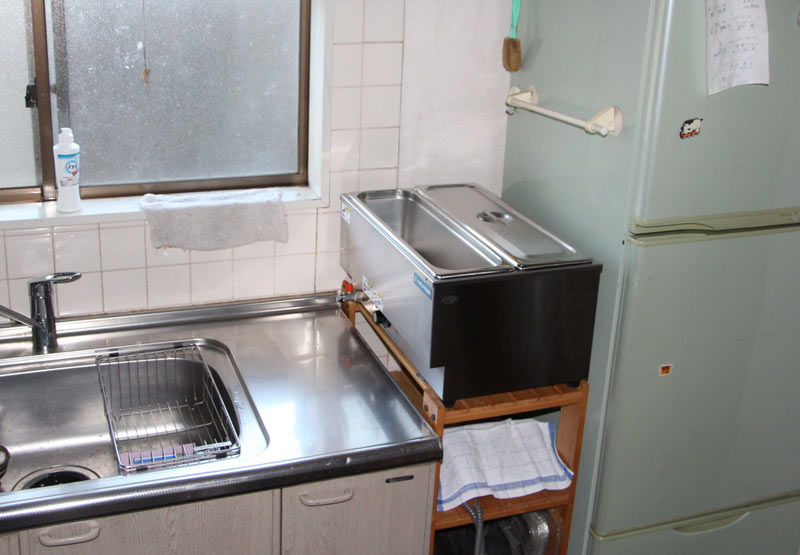
No prizes to those who can guess what this is really for!
As for the other visits, and the other interesting things I learned ... they will have to wait a bit; I have to get down to the work bench ... there is a ton of carving waiting for me ... :-)
'Shrink' back down ...
| Discussion [2]
Posted by Dave Bull at 8:09 PM, November 6, 2013
A week or so ago, I posted with photos of some construction we had been doing recently, and the project in question is now in use.
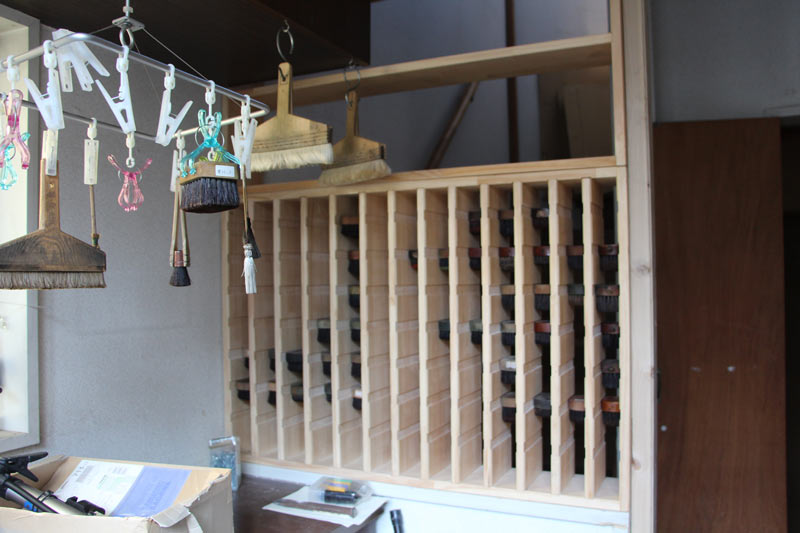
Here's our handyman Tashiro-san (and his wife, who hangs around making sure he doesn't get in trouble), finishing up the sanding and final fitting of the shelf unit he built for us.
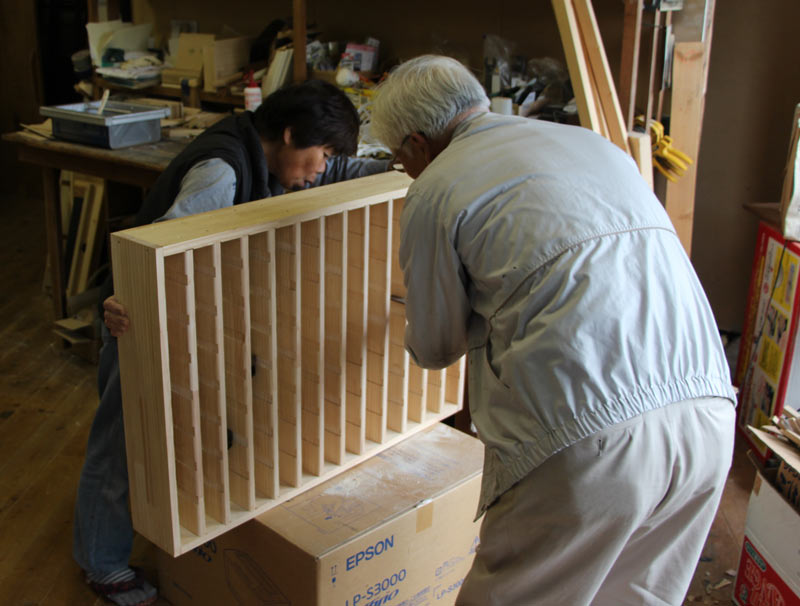
Around a week ago, the printer ladies went through our brush inventory and sorted them all into groups based on colour and size. Based on their organization, Tashiro-san then carefully adjusted his shelves so that each brush slides smoothly into its appointed slot:
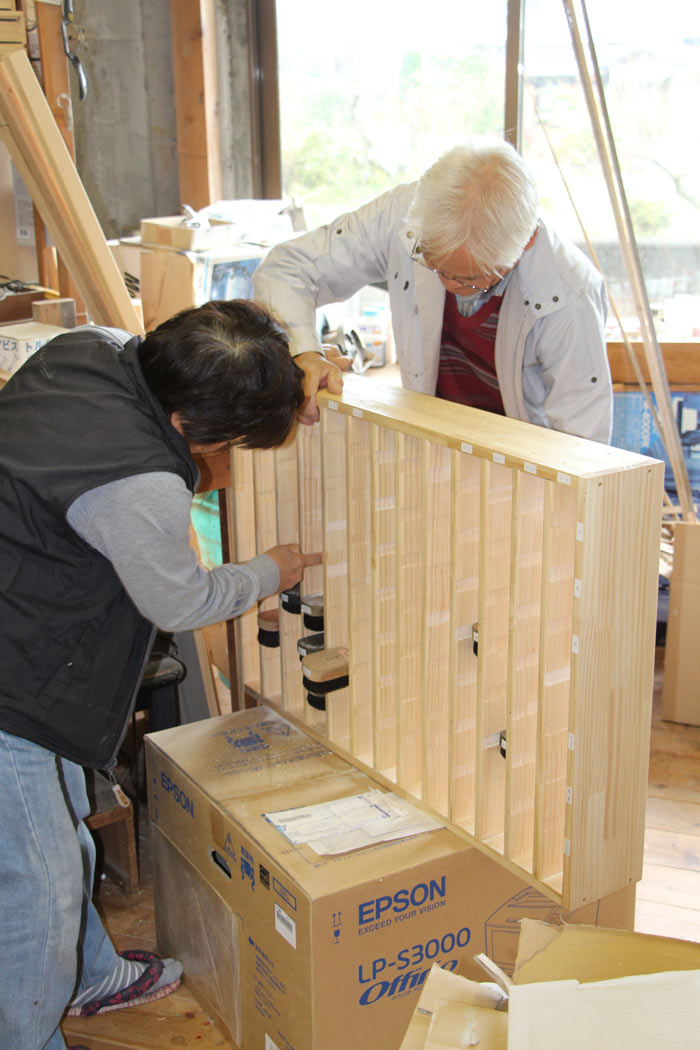
The brushes mostly fall into three standard sizes, but they vary a little bit from one to another, and it took him a bit of time to fit each one properly.
Once this was done, he installed the unit into the place he had previously prepared in our entranceway. Here is what it looks like when approaching the house:
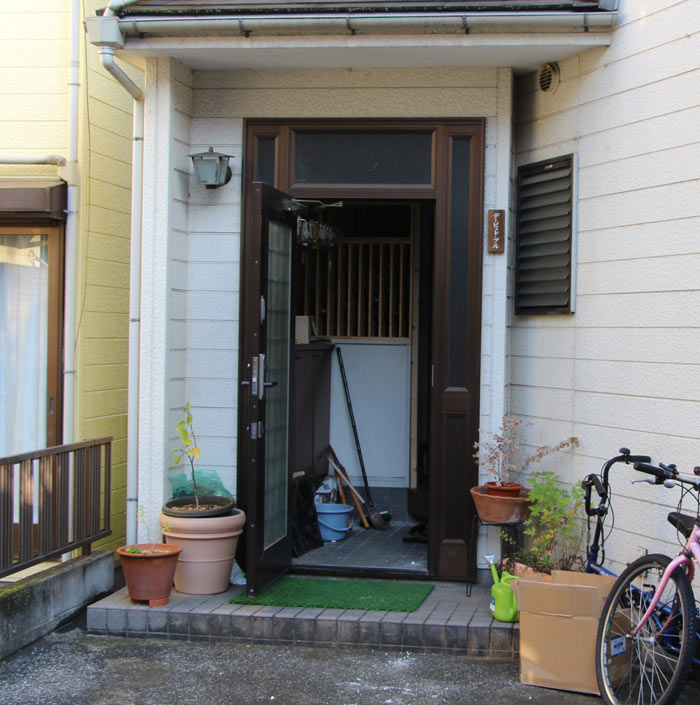
... and coming in the front door:
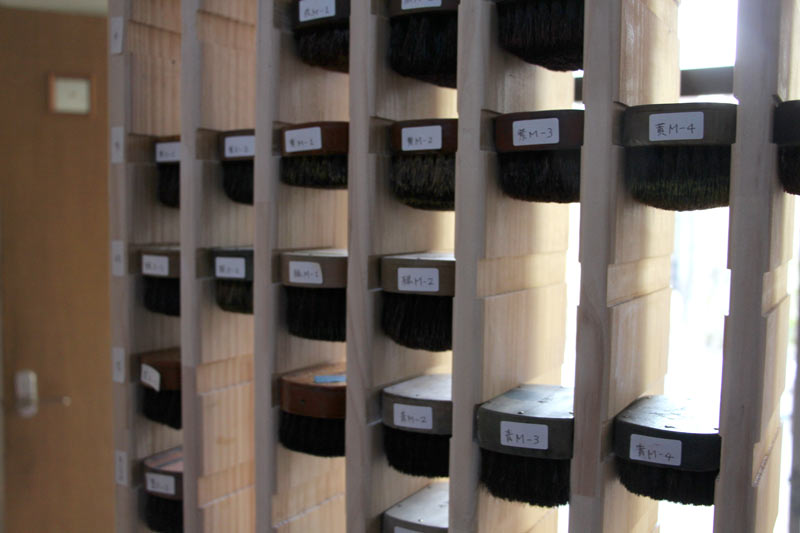
Here's the view from the other side - the way that the staff will approach it when selecting a brush. It's arranged with the colours in horizontal rows - the top four rows are for red/yellow/blue/green. The next row is black/grey, and the final two rows are miscellaneous. The left/right arrangement puts the brushes into three groups based on their (standardized) widths - S/M/L ...
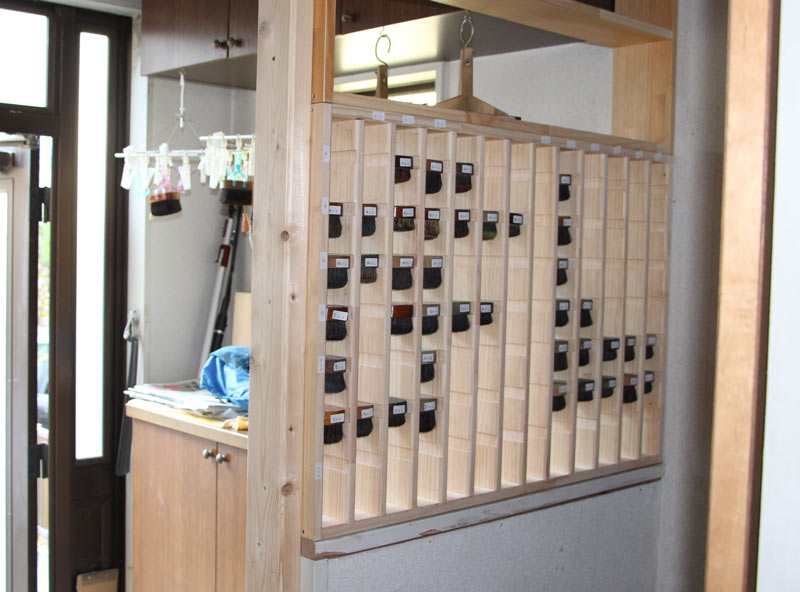
At present, we have just used small paper labels to number each one - so that everybody will know where it 'lives - but we plan to number them with a more permanent system once we've had a chance to see how this is working in practice.
Having this proper home for the brushes is already improving our workflow, and hopefully it will be healthy for the brushes too - keeping them in a steady airflow and not letting them get damp or mouldy.
The next construction project for Tashiro-san is to make a pile of storage cases for the Chibi Heroes series, and he (and a friend of his) are already well along with that job. We'll be showing some results (and opening an order form) soon!
'Shrink' back down ...
| Discussion [6]
Arts of Japan series : print #7 - finished
Posted by Dave Bull at 3:48 PM, November 1, 2013
Done! Here's the print with the final embossing done on the margins:

I'm pretty happy with this. It's not 'great art' by any means, but I think it is attractive and interesting, and uses the woodblock technique well, and those are the things that count for me ... I hope you agree!
'Shrink' back down ...
| Discussion [7]
For more entries, please make a selection from the 'Table of Contents' section of the SideBar on the right ...


