« July 2010 |
Main
| September 2010 »
I'll have block images, etc. from the new print - the Sukenobu reproduction - for you shortly, as I am now in the final stages of 'touch up' carving.
But there has been a short interruption (where have you heard that before!), and it might be interesting to mention it here.
I was reading my Japan Times at breakfast the other day as usual, and it was the day for their weekly feature in which they focus on some kind of 'interesting' person in Tokyo. I've been featured there more than once over the years, and this time it was one Mr. Urushibara. I didn't read it all, but quickly skimmed over the beginning section; he seemed an interesting person - born in England to Japanese parents long before the war - who has made a life as cultural interpreter and translator.
After I finished the newspaper, I went down to the workshop, fired up the webcam, and got busy with the carving. The computer down there is also doing an automatic 'mail check', in case anything important comes in during the day, and when I scanned over the list of emails at break time, I noticed a Google Alert: woodblock printmaking.
Funny, it was pointing to that same story in the Japan Times! But that person hadn't been a woodblock printmaker, had he?
I followed the link to the online version of the story, and instantly regretted how carelessly I had skimmed it while eating breakfast. Mr. Urushibara isn't just Mr. Urushibara. He is the son of Yoshijiro Urushibara, the Japanese craftsman who went to London in 1910, and stayed for the next 30 years, passing on information on printmaking skills to a number of the early British woodcut artists: Walter Phillips, Alan Seaby, John Platt, etc. ...
I fired off a note to the reporter immediately, asking to be put in contact with Mr. Urushibara, and she did the job. Long story short, I'll be heading off to Tokyo in the morning, to meet him for lunch. He has already warned me that he doesn't have much knowledge of printmaking, as he was of course only a child during those years, but that's OK. There is very little known about the 'who' and 'why' of Urushibara-san's time in London, and I'm sure his son can help fill in some of the blanks. I'll take my recorder, and if he will permit, will put it on the table while we talk ...
I'll let you know more as I learn it!
Posted by Dave Bull at 6:59 AM
| Comments (9)
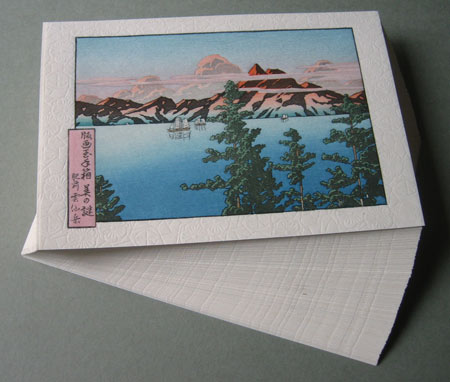
Mystique Series - first batch of the Hasui print is done ...
There certainly hasn't been much time this past week to sit around posting to this RoundTable; with 130 sheets of paper in the stack, nearly 20 impressions on the design, and the thermometer rarely going below 30C, even at night, it has been a question of 'every minute counts'.
But last night saw the final (embossing) impression, and the stack is now dried, trimmed, and ready for inspection and signing. And yes, it is still a kick - even after all these years - to have them all in a stack like this ... before they fly off around the world to their new homes!
I should perhaps mention something about the sizing - after all, this is the first time I have ever made a batch of prints on paper that I sized myself. The results were mixed. One the one hand, the experience was very positive - the paper printed very nicely, was completely stable through the entire process, and was very receptive to the pigments. But there were a couple of negatives: one was that the lack of sizing on the back side of the sheets (this was my choice) meant that I constantly had to use a protective sheet under the baren, and this is big nuisance when doing a lot of printing. The second problem was the inconsistency from sheet to sheet, due completely to my inexperience at brushing the sizing onto the paper.
So next time I'll have a go at doing 'both sides' sizing, and hopefully my brushing technique will steadily improve, so these negatives should at some point be a thing of the past!
Next job at hand will be to finish up the tracing of the sumizuri image (#6), and get going on the carving. (Again, these first batch of these two prints are being made separately; the second batch will be done together, as planned ...) Before that though, I have to get the summer newsletter written and produced, and catch up with all the waiting office work (invoicing, back issue shipping, etc.)
And there will be a bit of an interruption tomorrow, as some people are coming for an interview and photos for a magazine story. I mentioned in the comments the other day that when their request came in I had to laugh. "You want me? Really?"
Yep. People from Playboy (Japanese edition) are coming over tomorrow ...
Posted by Dave Bull at 3:57 AM
| Comments (10)
Size matters - done, at last!
This thread about paper sizing is continued from here, and started here.

So, here we are with what - I hope - will be the final entry in the sizing saga. I ran the batch this morning, and by just before noon, they were all dry. Here they are, hanging in my bedroom upstairs:
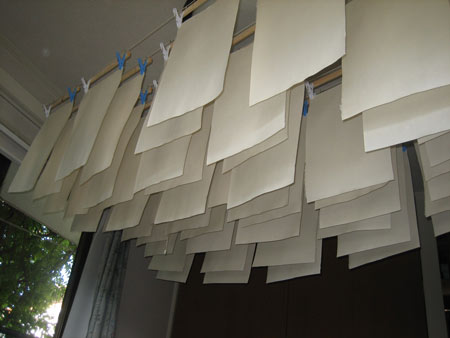
The job went pretty smoothly, and because there were 60 sheets in the batch - compared to the previous test batches of just a few sheets each - I was able to really get a much better 'rhythm' in the work. Some things I learned:
- I'm not 'strong' enough to make a good full stroke with just the arm, as the brush really has a lot of resistance on the surface of the paper. Shifting from one foot to the other as I move across the sheet (shifting the body weight), really helps keep it moving smoothly.
- The 'angle of attack' of the brush on the paper is critical. Too vertical and the sizing all dumps out quickly. Keeping the angle lower helps control the flow of the liquid steadily.
- After dipping and wiping the brush, you have to hold it horizontally in the moments before you make contact. If held vertically, it not only tends to drip, but all the liquid gathers at the tip, and then gets 'dumped' right away. Holding it horizontally until the very last second seems to help with this.
In the interests of 'keeping my options open', I sized only the front surface of the sheets. The tests the other day which had just a single face sized were no problem, so I'll give it a try this way first. If something goes wrong at printing time, I can always dry the paper off, size the back side, and then resume ...
So it should be time to move on to the printing, but unfortunately there has been another interruption. Some people from NHK are coming over tomorrow to discuss an upcoming show they want to do with me. I don't have many details yet, but this one should be of particular interest to RoundTable readers, because it is intended for NHK's overseas networks, and the program (30 minutes proposed) will be in English.
* * *
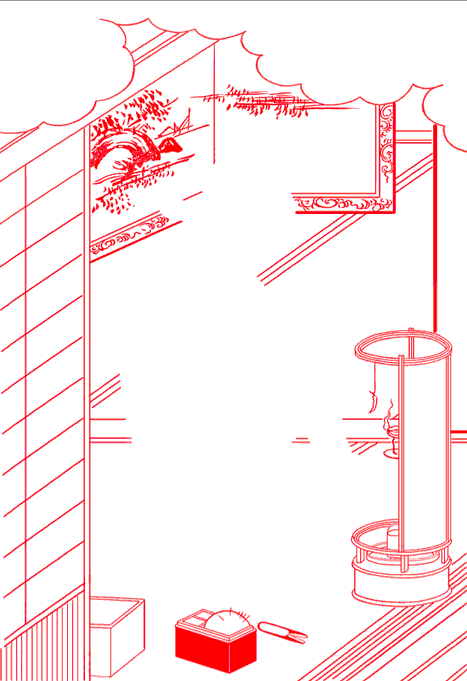
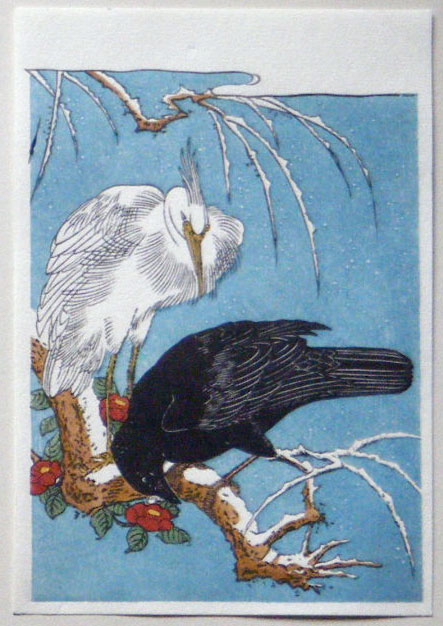
In the meantime I'll 'keep busy' by getting started on the keyblock for image #6, the one that shares the block with the Hasui image we saw earlier.
First step is to scan an original of the print, and then trace all the key lines with my tablet. Here's what it looks like so far:
Posted by Dave Bull at 7:17 AM
| Comments (9)
Size matters - go with this, or ... ?
This thread about paper sizing is continued from here, and started here.
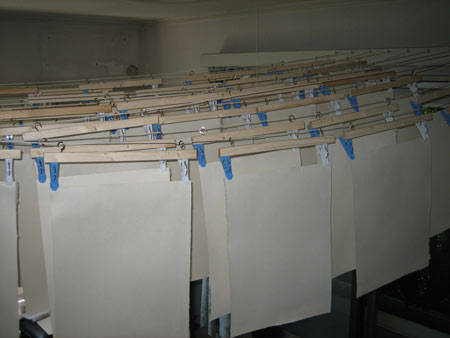
After the non-committal results from yesterday's 'strip' test, I tried something a bit different today. After the half-dozen sheets from the sizing run were dried, I cut some pieces from each one and headed down to the workshop to make a real test - using some of my blocks to make actual prints, not simply test strips.
This was much more enlightening. We can dispense right away with the kind of comment I heard yesterday - about how good I am at this. This is very poorly sized paper!
It was apparent right away, as I started moistening the blank pieces before printing. Parts of each sheet took up the moisture far too rapidly, while others areas were more like what I am used to. Even after letting them sit under cover for a couple of hours to even out, they refused to do so. It seems as though there are areas that are almost 'unsized', and those places just suck up the water far too much.
I waited until it seemed to have reached a basic stability, then made a run of half-dozen copies of one of the little Gift Prints I have:
And here we have another surprise ... Even though the paper was clearly not 'good', the resulting prints came out just fine. And after they were dry it was impossible to find the areas that had been causing problems with moisture absorption.
So ... I guess I can see where this is going. I now know that I can produce prints on paper that I have sized myself, but I can also see very clearly that I really have to get the brush motion down much more smoothly. Given that I have no stock of other paper available, and with collectors waiting for the next one in the 'Mystique' series in a couple of weeks, I'm going to move forward and try a 'real' batch. I'll cut enough paper for the edition, and will include in the sizing stack a considerable number of 'practice' sheets of junk paper, which I will toss out later. Hopefully, after I get going on the batch, I can develop a basically smooth motion with the brush. We'll see ...
I'll start tomorrow morning, and will put the Webcam in the kitchen, to try and catch a bit of it ...
This thread about sizing continues here.
Posted by Dave Bull at 8:27 AM
| Comments (6)
Size matters - testing the results
This thread about paper sizing is continued from here, and started here.
After yesterday's unforeseen delay (check the Comments in the previous post ...), it was back to work on the sizing experiments today.
First on the job list was a quick set of printing tests, using strips of paper cut from the sample sheets I sized the other day. I just grabbed a little blank strip of cherrywood, and printed it in a flat colour, doing it twice - overlapping to see how well the paper would take pigment.
I also picked up a nearby keyblock, and did a bit of 'delicate' work as well.
With all the strips from the 'junk' paper that I tried culled out, here are six pieces of Iwano's hosho paper:
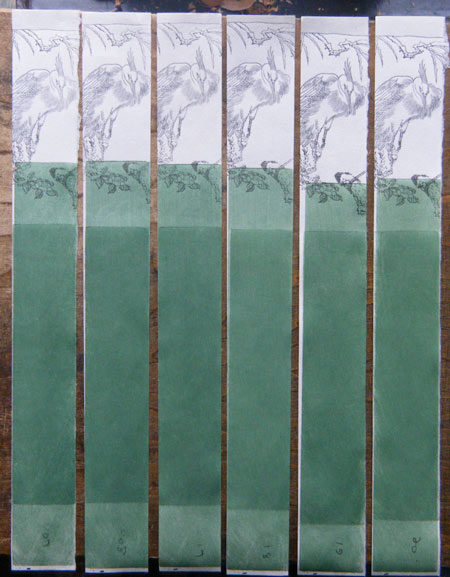
1) light size, one side only, 1/2 recommended alum
2) as 1) but sized on both faces
3) and 4) as 1) and 2) but with the size applied more heavily
5) and 6) as 1) and 2) but with the alum at 'full strength' (1/2 of the weight of the glue in the mix)
The results ... well, it's kind of good news/bad news. The good news is that all these strips printed quite well. There were no problems with the paper sticking to the wood (indicating too weak on the front), tearing on the back (indicating too weak on that surface), or 'disallowing' pigment entry into the paper (indicating too much alum). If the paper I have been recently receiving from the sizing craftsman was all like this, I would never have complained, and never started this whole project ... So the short story is that this is going to work! Woot!
But now, the bad news. I can't tell the difference between these test strips! Some have double the alum. Some have double the amount of size. And none of them were brushed nice and smoothly, as you saw the other day. But they all came out pretty much the same ...
Hmmmm ...
In any case, I made another practice run today. I have to get the brushing better, no doubt about that. And I added another variable to the mix: doing some sheets on the second face right away, and some after the first had dried. We'll see if that makes a detectable difference.
This thread about sizing continues here.
* * *
And to finish off today ... an update ...
Posted by Dave Bull at 7:22 AM
| Comments (3)