« February 2012 |
Main
| April 2012 »
Arts of Japan series : case construction part 4
Lee-san has gone home to see if his kids still remember him; while he's away, I'm sneaking a bit of work on this construction, among the other jobs ...
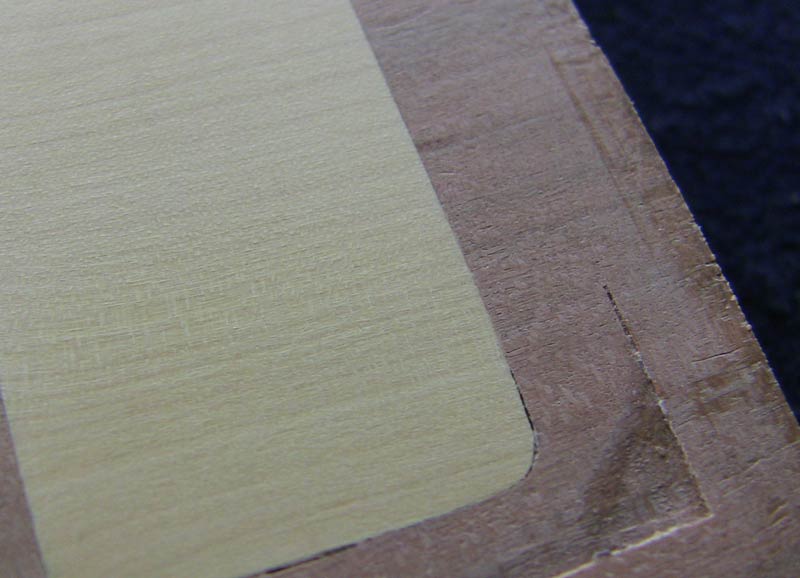
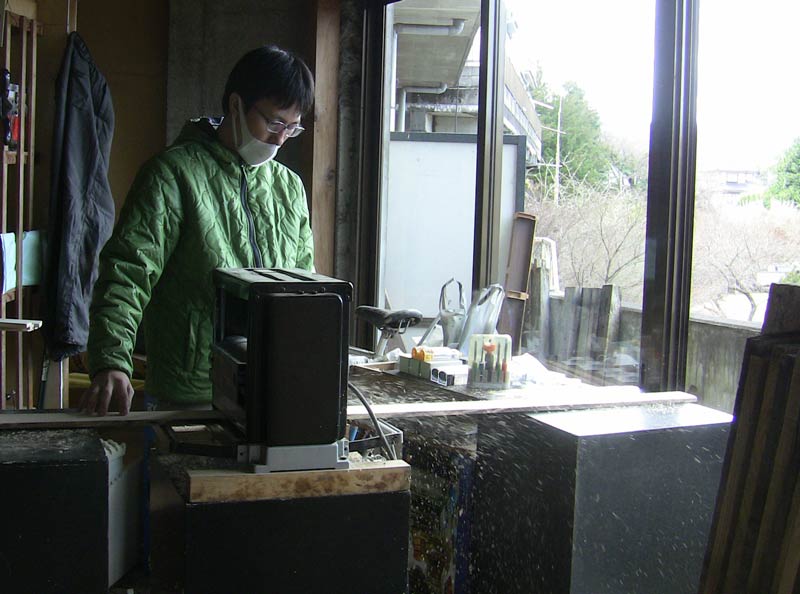
I tested a new router bit for cutting the small slots that will hold the base (and top) of the case:

... and then cut a few sample pieces to length:
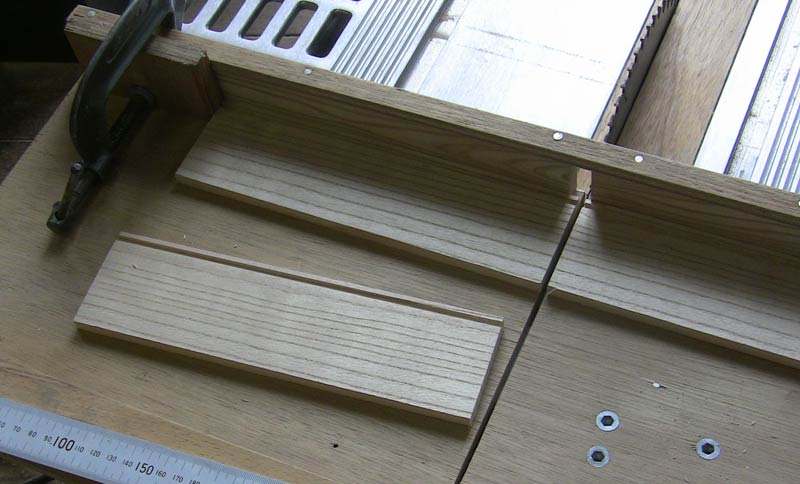
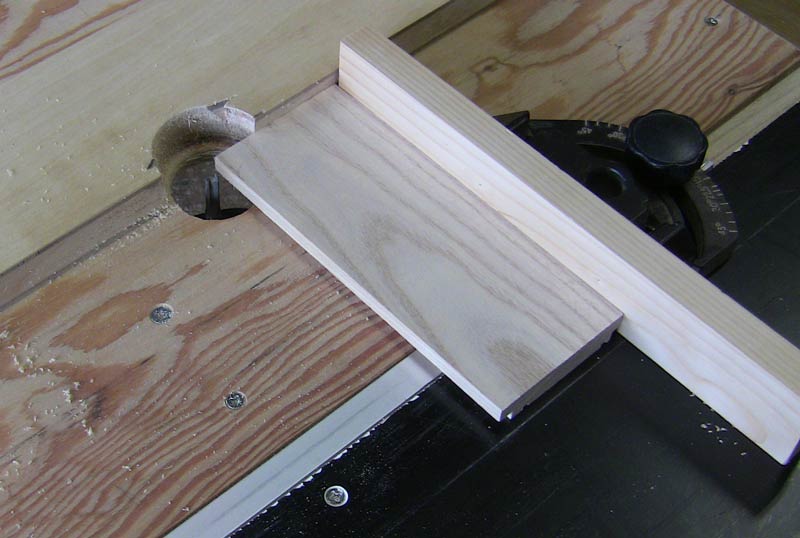
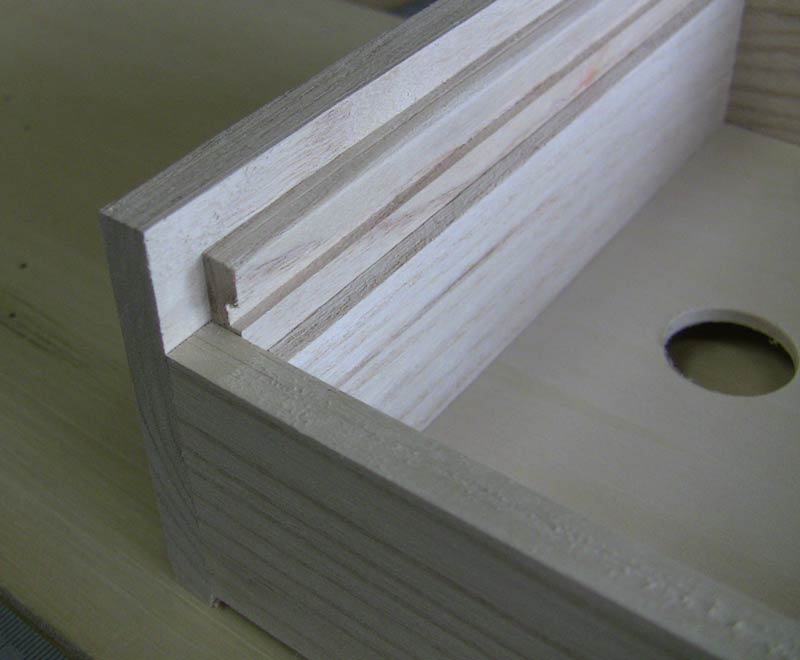
The two side pieces need to be rabbeted again after cutting to length - to receive the front and back pieces:
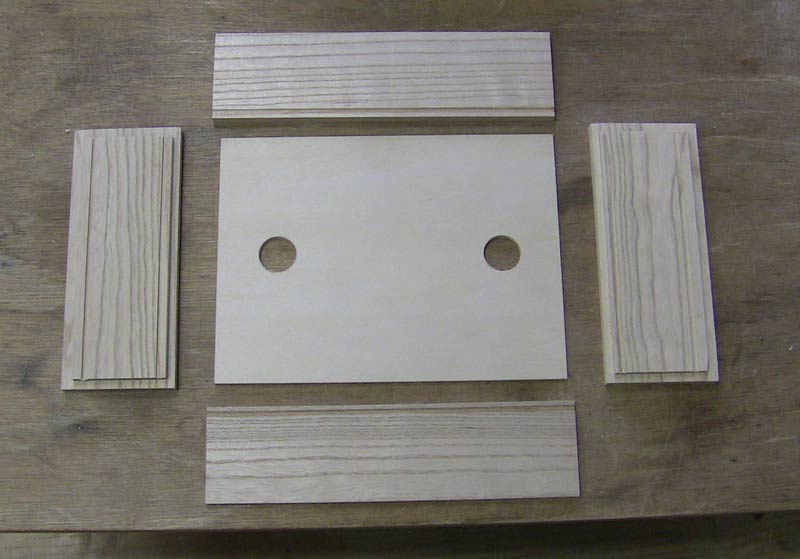
So - together with the base piece, which I ordered pre-cut - that gives us the main parts of the carcass itself:
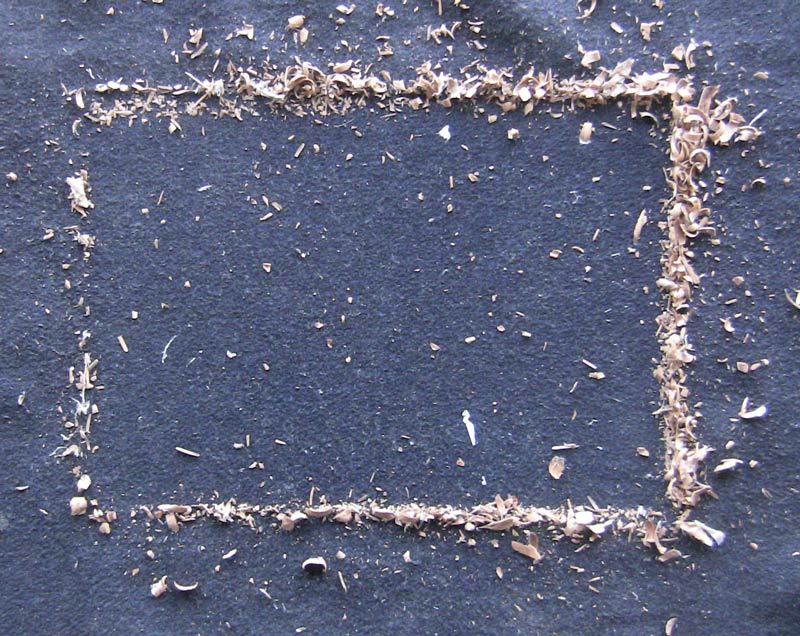
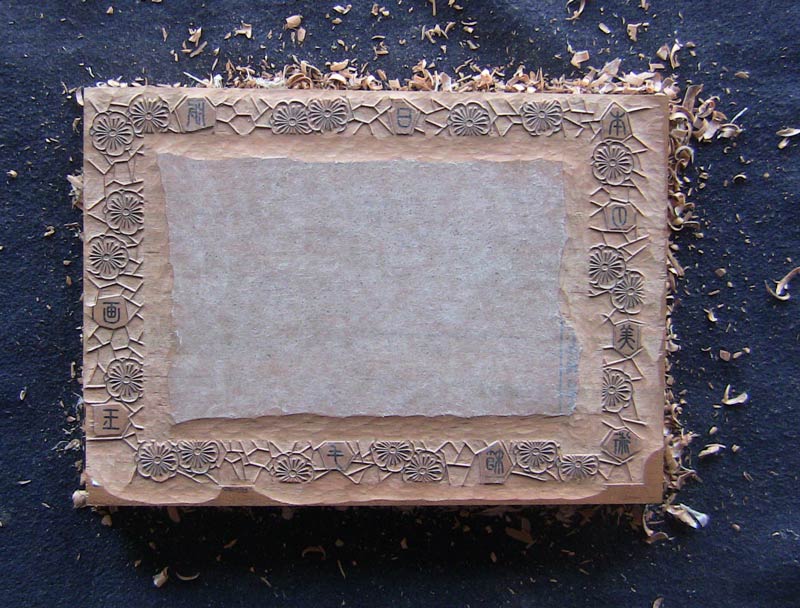
We're going to glue them up a batch at a time, but we haven't yet built the jig for that, so I used a small plywood tray (one of the jigs for making the Surimono Albums print mountings, actually) as a quick 'n dirty glue jig for this sample:
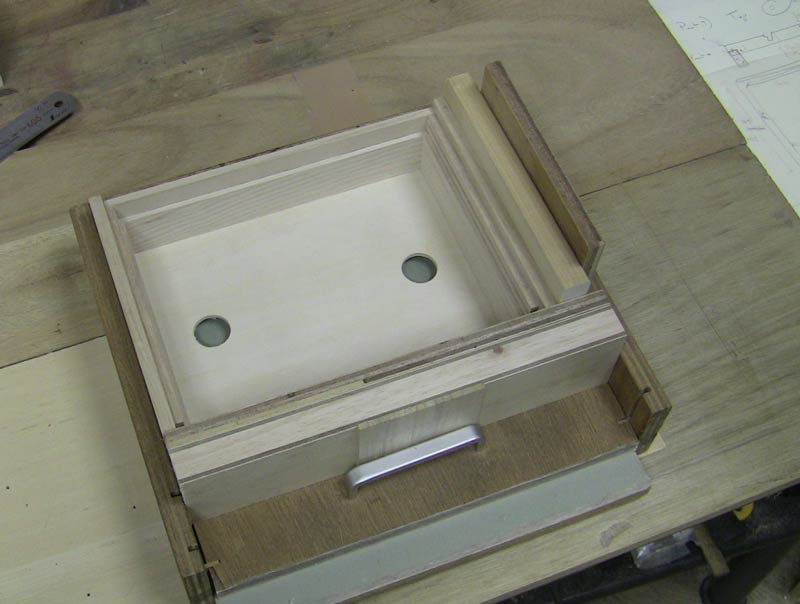
It's going to be a nice little piece of joinery, I think!
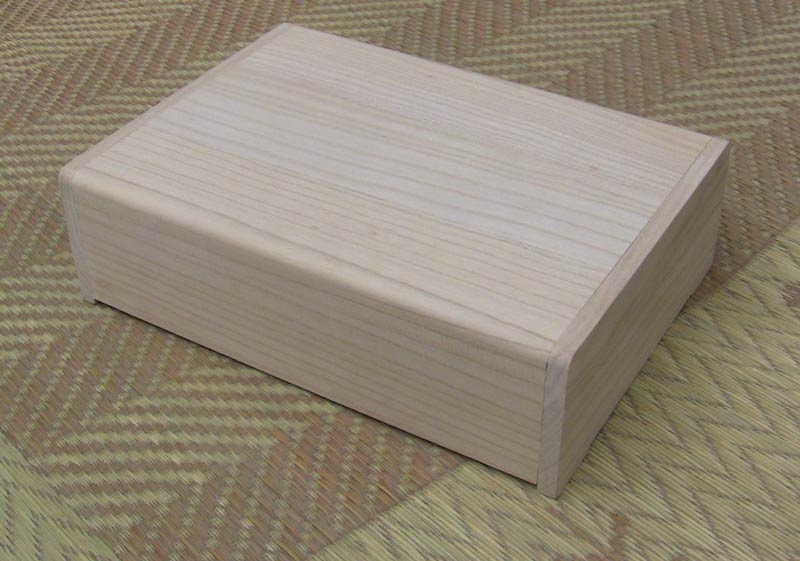
And with the top rabbeted and slipped into place, our basic box is together:
At this stage, it is indeed very 'boxy'!
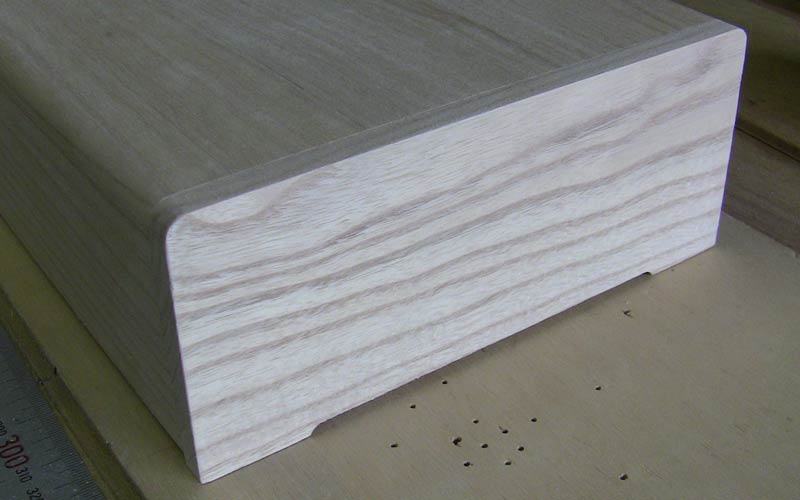
Next step is to use the router to put some 'feet' on it:
And also to gently curve the two top corners - front and back:
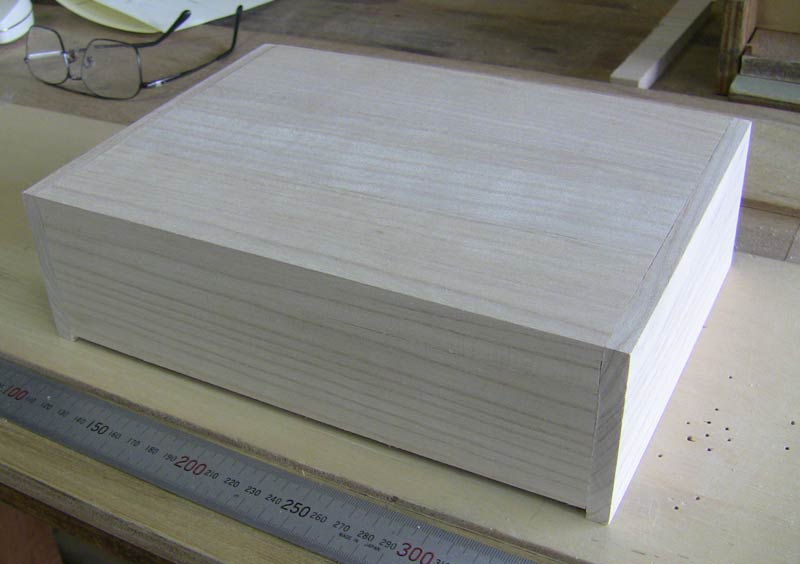
We're not completely done yet, as we still have to figure out how to put the slots in the top for carrying the print stand, but anyway, this is pretty much what it will look like (we're going to stain and finish it, of course):
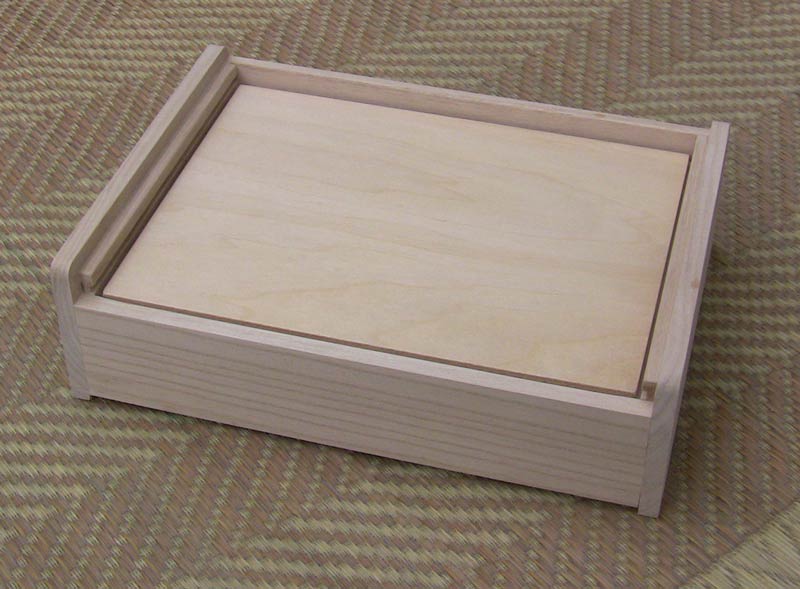
And when opened, the print stand - just as with the previous Mystique series case - acts as a cover for the print storage compartment.
So we've confirmed that the set of scribbled sketches is actually going to result in a nice-looking case in actual practice. Once Lee-san returns on Monday, we'll get that gluing jig built, and start up our little assembly line!
Posted by Dave Bull at 2:16 AM
| Comments (2)
Arts of Japan series : case construction part 3
Time to snatch a few minutes and put up a blog update ... Lee-san has just gone home after another three days of work here, and I have a few minutes to myself. We still don't have a finished sample case to show everybody, but we've pushed things forward quite a bit. Actually, we've spent the past three days up to our neck in alligators ... one problem after another, and we're getting quite proud of our ability to shoot them away as they rise up to bite us!
This tool, we have had no problem with at all - a beautiful (and powerful) Hitachi router. Lee is putting a straight face on each board before starting the work of ripping the stock to the widths we need:
We then hit the first of the major problems. I wrote a few days ago on the Mokuhankan Conversations blog about the problems with the table saw, and how I jury-rigged a set-up to cut rabbets on it. That worked basically OK, but given that we have 200 cases to make, both Lee and I thought that we should bite the bullet and order a proper router table for that kind of work. So I browsed around, and ignoring the Chinese junk models, ordered a nice Bosch table. Good brand name, solid metal top, etc. etc. What could go wrong?
Everything. Google, are you listening? Current model Bosch tools are junk! Repeat: Bosch = junk! (Am I bitter? Not much ...)
We opened the package and started inspecting it, laying a straight edge on the table itself:
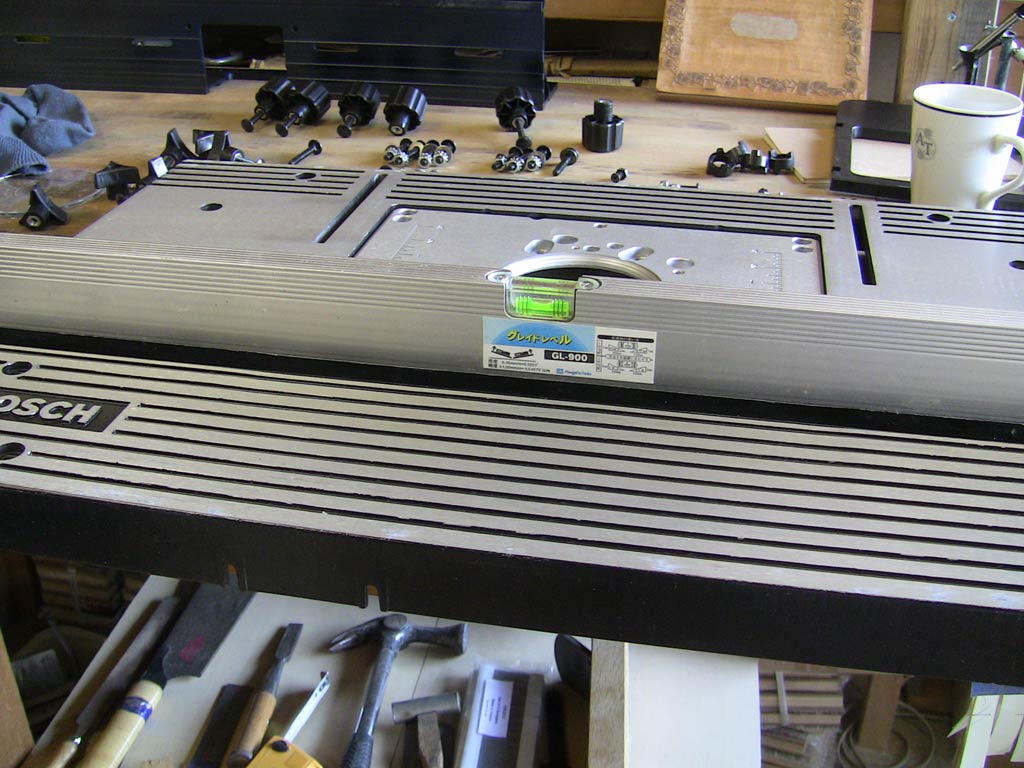
Oops!
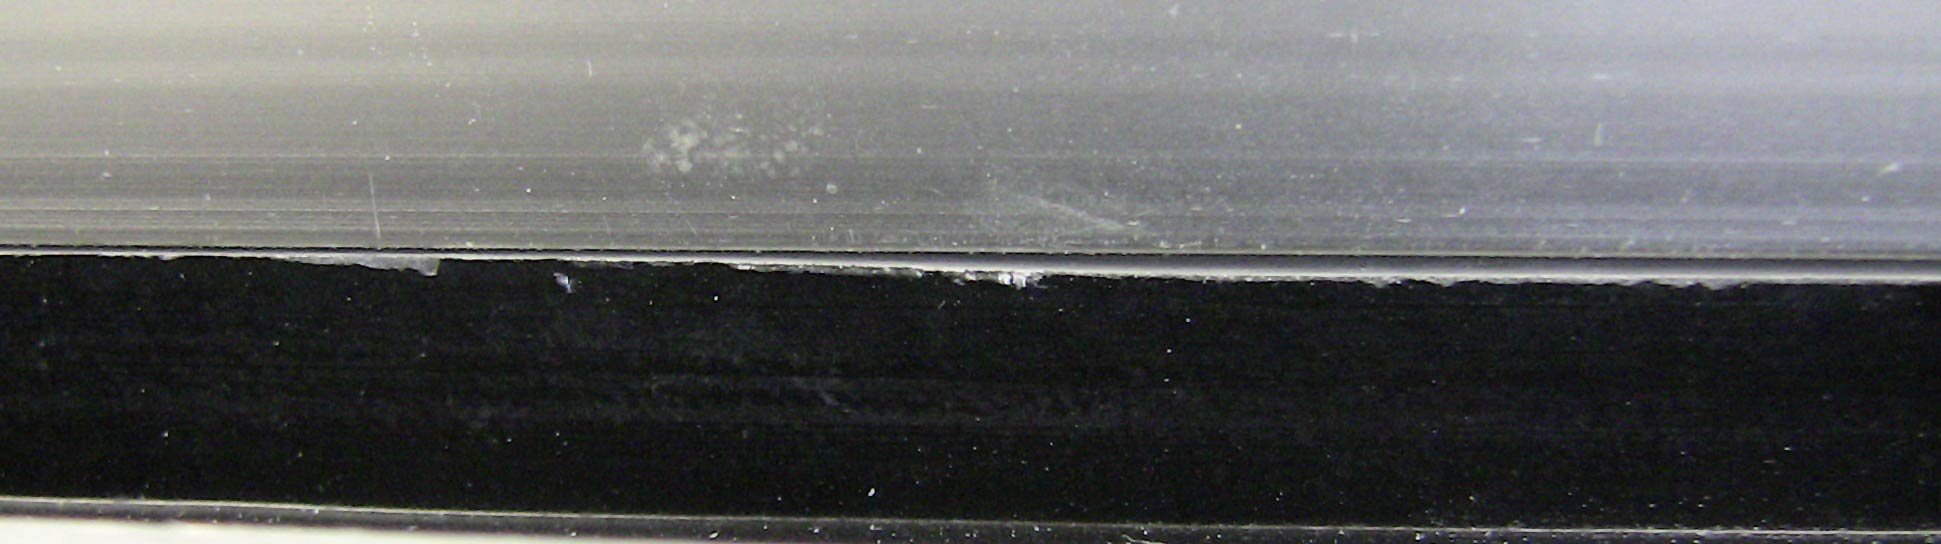
And here's a view looking horizontally along the table (click for closeup):
It looks like the runways of Sendai Airport after the earthquake last year! So back in the box it went, straight back to the supplier ... Time for Plan B. Lee-san and I have now lost our faith in ordering anything, so we looked around to see what we could use to build our own. Here's a little TV flashback to 1994, sitting with my father in the Gallery Takano, in Shinjuku:

That little black table! Solid frame, sturdy legs ... and I still have it!
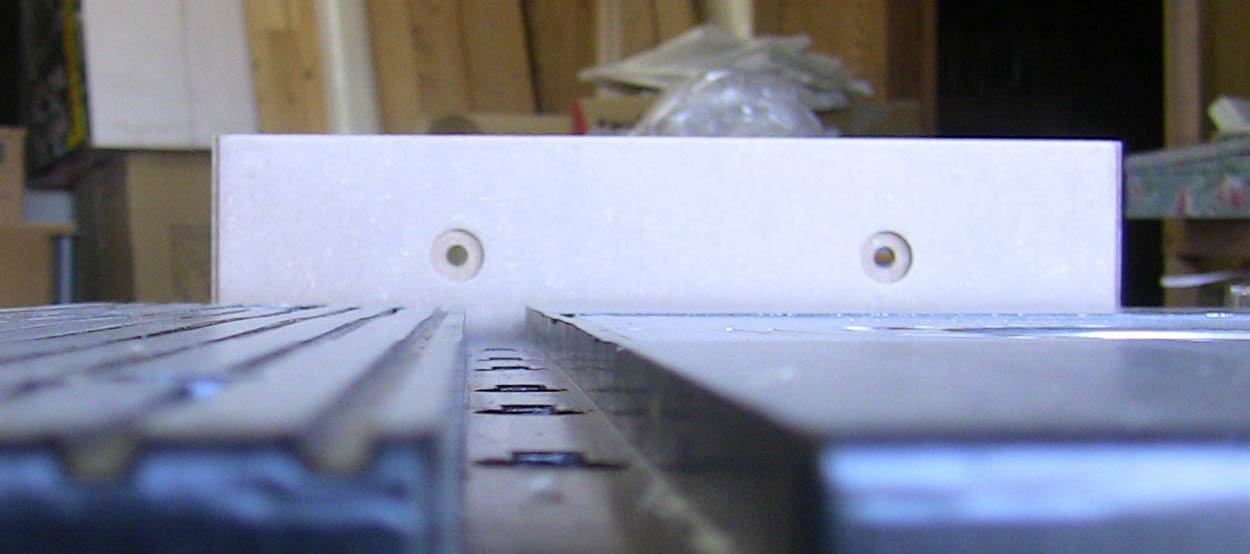
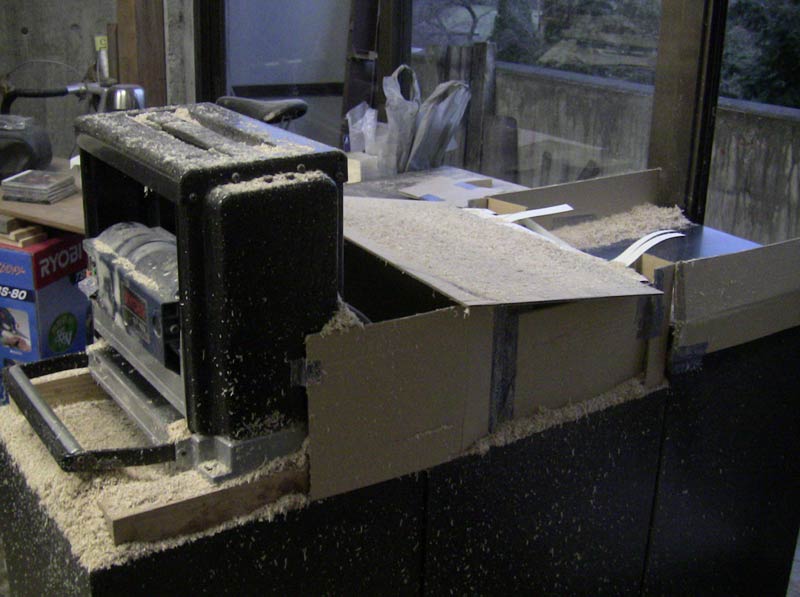
I dug it out of storage, and a couple of hours later, we had it outfitted with reinforcement panels on top, a mitre gauge slot, embedded nuts for attaching our featherboards, and a place to mount the router:
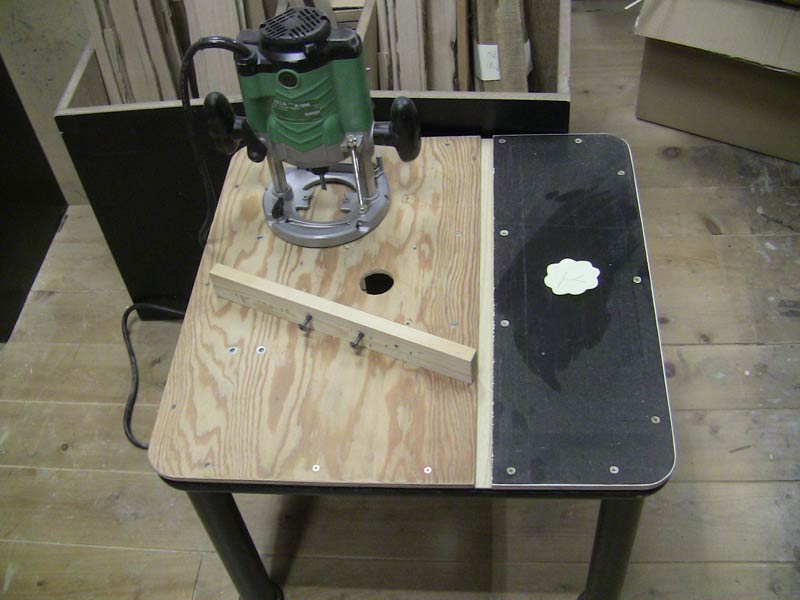
... which of course goes in from the underside:
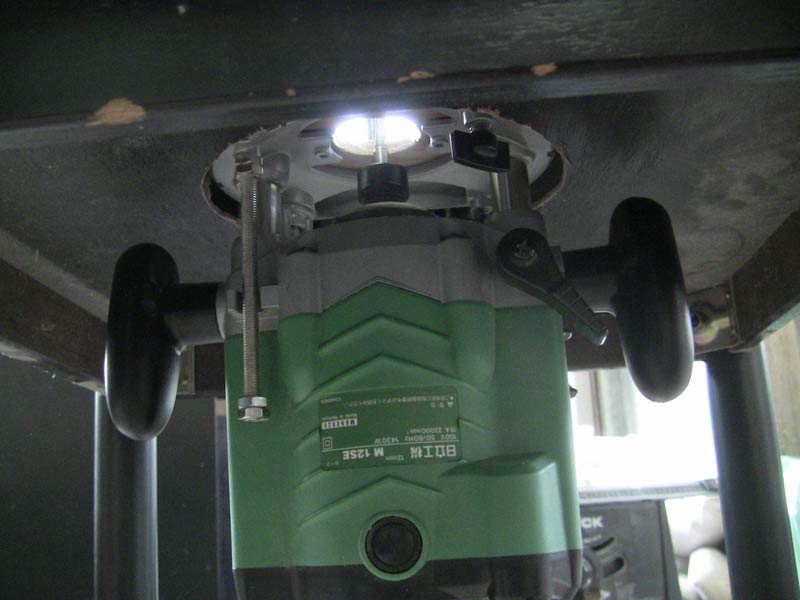
You'll see this 'new' table (which in our first testing worked very well indeed), in plenty of photos in the coming weeks!
Once Lee got a pile of stock ripped to width - enough for a first test run of 20 cases - he began cutting rabbets and slots, using a combination of our jury-rigged table saw ...
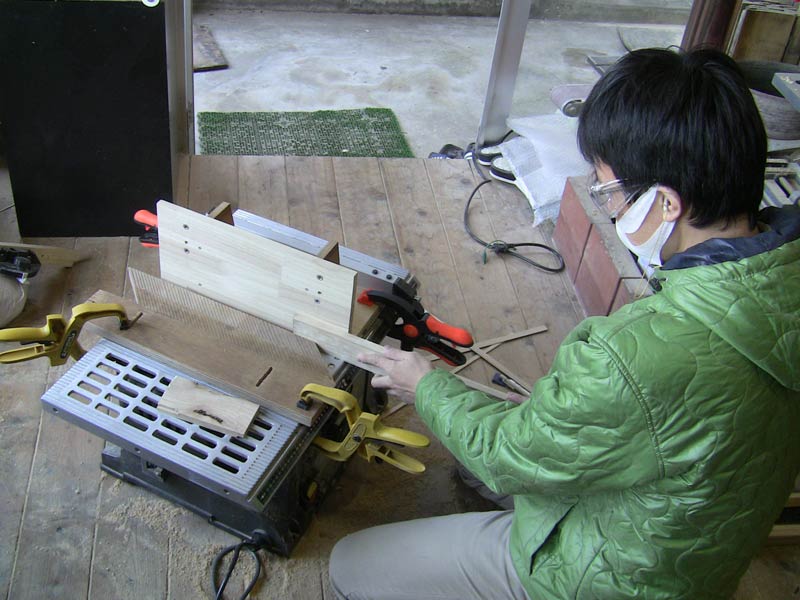
... and our new router table:
And the results look pretty good.

By the time he left this evening, he had done all the rabbeting on this batch, and the first job waiting when he returns next week will be to cut the slots for the base in all the side pieces, fronts and backs. We'll then begin to make the first assembly of the basic 'carcass' of each case.
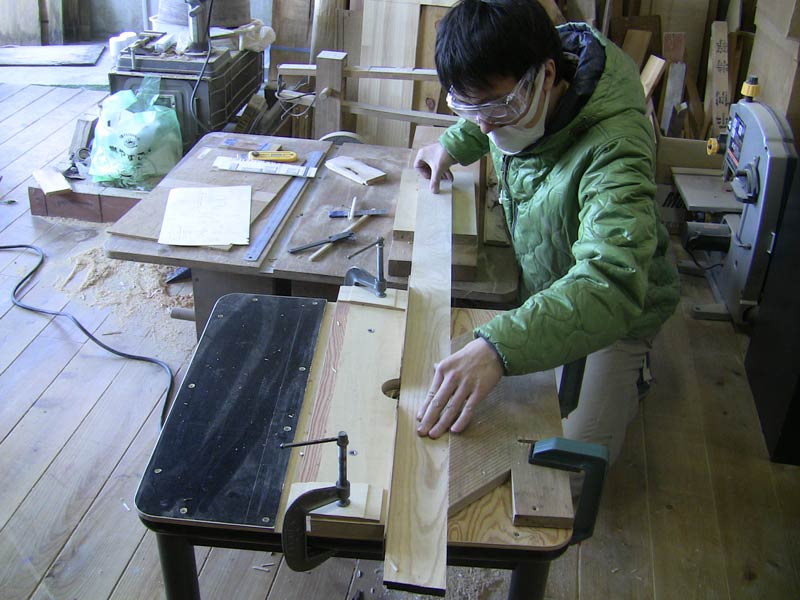
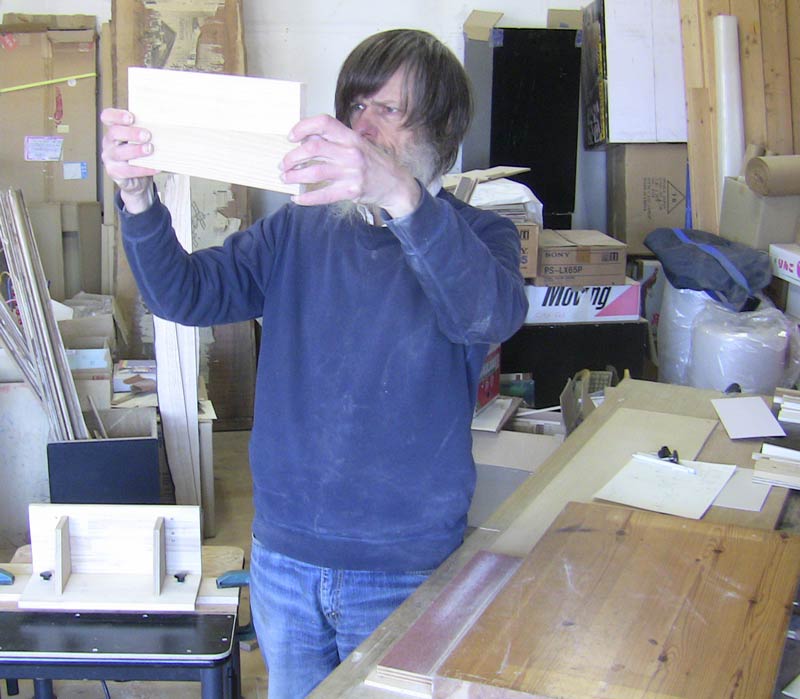
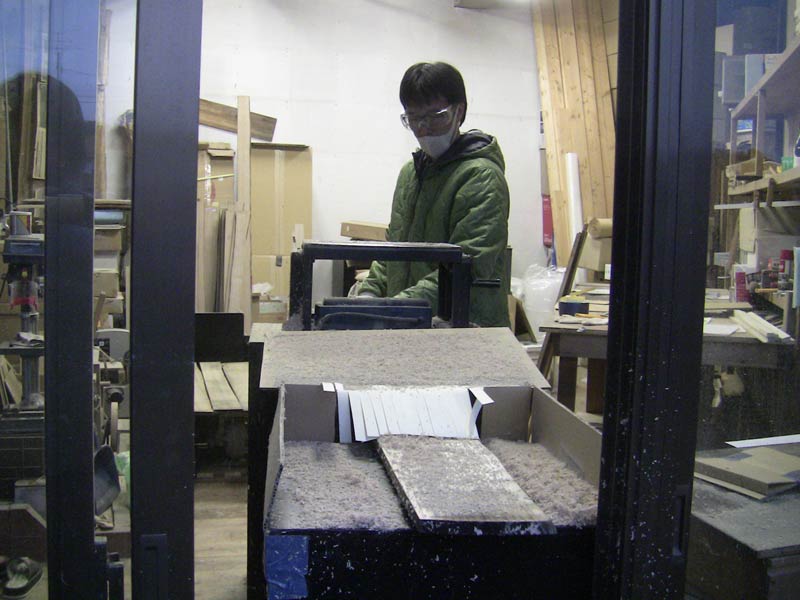
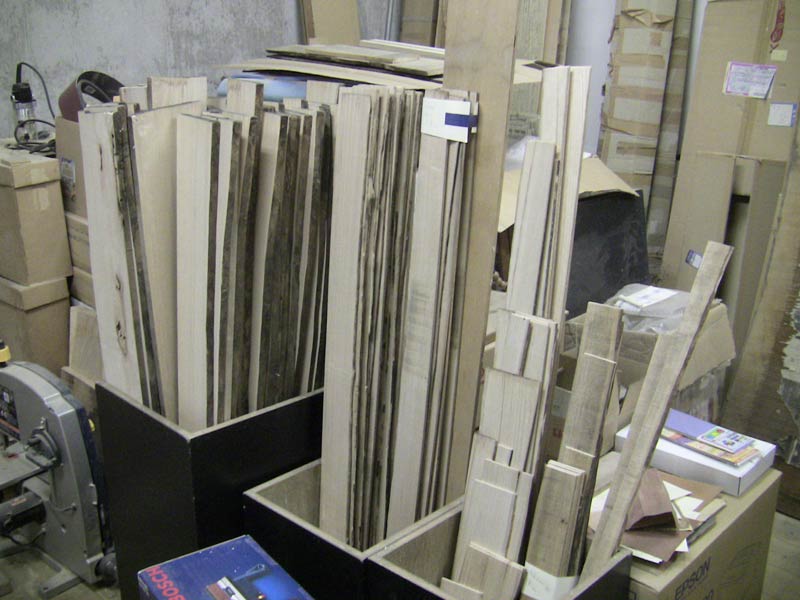
In the meantime, I got busy with the job of building a batch of case 'tops'. None of our lumber is wide enough to make a top in a single piece, and we don't want to try that anyway, as such pieces would almost certainly warp, so we're building them up from smaller bits. I took a batch of the paulownia pieces that Lee had put a straight edge on, and worked out what bits of them we could use for the tops, avoiding knots, bad grain, etc. etc. 'Unfortunately', Lee-san had the table saw pretty much tied up, so the only tool available for me was the one visible in this photo ...

A few (sweaty) hours later, I had a nice pile of pieces cut to rough length, and ripped to width:
A hand saw doesn't leave a nicely finished edge of course, so I dressed them all on our belt sander:

Unfortunately, the 'bed' of the belt sander has a slight arch in it (I'm not making this up you know - every single one of those Chinese tools has 'deal killer' level defects...) so all the pieces had to be given a final dressing with a sanding stick before they would fit together properly:
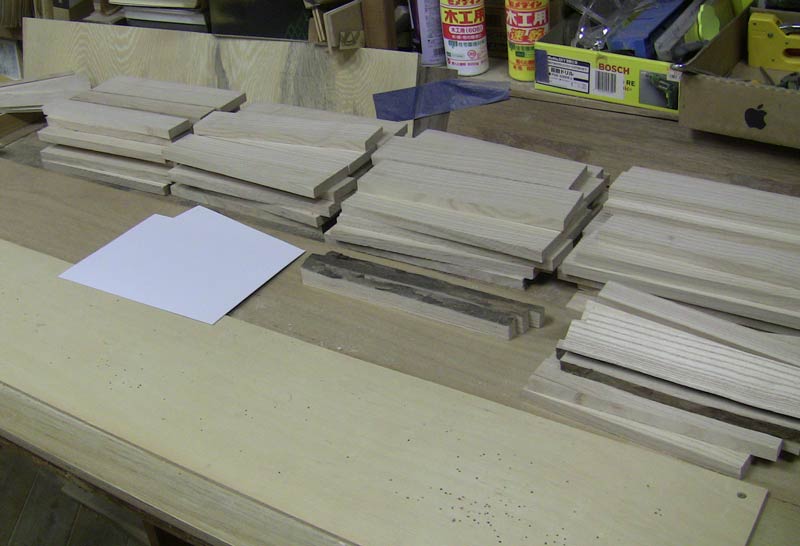
I then matched them all up with suitable mates for gluing up to make tops (I'm laying up sections wide enough to cut two case tops):

I roll a thin layer of glue evenly on each piece (trying to avoid squeeze-out as much as possible):
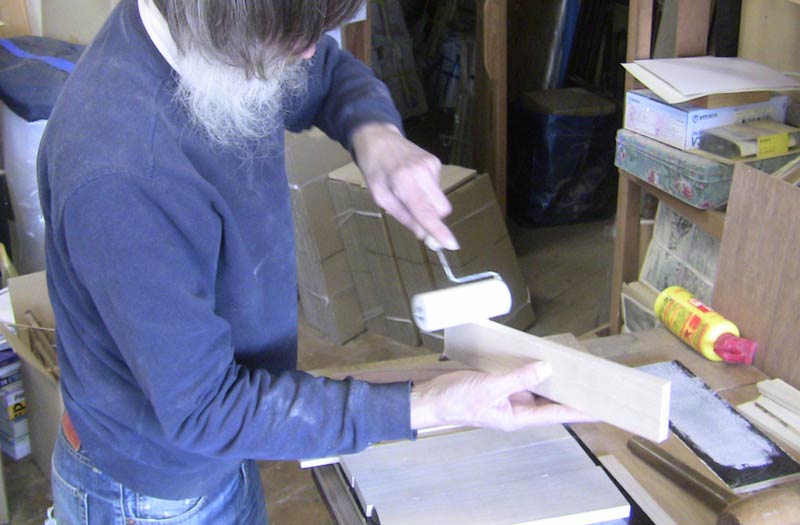
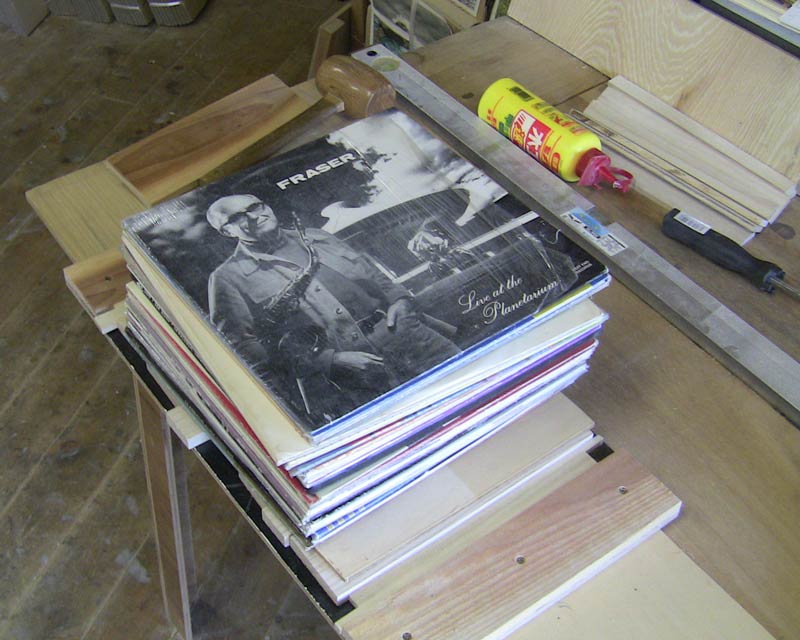
... then clamp them all together, and - with a little help from old friend Fraser MacPherson - keep them flat while the glue dries.
It's going pretty slowly - a lot slower than I had wanted - as we're spending very little time actually cutting wood ... most of the time being spent in building tools and rigging jigs. The second - and subsequent - batches should move along much more quickly we think ...
Posted by Dave Bull at 2:31 AM
| Comments (4)
Arts of Japan series : print #1 - one colour block in detail
We got an overview of the entire set of 10 colour blocks yesterday; today let's see how one of them is carved - start to finish.
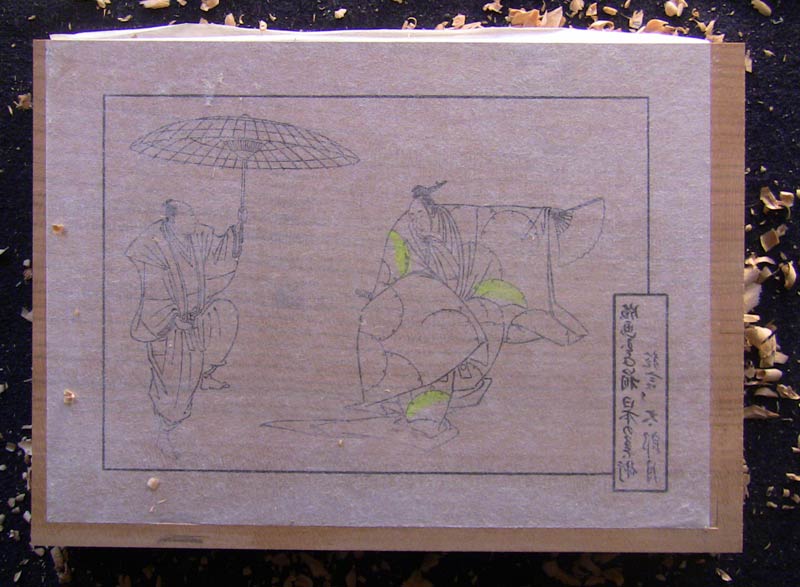
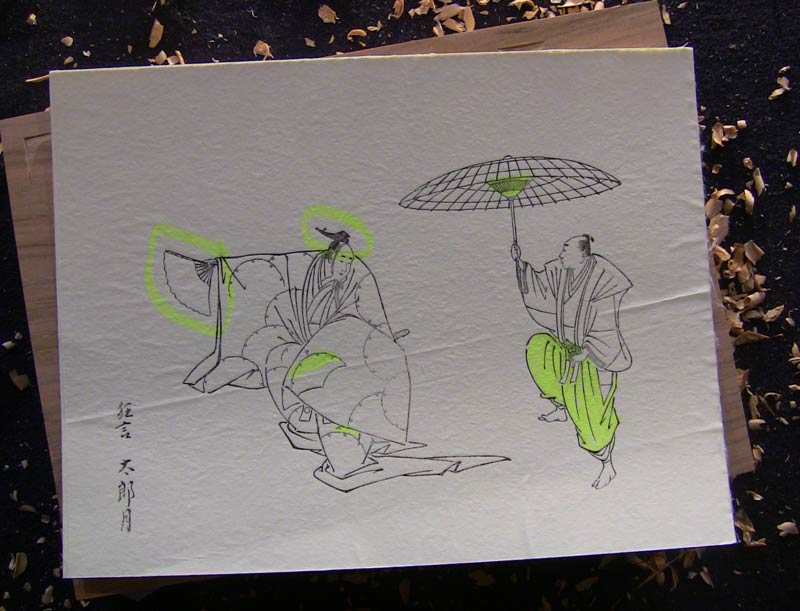
Here's the block ready to carve. The paper sheet pasted on the wood is a kyogo-zuri ('transfer printing'), and was done on a very thin gampi paper, lightly bonded to a carrier sheet with spray adhesive. It was pasted face down onto the wood, and the carrier then peeled away, to leave nothing but the gampi in place.
Here's what happened over the course of the next hour:
First step in carving one of these blocks is to rub lightly with a damp finger in the areas to be carved (marked here with yellow highlighter), to peel off some of the gampi paper:
I then rub a very thin film of camellia oil on each area - just as I am about to carve it. Don't do the whole block at once, or it will just get smudged and smeary.
First tool at bat is the hangi-toh:

... which is of course used to cut the outlines of the relevant areas, giving us this result:

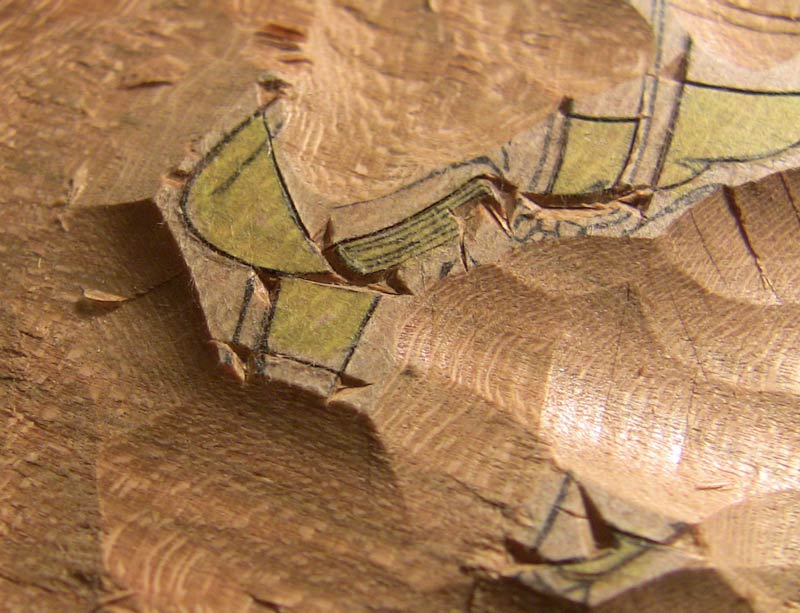
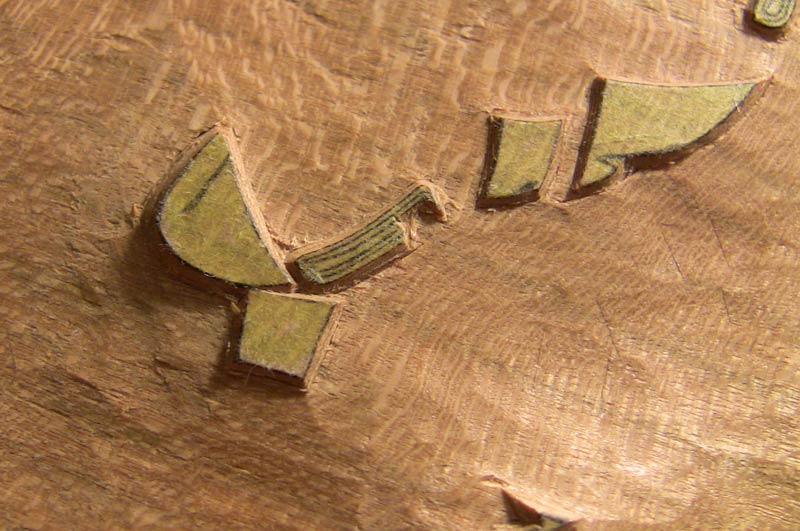
Here's a close-up of one particular area (we'll come back to this same place again as we move along); I've 'popped out' many of the corners, giving a place for the clearing chisels to enter cleanly later on:
For the second stage - general clearing - I begin with a 15mm maru-nomi (shallow U-gouge), together with a mallet:
... and with the block sideways on my bench, gouge a groove alongside each area:
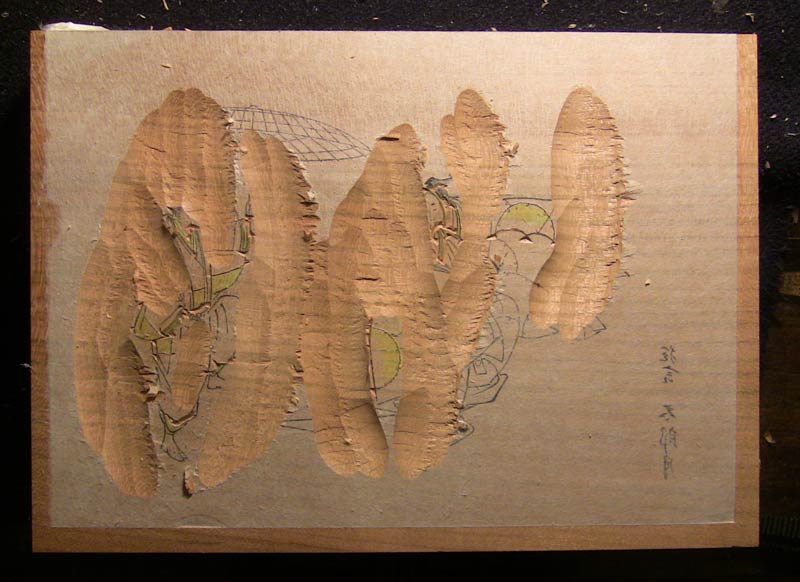
I then turn the block back to the normal orientation and complete the 'isolation' of the desired printing areas:
With the areas to be retained now safely visible, I switch to my 24mm soai-nomi (general clearing chisel):
... and quickly whack away the unwanted wood, out far enough that my printing brush won't strike the unwanted edges:
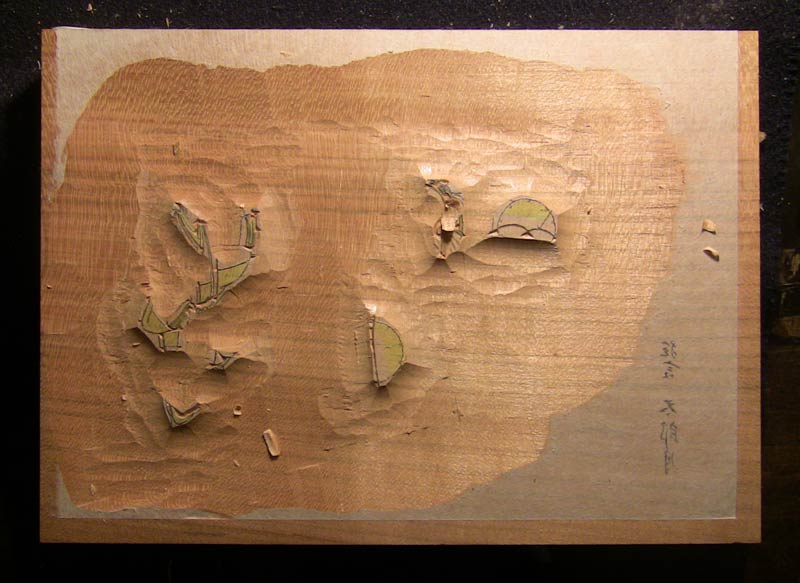
Here's a close-up view; you can see that I don't run too dangerously close to the retained places:
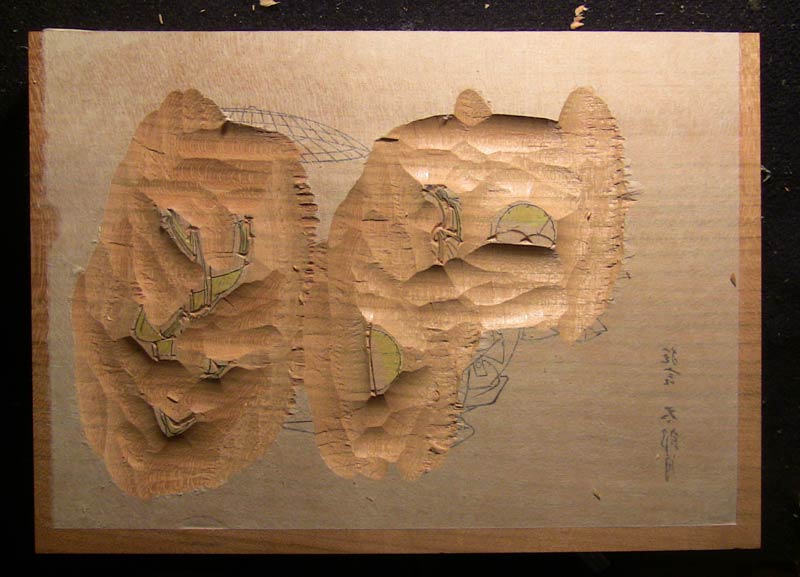
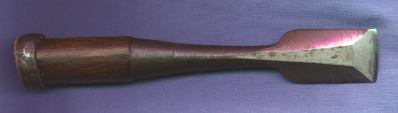
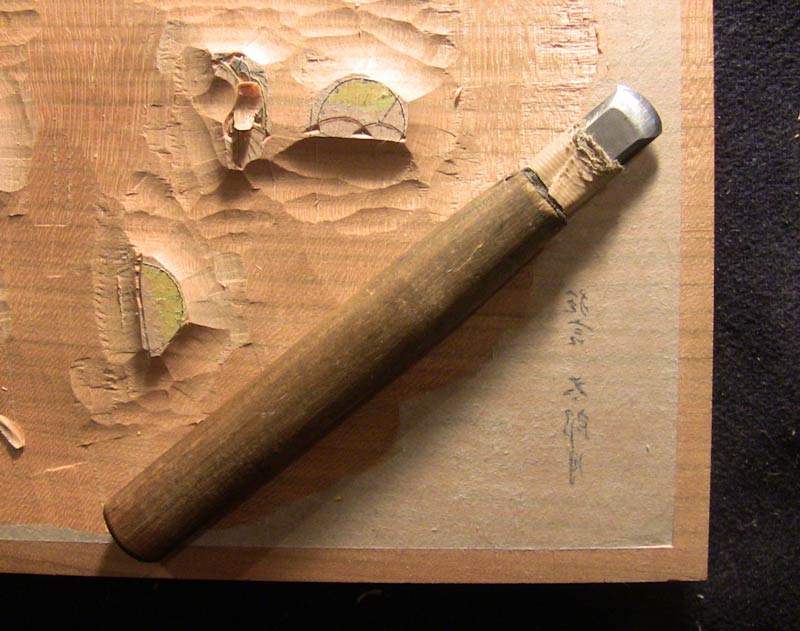
That's it for the 'rough stuff', and the mallet now goes away back into its drawer. For the third stage, I use my collection of aisuki (bullnose chisels), starting with this nice fat one:
After I'm done with it, the surface of the wood between the carved zones is nice and smooth. This is important, as roughness here will quickly cause pigment to build up as the printing progresses, leading to blots on the front of the paper.
Here's the rest of the aisuki collection, from 6mm down to a tiny point:

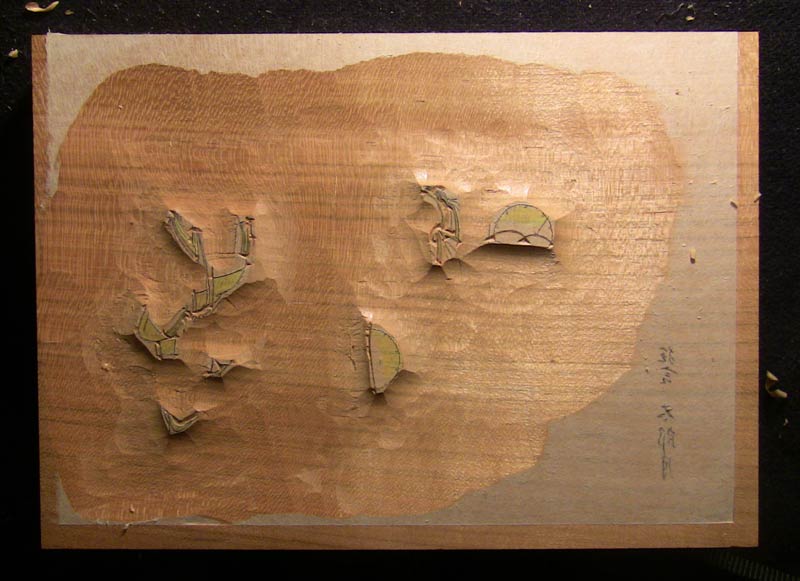
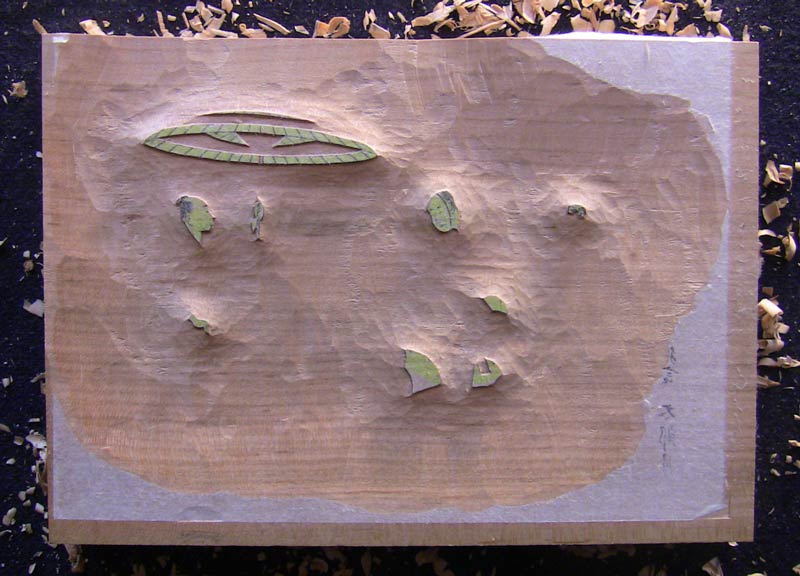
And with their work done, the block looks like this:
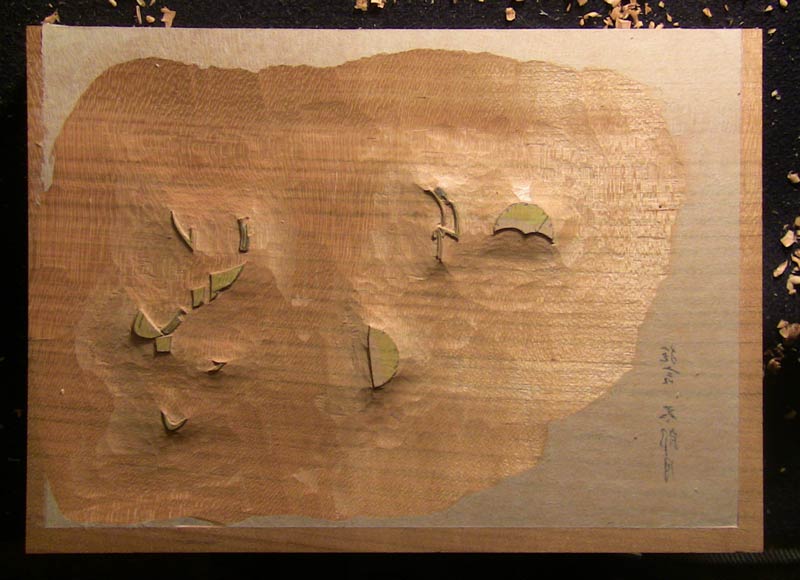
Zooming in to our chosen area, we can see that the surface isn't 'perfectly' smooth, but this is close enough for jazz!
Posted by Dave Bull at 2:19 AM
| Comments (4)
Arts of Japan series : print #1 - colour block carving
Seems like the block count for this print will probably be ten 'faces' (not including the 'series' blocks for outline and embossing).
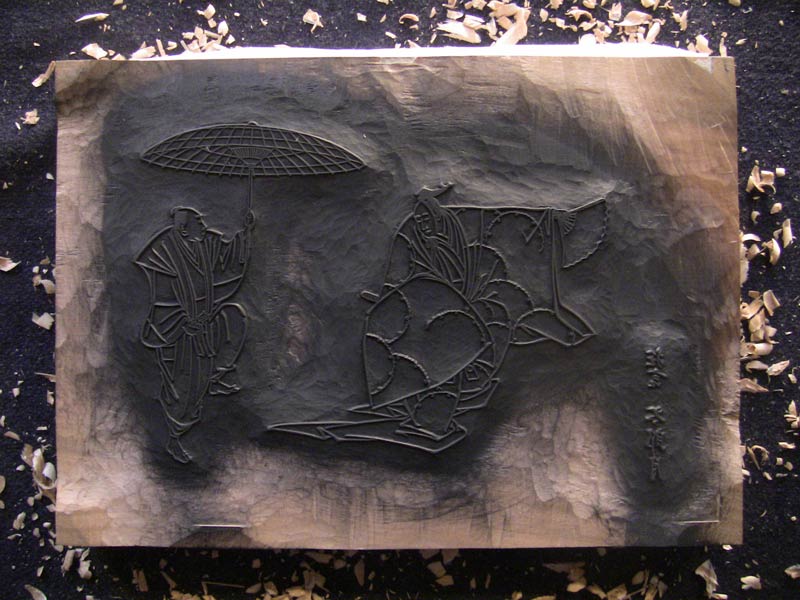
We saw the key block the other day, but it looks a lot more 'real' now:
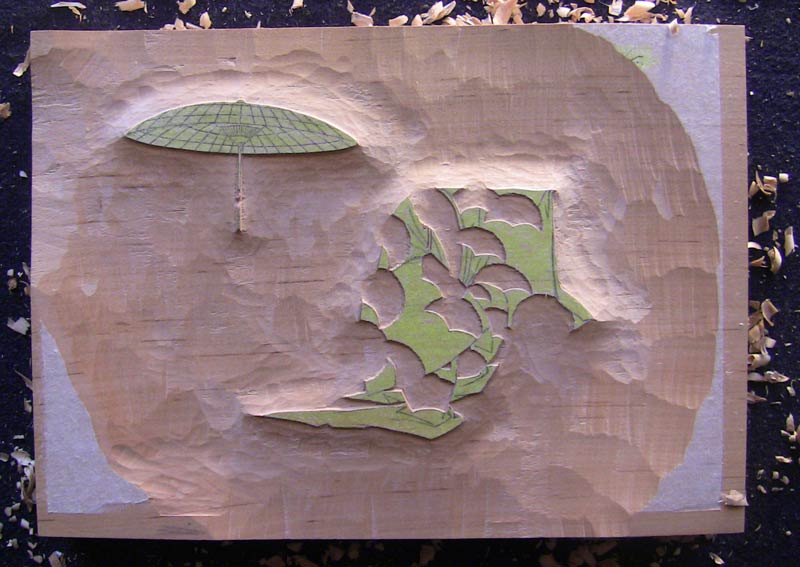
And here are the colour blocks - some done, some ready to carve, and one not yet pasted down:

Posted by Dave Bull at 2:11 AM
| Comments (2)
Arts of Japan series : embossment blocks part 2
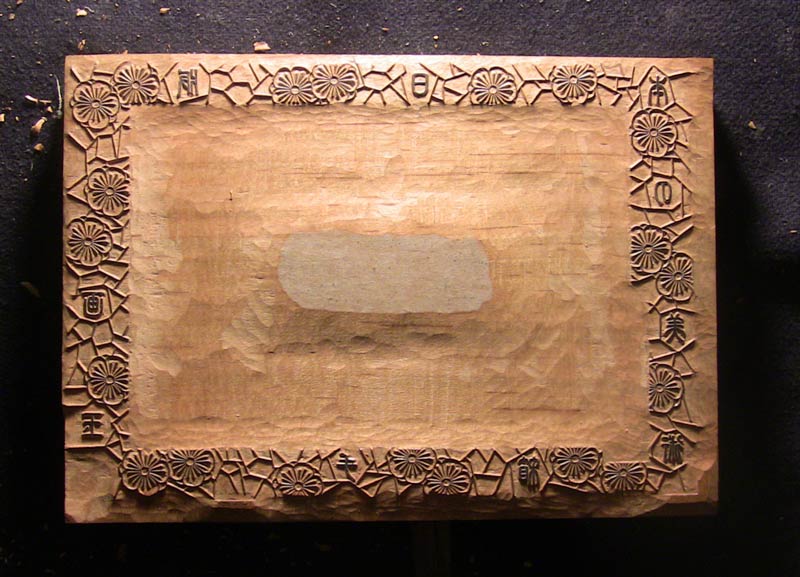
So the two blocks that will be used for the borders and embossment decorations on all the (horizontal) prints in this series are now done:
... and ...
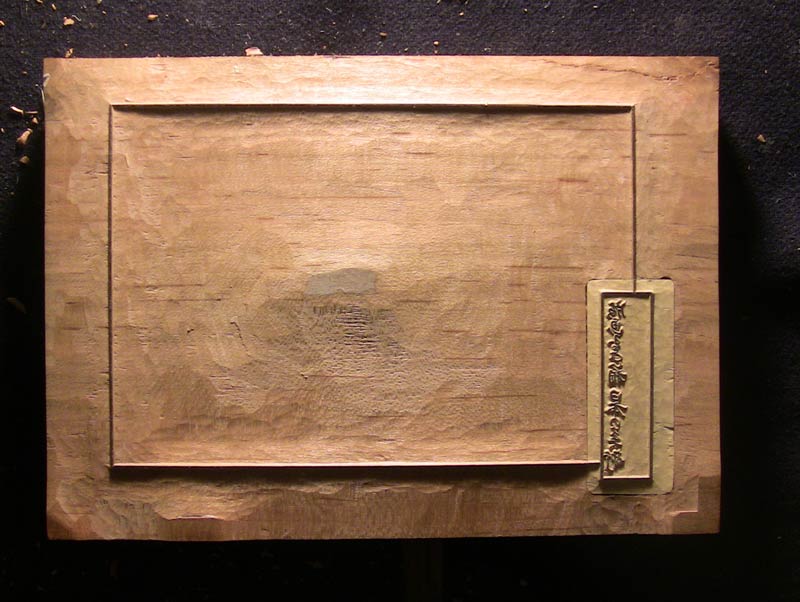
As you can see on the outline block, I inlaid a bit of boxwood at the place where the title was to be carved.
Given that there are going to be 18 prints in the series - 9 of them printed from this block - at an 'edition' size of about 200, that's a bit more wear and tear than I would like to submit the cherry to. Boxwood will do fine. (Not to mention that it is much more pleasure to carve!)
Posted by Dave Bull at 2:35 AM
| Comments (2)
Arts of Japan series : embossment blocks
What's this?
If I go back one step, and return the block to its place, you can see!
There will be some among the waiting collectors who will not be all that pleased to see this block! Those who received the previous 'Mystique of the Japanese Print' series prints will recognize what this is for - printing an embossed pattern around the edges of each of the prints. I think that the embossment is sort of a 'trademark' of this Treasure Chest series, but I heard recently from one (long-time) collector that he would rather I made the prints in a more straight-forward form, without this sort of decoration applied.
I certainly can't argue with his point of view, as I too of course appreciate woodblock prints even in 'simple' form, but I don't feel at this point that I can 'scale back' the presentation to something more 'bare' - in what is basically a continuation of the previous series - without leaving most collectors feeling somewhat short-changed ...

While I was down in B2 carving, Lee-san was still busy up in B1, trying to get the entire batch of paulownia planed to thickness for our cases:
He built a huge pile of sawdust, and by the time he left for home tonight, he had made a pretty good dent in the pile:
He'll be back again early next week for his next three-day stint, and at that time we'll get this stuff dressed to width, and run the first trial batch of actual cases ...
Posted by Dave Bull at 2:09 AM
| Comments (2)
Arts of Japan series : case construction part 2
And we have our first bites into the wood! With this case construction - just as with the printmaking itself - it's fun to get the planning and prep behind us and get some wood shavings flying!
Lee-san got busy with the planer that we borrowed from my neighbour Abe-san. We found that this kiri (paulownia), although soft and 'easy' to work, is not so forgiving with the grain direction. He has to get each one entered into the machine in the proper direction, or we get grain tear-out, no matter how finely we set the cut.
After he got started I headed down to my own bench to do some carving on the embossing block for the first print, and next time I came upstairs I found that things had changed:
This guy is nothing if not inventive, and as he goes along, he is working out a system for catching as much of the sawdust and chips as possible. (There is no way we can afford a big vacuum extraction system right now ...)
We're going to be working with paulownia of four different raw thicknesses, although if I tell you that they are expressed as measurements such as 5分5厘柾, I doubt that it will mean much. We're targeting a finished thickness of 15mm, 9mm, 6mm, and 4mm for various parts of the case, and as the resawing on this stuff was done pretty finely, he only needs a few light passes through the planer to get there.
Posted by Dave Bull at 2:45 AM
| Comments (1)
Arts of Japan series : case construction part 1
It's hard to believe that it was over two months ago that I posted on this Roundtable about the first sample cases I made for 'Arts of Japan' print series, but there it is ...
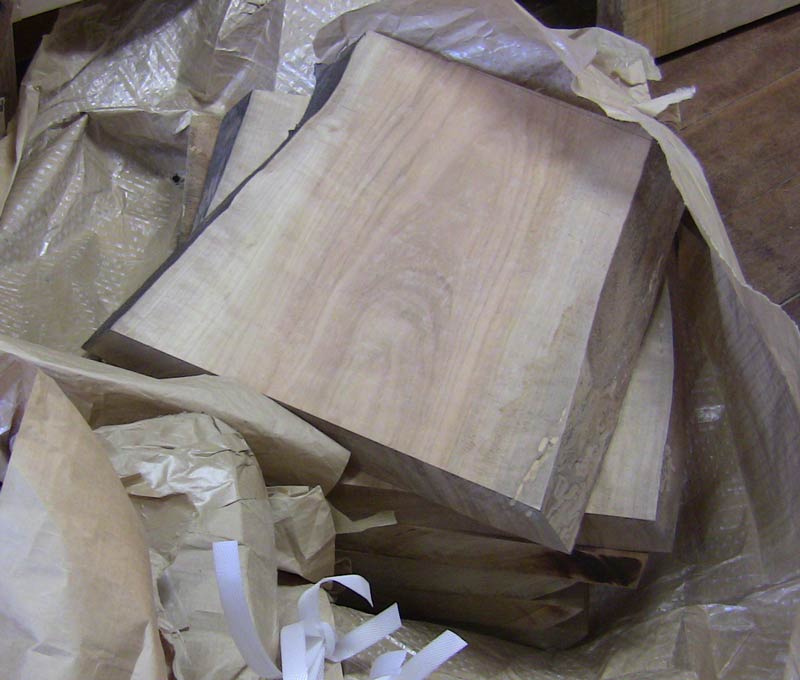
Things have been moving along in the background since then, and the 'idea' became concrete today, with the delivery of the first batch of timber for the job of making 200 cases:
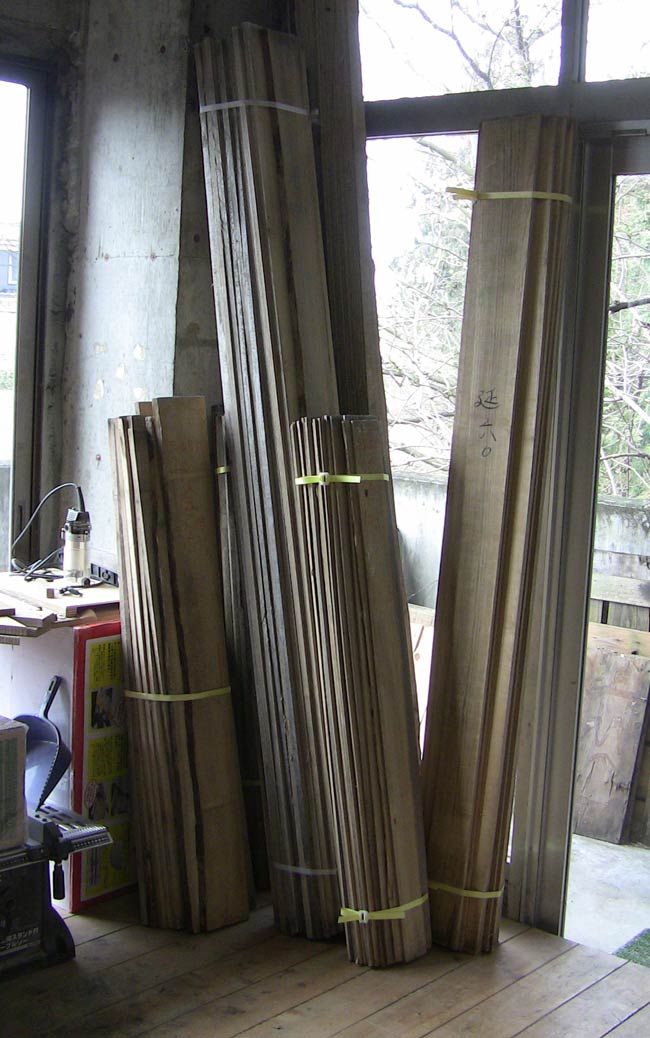
This should be enough for about 80 cases, we think. It certainly doesn't seem like a whole lot of wood for $1500, but that's the way it goes ...
The stuff certainly does seem well seasoned:

If this were any other kind of wood that I was familiar with, I would say it has been overly seasoned, but everything I am learning about this paulownia points to this as being completely normal for a stack of timber ready for use.
Lee will be here on Monday morning, and we'll begin the process of translating our sketches and drawings into jigs and setups for working with this stuff ...
Posted by Dave Bull at 2:35 AM
| Comments (0)
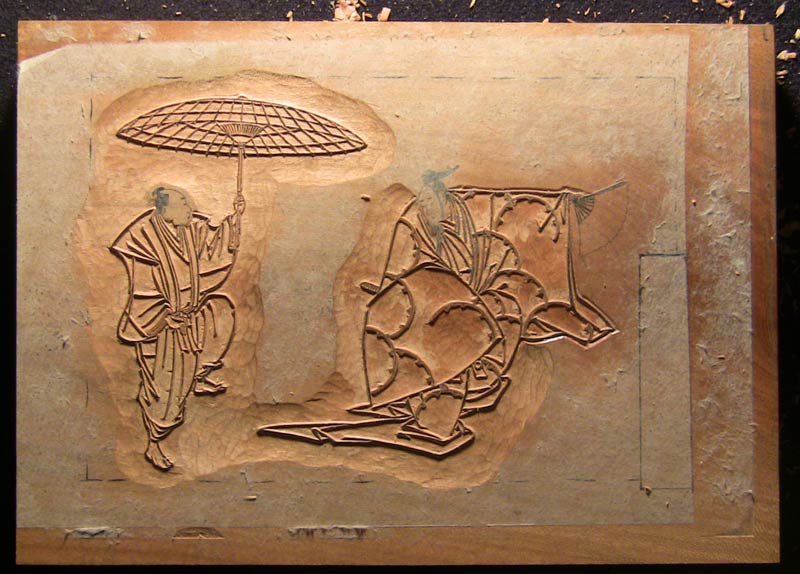
Arts of Japan series : print #1 - keyblock finished
The keyblock for the first print in the new series is now 'finished'. It'll almost certainly need some touch-up work after we get to the test printing stage, but for now, this is as far as I can take it:
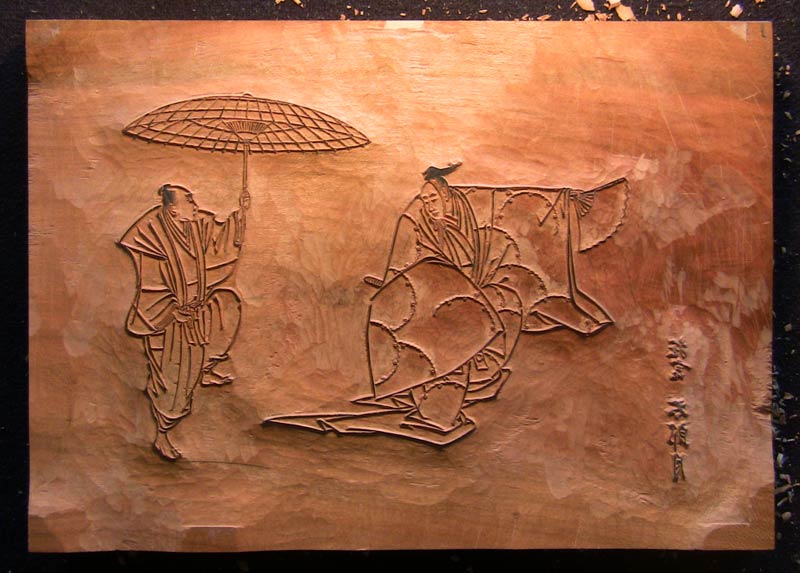
It has turned out pretty well. I selected an extremely hard block of wood for this one, because of the small-scale of the linework, and the wood held up no matter how thin the lines became.
I'll now get started on preparing the colour separations. Some of these will be straight-forward - 'painting' the areas on impressions pulled from this key block - while others will require going back to Photoshop to trace some patterns from the original print.
If there aren't too many interruptions over the next few days, they should be finished and ready soon. Yesterday was actually a 'write-off' day, as I went out with carver Sato-san on another hunt for more cherry wood. We thought that all our problems on that score were solved when we found the place in Shin-Kiba a couple of weeks ago, but it hasn't turned out to be quite that simple. I'll report more when I have some more definite news on this ... but for now, here's a little 'taster' ... some nice thick (and very heavy) cherry:
Just waiting to be hit with a few of these:
Posted by Dave Bull at 2:04 AM
| Comments (1)
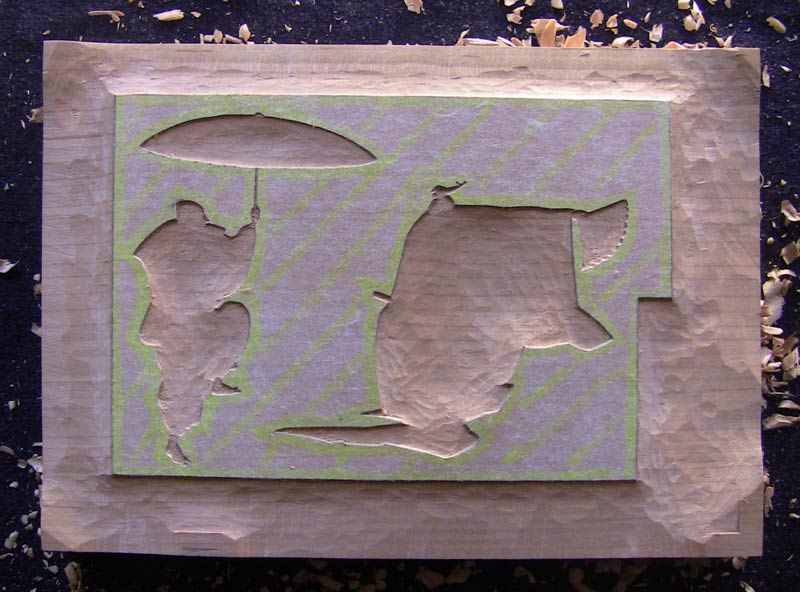
Arts of Japan series : print #1 - keyblock carving-3
Plodding along at the same steady pace ...
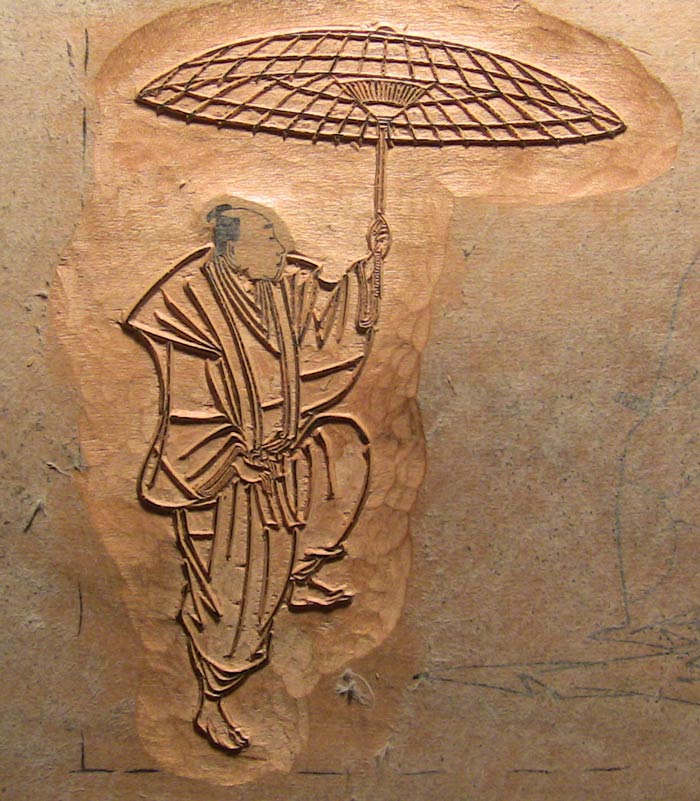
The focus today was on the main dancer:

The wood in this area is extremely hard - almost rock-like. If you look closer at the kimono patterns, you can see where I have just 'roughed it out' at this point, and will go back and finish the detail later:

Posted by Dave Bull at 2:42 AM
| Comments (1)
Arts of Japan series : print #1 - more keyblock carving
A very long day of work on the block today ... not all that many square centimetres involved, but actually quite a lot done:
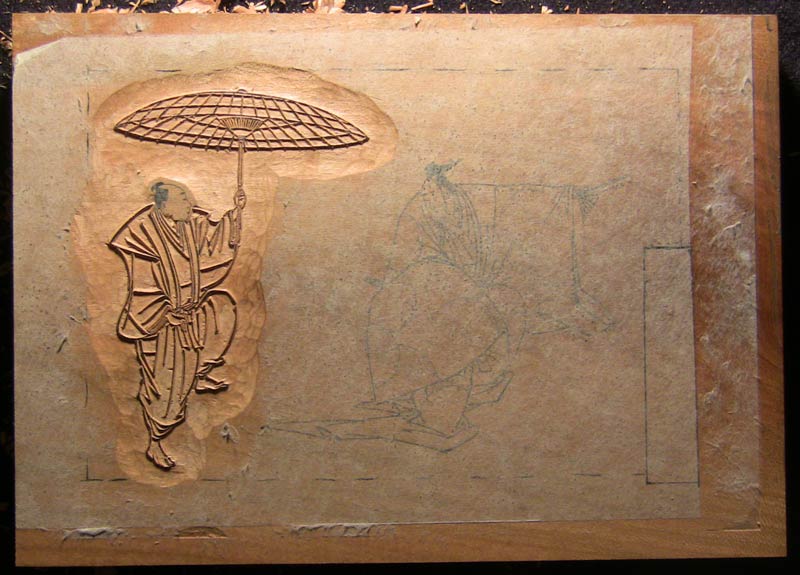
Here's a closer view; I had hoped to get this figure completed today, but the yawning took over before I could get the face done. I'll come at it 'fresh' tomorrow morning ...
Posted by Dave Bull at 2:36 AM
| Comments (3)
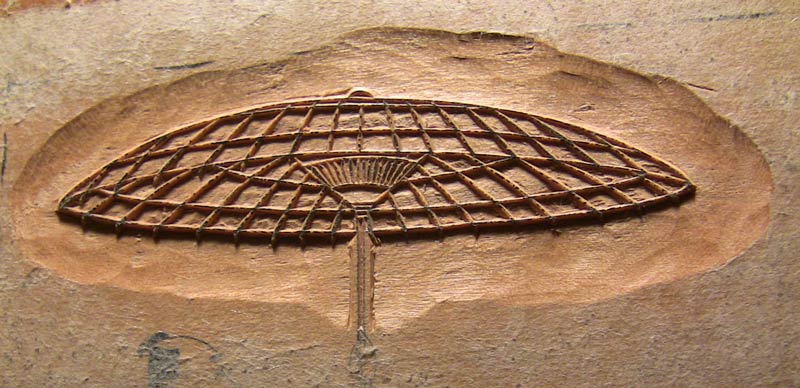
Arts of Japan series : print #1 - carving begins
Back to the bench, at last!
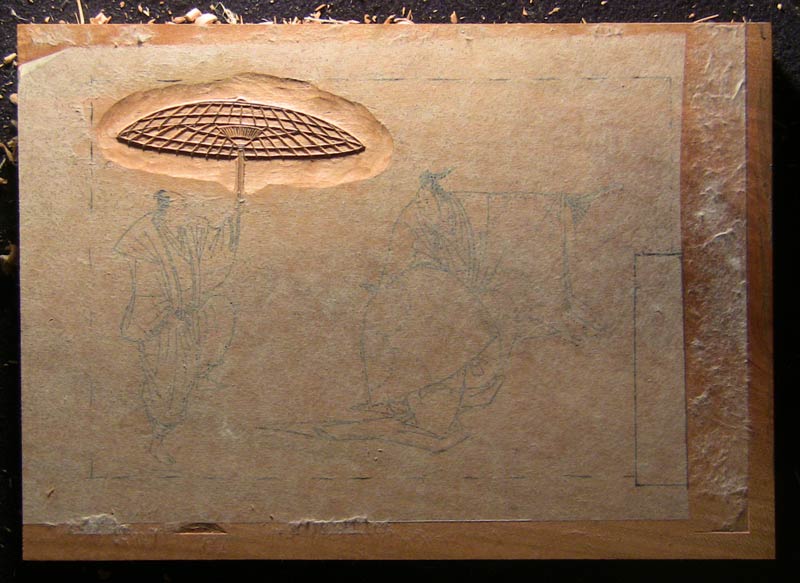
That's not a whole lot of progress for one day, but - as usual - there were plenty of other things getting in the way. But anyway, I'm back in the saddle, and work should progress smoothly from here on, I think.
Posted by Dave Bull at 2:46 AM
| Comments (6)
Arts of Japan series : first actual work ...
After endless 'playing around' over at the workshops of the giant Mokuhankan Corporation, trying to get the new knife series up and running, it's time to 'get real', and get some actual productive printmaking work done. If my own subscription prints don't start moving out the door again pretty soon, none of the other projects will be able to survive ...
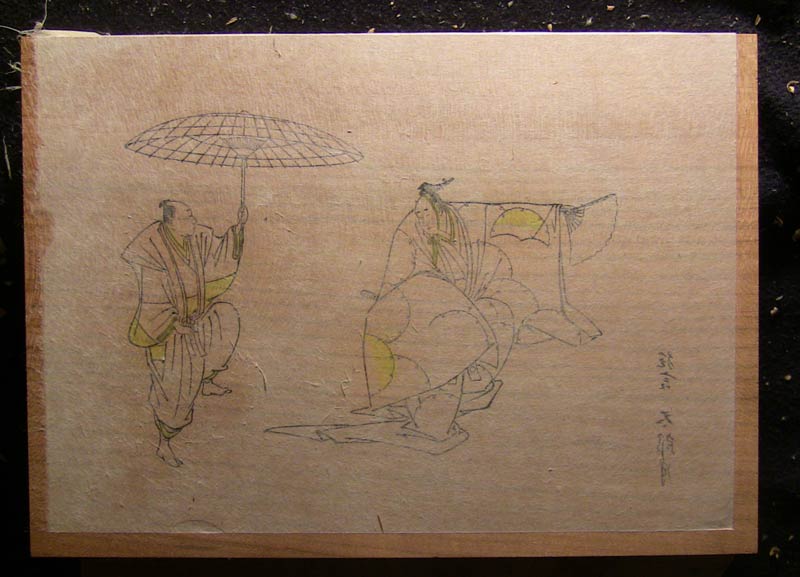
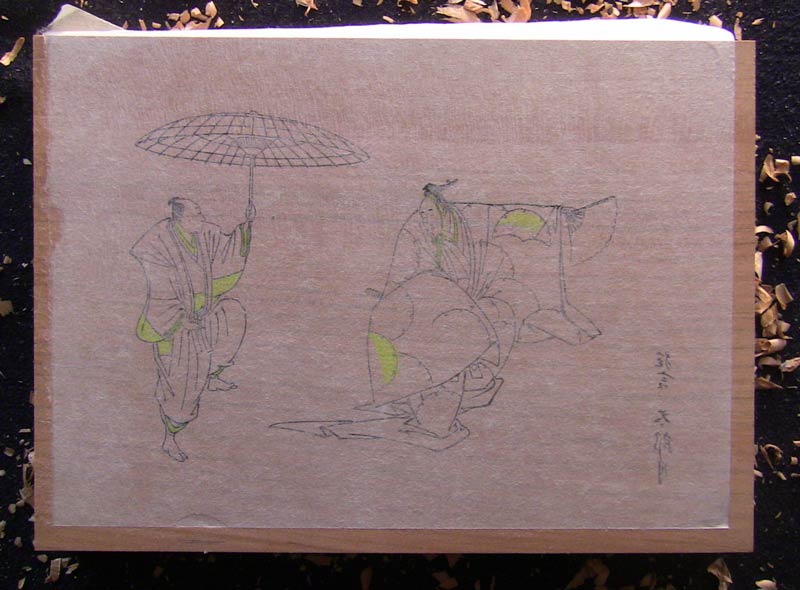
Our subject for this first print in the set is an image created by the man we now know as Hokusai, although he was using the handle 'Sori' when he drew this one. It dates from around 1798, and is the only illustrated page in what has been described as "an otherwise featureless book of quite unmemorable verse."
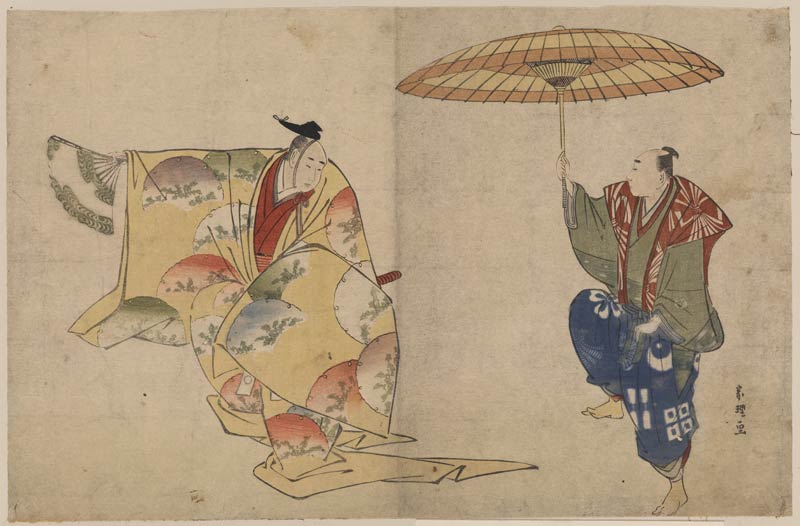
The process starts with getting the image into my iMac, and then opening it in Photoshop.
I scanned it at quite a high resolution, so even at 100% (before any other enlargement), I can see all the detail I need:
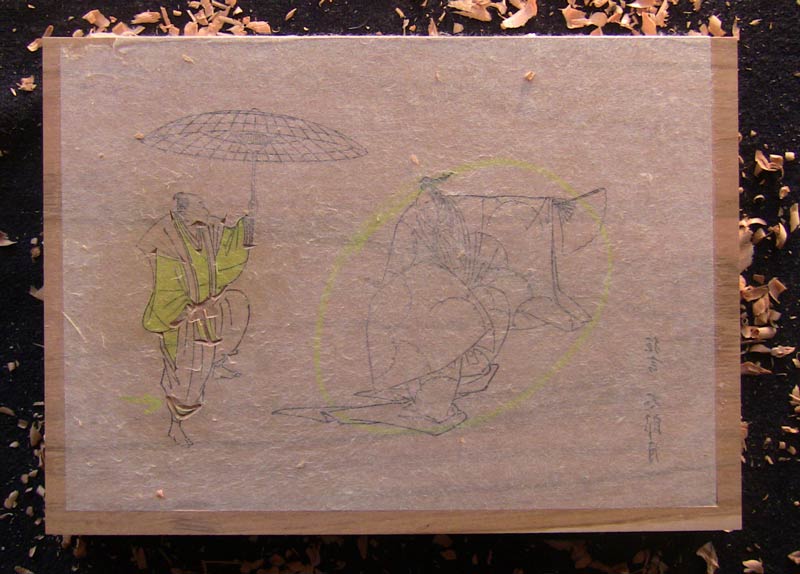
I use my Wacom table to trace over the main lines of the image, ignoring all colouring at this point.
I use a flat red, to contrast with the black lines, and have it set at around 50% opacity (on its own layer of course) so that I can still see the black underneath, allowing me to tell if I have gone too far over the lines at any point.
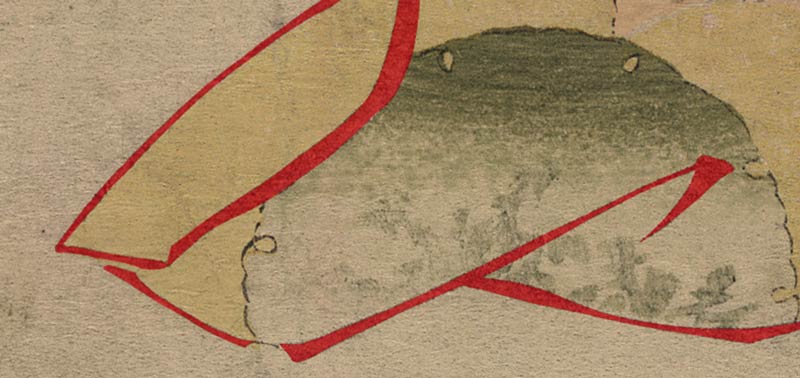
Once it's done, I'll hide the print layer, convert the red to a full black, scale it down to the size I want, and print it out onto tissue-thin gampi paper, ready for pasting onto the wood.
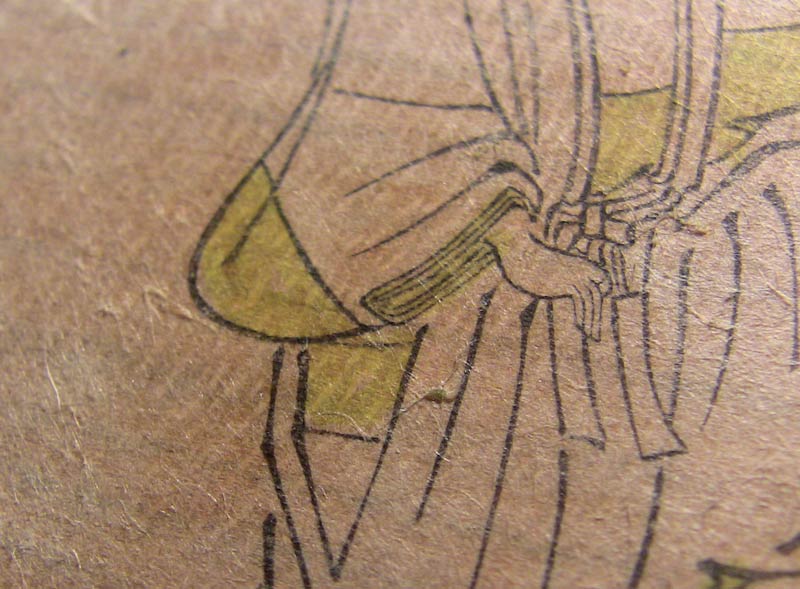
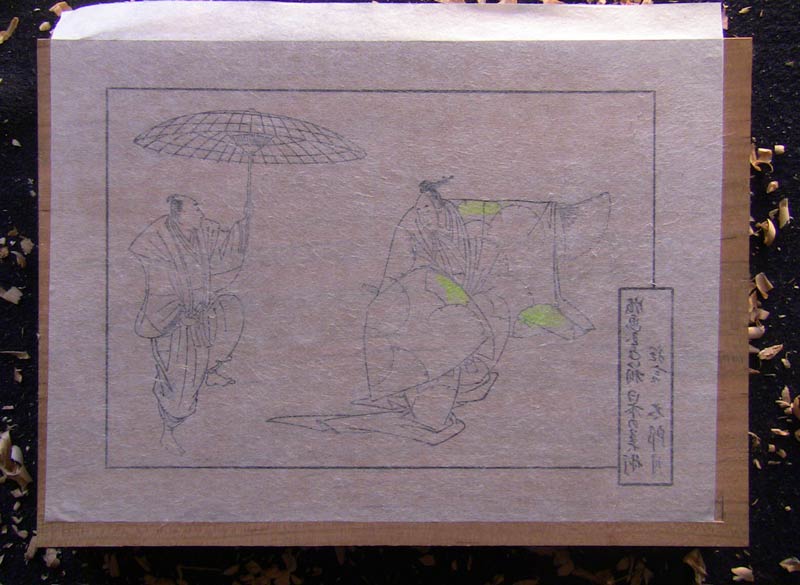
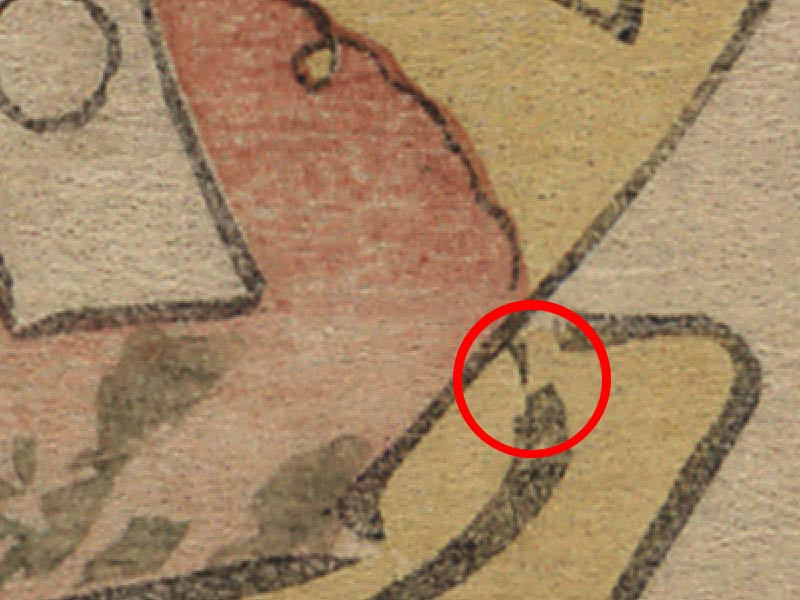
Going over the entire image this way gives me a real advantage once the actual carving begins, as I am already pretty familiar with all of its nooks and crannys by then. Look at this, for example - we can see a place where the carver of the original version slipped a bit, cutting an unwanted notch in one of the lines. And nearby, you can see where he sliced just a tad too far when cutting the hairs, slicing into a nearby line.
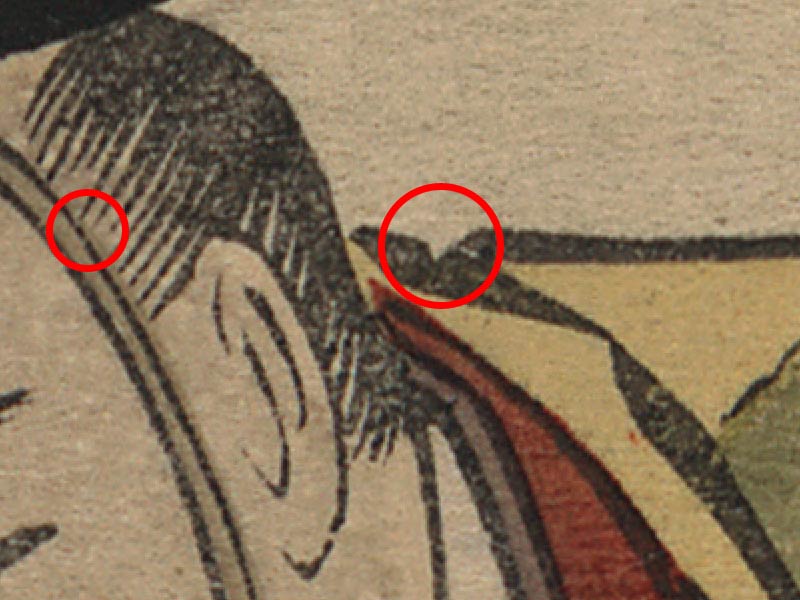
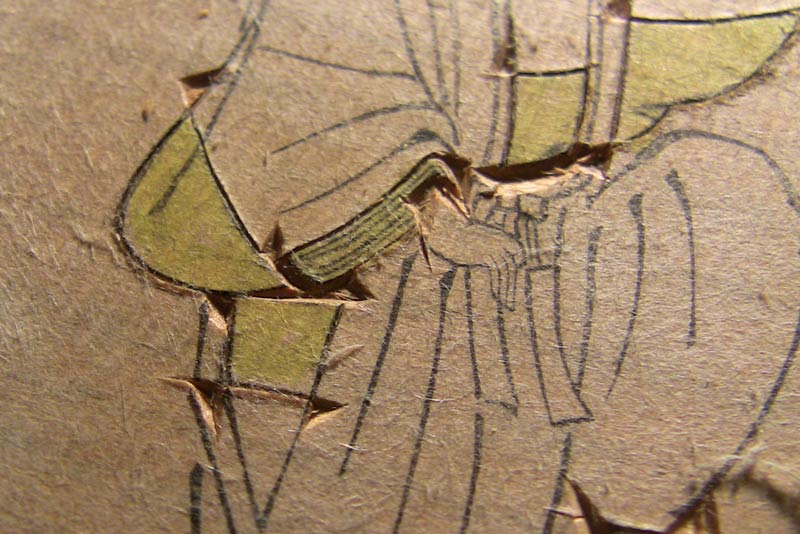
This isn't the 'finest' work I have ever seen, and I suppose that's a reflection of the generally low quality of the original publication. It seems that it was indeed perhaps quite 'unmemorable'. Here's another messed up part ...
(That printing is nothing to write home about, either ...)
Will I 'fix' these, or will I copy the original exactly? I'll fix them, of course!
Posted by Dave Bull at 2:52 AM
| Comments (0)