« March 2010 |
Main
| May 2010 »
So a few days ago we saw a photo of a few dozen boxes being readied for the Japan-based collectors, today it was the turn of the overseas people!
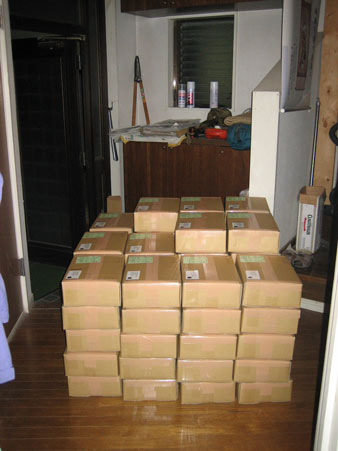
It took me most of the weekend to get these ready. The packages are pretty much the same as those for shipping within Japan, but with the addition of some corner reinforcements inside the box.
Where are they going? Most of them to the US - 47. Then 6 to the UK, 5 to Canada, 2 each to Holland and France, and one each to Australia, Spain and Belgium.
At the end of the previous post a couple of days ago I mentioned that it was going to be difficult to scrape the money together to pay the postage for these, but that situation has resolved. A couple of people made payment for some overdue invoices, somebody paid in advance for the next few prints, and one of the most supportive collectors in the US ordered a couple of other print sets, all helping to put things on the level for this month.
It feels so good to get these finally shipped. For most of this year so far, I have been neglecting the main tenet of anybody who makes a living by making things - if you don't ship, you're dead. That final print in the My Solitudes series was delayed more than a month through the combined tardiness of both myself and Ichikawa-san (the lady who did the book production for that series), and then of course getting the new series up and running took somewhat more time than I had anticipated, what with all the various issues that came up along the way.
So with a nearly three-month gap with nothing going out the door, of course things have become tight. But now that prints are finally moving, the next few months should be a time of gradually chewing through the thick stack of unpaid bills, and getting back to normal (whatever 'normal' is).
I'm still under very severe time pressure, and will be for a while yet. I have to print the second batch of this pair, which will take around a week, and immediately following that I have to select, carve, and print the second pair (#3 #4). That has to be done immediately because our family is having its annual get-together in June this year (the date being determined by my parents' 60th anniversary), and that pair of prints has to be 'ready to go' before I leave on the 4th of June.
The spring newsletter should be out 'now', but I have yet to even begin to write it. I also have to write and record the May (and June!) stories for 'A Story A Week', and then I have to work out the display setup for a 'design' show I will be taking part in over the weekend of May 15~16th (more about that soon ...)
And there is a constant parade of other distractions. A video crew was here this afternoon (postponed from yesterday) to do some filming for a 'pilot' for a Canadian documentary maker who is preparing a project about Canadians living overseas, there are dozens of unanswered emails stacked up in my Inbox, and I can no longer find my vacuum cleaner, as it seems to have disappeared under the dust mountains ...
Actually, it's all great fun. If there were a 'boss' here, holding a great whip and forcing me to do all this stuff, life would be pretty unpleasant. But you know, work is only 'work' if you would rather be doing something else ...
Posted by Dave Bull at 1:25 AM
| Comments (2)
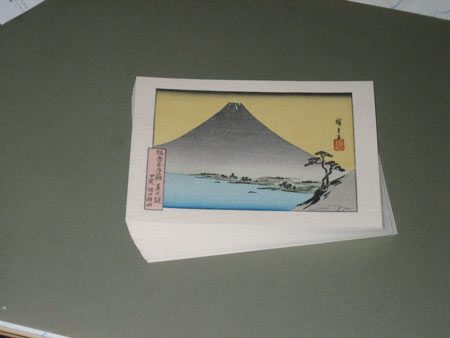
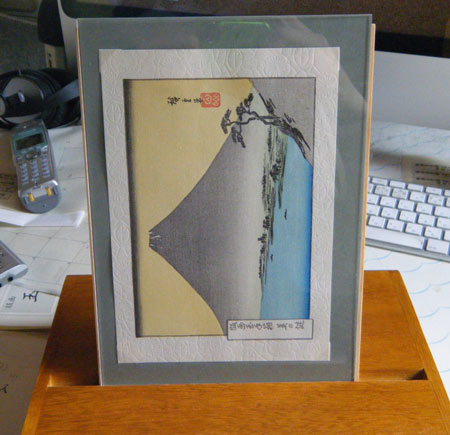
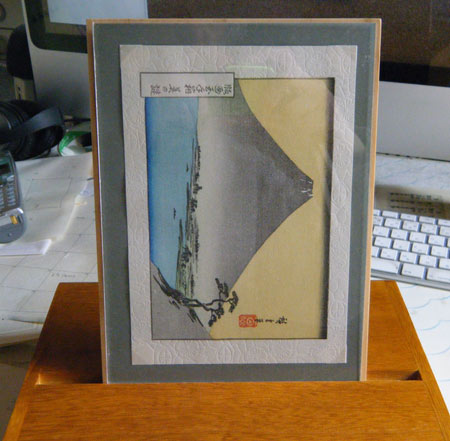
Mystique Series - Shipping Day!
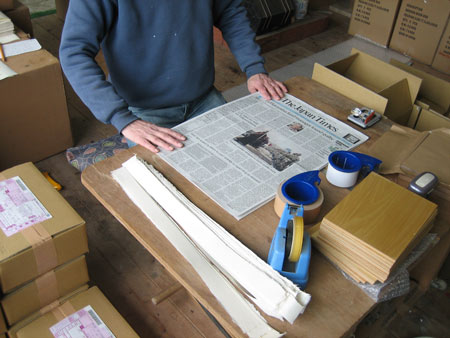
With the first batch of 100 or so prints now printed (and dried), and the cases all 'prepped' and ready, there are only a 'few' things left to do before I can get these out the door ...
First step is to get them 'separated at birth'! The border embossing pattern is carved right across the 'joint', so a single cut will do it:

Those actor prints will now go into a drawer to await their turn. (Actually, they aren't finished yet ... we'll read more about that later ...)
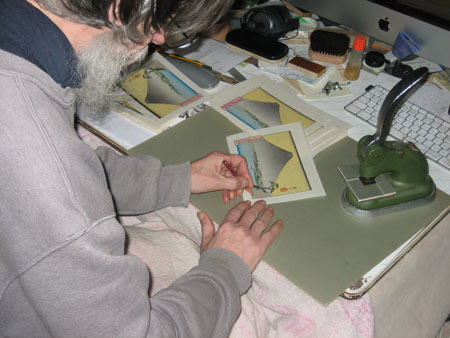
My embosser for my 'studio mark' doesn't function well when used too close to the edge of a sheet, so I do that step now, before any further trimming.
And my name goes on ...
With those steps done, the print now gets trimmed to final size. I have guide marks taped to the base of my trimmer, and simply run each sheet through the sequence. Trim to width:

Then the top edge:
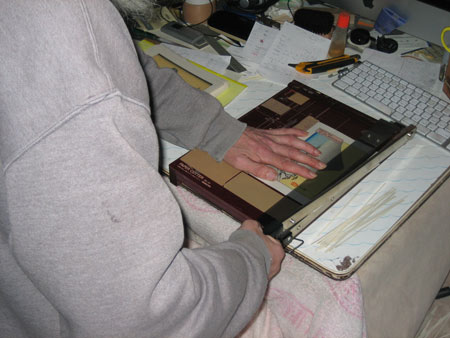
And finally the bottom edge:

This is their last chance to spend time 'together' before they are scattered all over the planet!
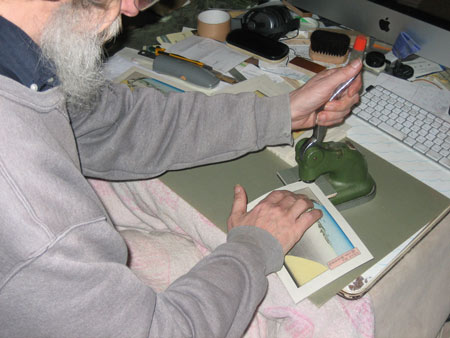
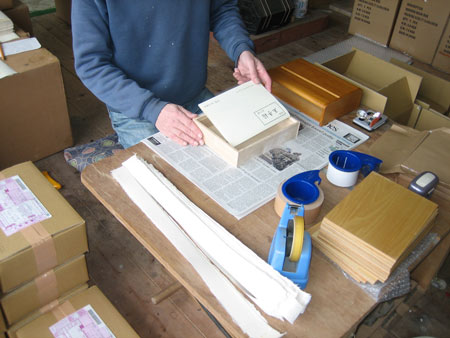
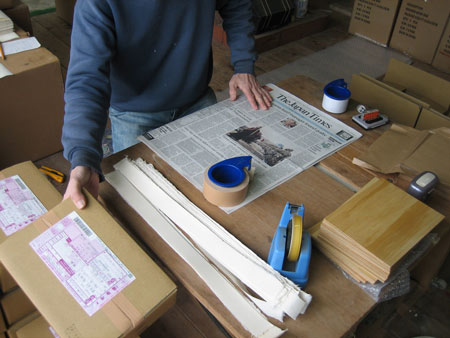
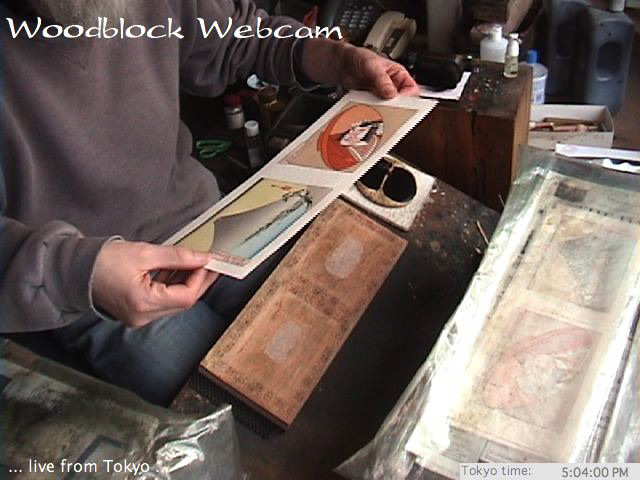
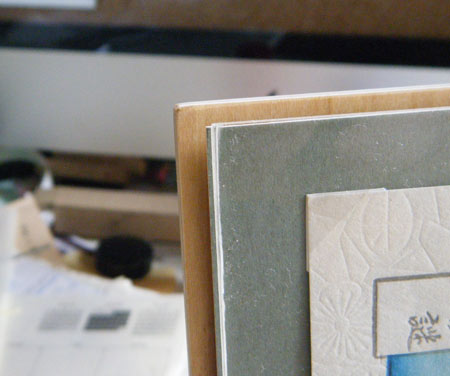
This next job is one of the more tiresome parts of the packaging procedure - printing the title on the mat boards (with an Epson ink jet). I really had to hunt around before I could find a printer with a rear-entry slot (necessary because stiff mat boards won't go through the roller system of most modern desktop printers.) But it means of course that I have to sit there and feed them one by one ... and this is one sl ooooo ww printer!
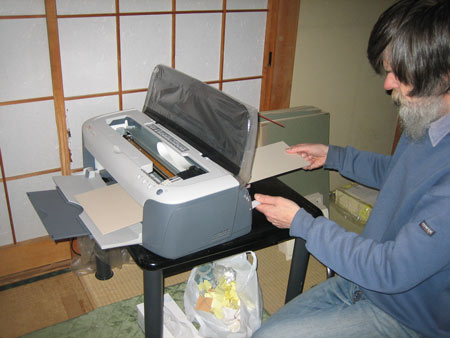
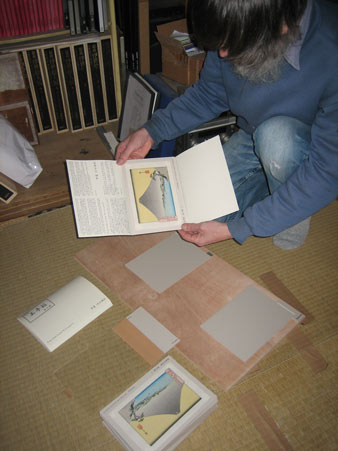
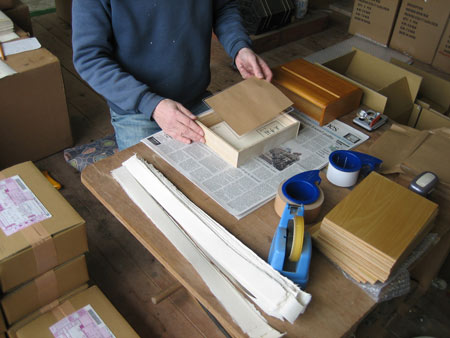
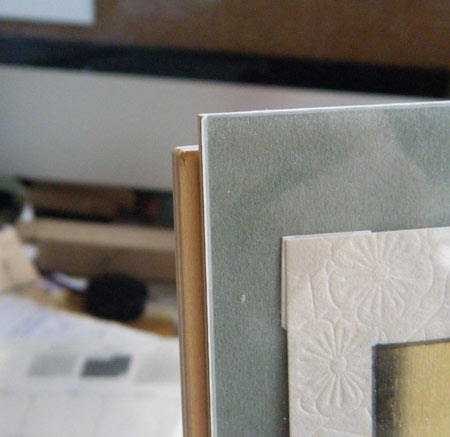
With the mats ready, the prints get mounted by transparent photo corners. To help me get everything lined up the mat boards are printed with a very faint marking showing the location of the two top corners:

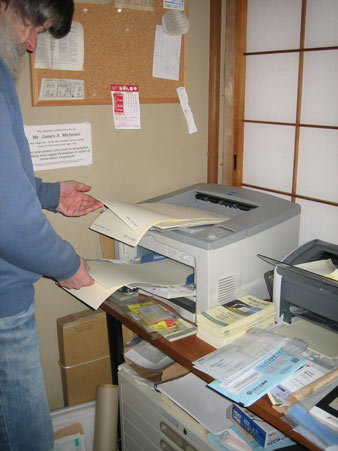
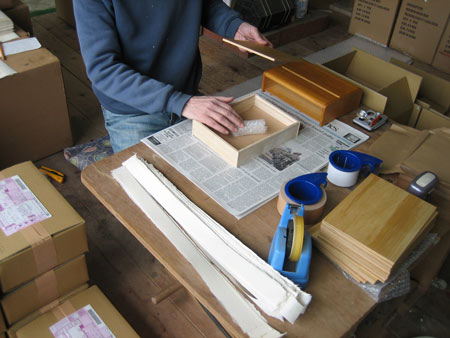
Next step ... print the 'wrapper' that contains the explanatory little story. The stack of fresh paper goes through the big Epson laser printer once with no problem, but the reverse side does not - I have to feed those one by one. At the same time, the little Canon laser next to it is spitting out the letters and invoices that will also be included in the package.
Once the story sheets are all printed, it's time to fold them. Each sheet goes into place in a jig, and a sheet of acrylic comes down and is pressed into place:
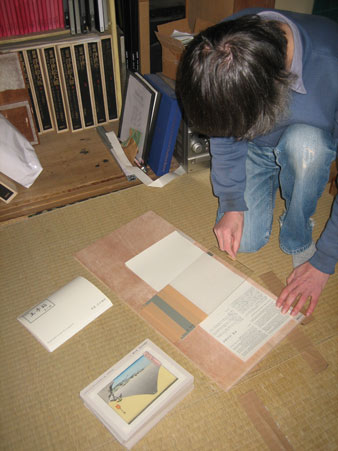
This leaves the center section properly recessed to receive the mat board.
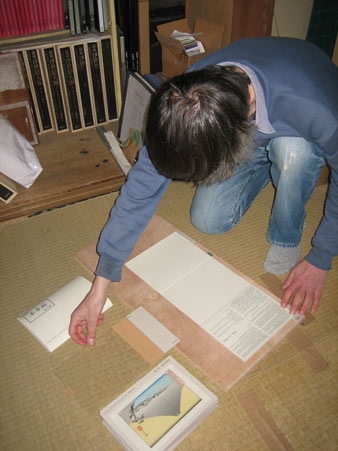
The mat goes into place, and the two flaps are folder over:
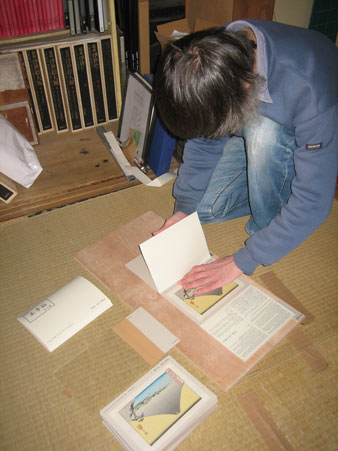
Quick and easy!
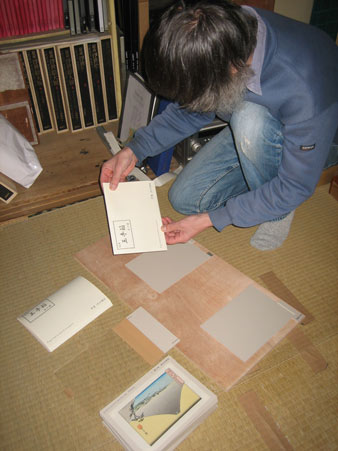
The flap that touches the surface of the print has nothing printed on it, to avoid any possibility of toner transfer in subsequent years ...
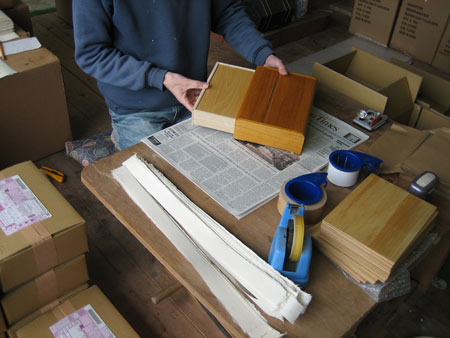
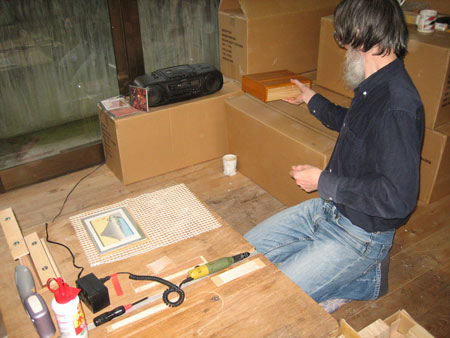
OK, time to get this stuff shipped! You know how you can see sequences of 'unboxing' photographs on the 'net whenever some new Apple product is available? Well, let's do it backwards ... here's how the Mystique prints get 'boxed'!
Scene of the crime ... yet again on the top of my table saw!
Into the drawer of one case goes the print pack:
Followed by a pristine acrylic sheet (with paper cover)
A small roll of bubble-wrap goes on top, to stop the stuff from rattling around during shipment:
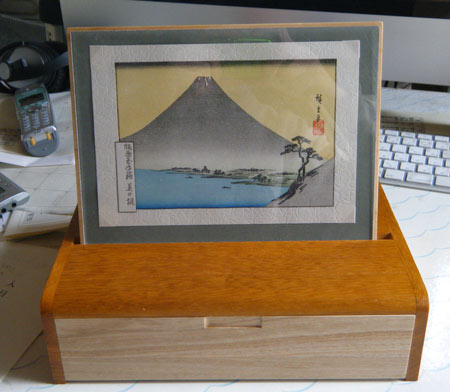
The wooden stand then goes on top, and the drawer slips into the case.
When I was doing an 'unboxing' test earlier, I found that there was a good possibility that people will drop the drawer when unwrapping the packaging, so I tape it closed with a strip of offcut washi:
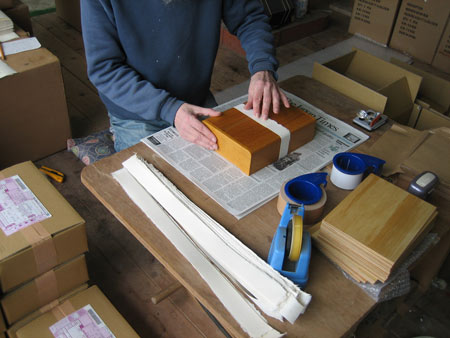
The case then gets a triple roll of bubble wrap. I'm not so excited about using so much plastic like this, but I don't really have any alternative - I need good protection, yet can't use anything heavy, or I just get killed on the postage ...
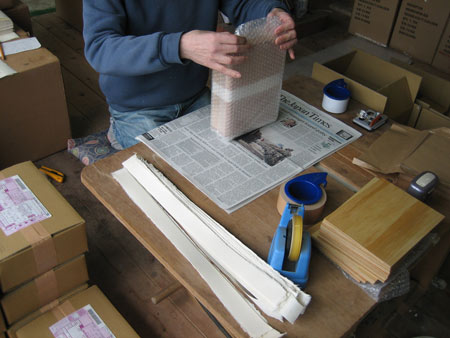
And then it all goes into the box perfectly snugly. The letter/invoice/etc. go on top, and the box is sealed.
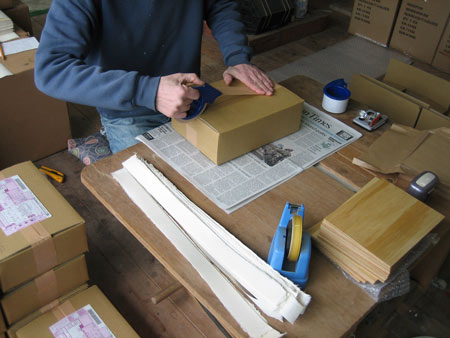
Shipping label goes on, and all done!
After I got the 30 odd packages for domestic delivery done this afternoon, I called the parcel delivery man, and he came over to get them. These guys are great; they show up just a few minutes after I call (even for just one package), take the stuff away, and send me the bill more than a month later ...
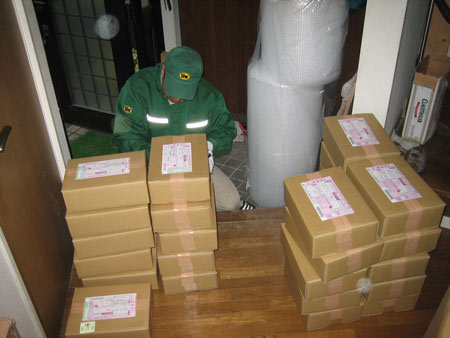
Tomorrow morning I'll get busy with the first batch of the overseas orders. They will have to go to the post office on Monday morning, and I'm not quite sure just how I'm going to get them all down there ... I don't mind balancing three or four packages on the back of my bike, but I don't think I can manage 64 of them!
And I'm also not quite sure just how I am going to pay for this! The overseas collectors all paid in advance for this first print and case, but that money (and more!) all went straight out to the case makers a couple of weeks ago. It's going to run about $800 to get these sent off. There is almost that much in my post office account, but we're only one week away from the month-end mortgage payment ...
But Ichikawa-san tells me that she sent the final batch of the last 'My Solitudes' prints out during the past week, so that revenue should be starting to come in soon! Will it get here in time? Cross your fingers, Dave!
Posted by Dave Bull at 7:48 AM
| Comments (1)
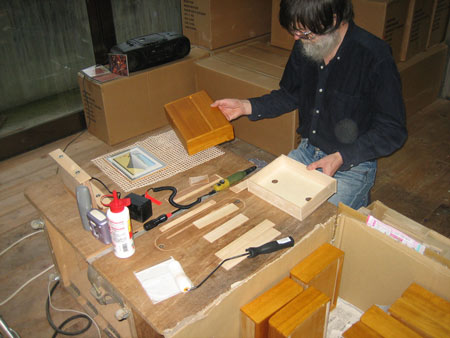
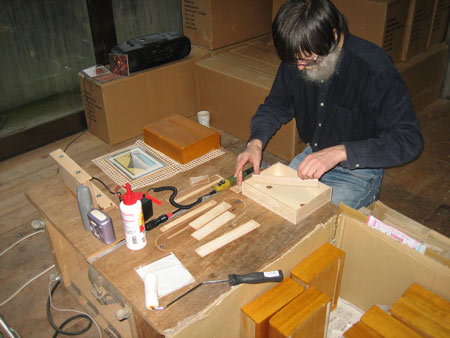
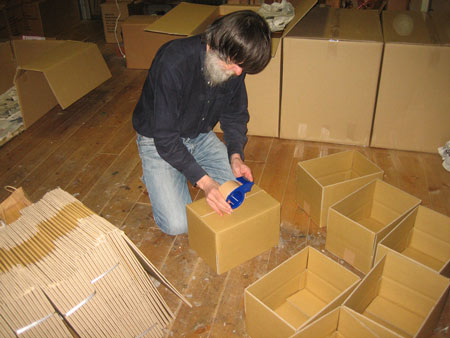
Mystique Series - fixing the cases
Time to fix the cases! With the first batch of prints now done (actually still sitting under the drying boards, waiting to be trimmed, etc.), it's time to figure out what to do with the cases.
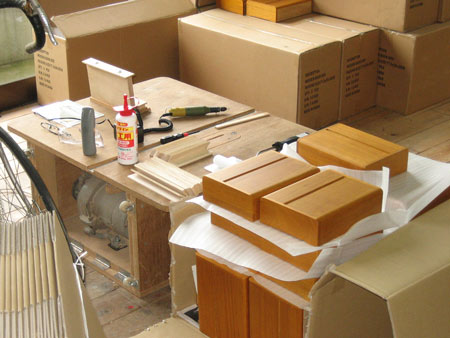
There are two parts to the job - gluing the inserts into the drawers, and widening the slot for the acrylic panel. The guys at the wood shop sent over a box of inserts cut to the correct size, and they have done a magnificent job - the pieces are exactly the right size. I did a test on one drawer, and the four pieces just perfectly squeezed into place. That part of the job should go with no problems.
But widening the slot is a lot more complicated. I spent this morning in the usual three-step procedure: think about various approaches, decide on one of them, and then ... do it! I made a quick bike trip to the nearest 'home center' (which is actually not all that 'near' - around a 30 minute hard ride ...) and picked up a small hand-held trimmer/router kind of tool, then built a jig so that I could cut the slots accurately.
Here's how it turned out:
The scene of the crime - down in my 'first basement', the room that mostly serves as a storeroom. I'm going to work on the top surface of my table saw:
Here's a shot with all the tools, etc. laid out. We'll step through the procedure in the subsequent photos ...
Here's the main jig. It has three 'points of contact' for the trimming tool, two slanted edges to hold it at the correct angle and a base piece to control the depth. The guide pieces have slots (hidden under the washers) so that their position can be adjusted by loosening/tightening the screws.
The small 'lip' piece at the front of the bottom of the unit slips right down into the slot on the top of a case. It sits very firmly, and needs no further clamping.
Here's how the tool will 'ride' along the guides:
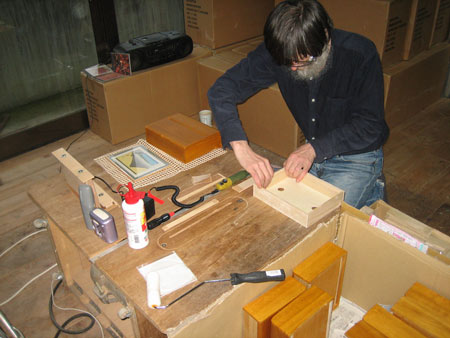
OK, let's have a go! First step is to inspect four insert pieces, so see which orientation is best (some are slightly warped and thus need to be inserted in a particular direction to glue securely).
Grab a case from the input pile, and put the drawer on the left workstation and the body on the right:
A squirt of white wood glue goes onto the special 'hi-tech' glue platform (an old CD case):
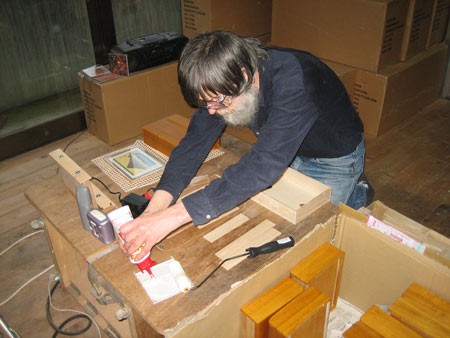
Using a dense spongy paint roller ...
... to roll a thin layer of glue onto the slats.
The pieces are then pressed into place inside the drawer.
They fit very tightly, and the two smaller pieces perfectly clamp the longer ones in place. For the few cases in which they don't 'sit' tightly, there are a couple of small sticks at hand to hold them wedged in place:
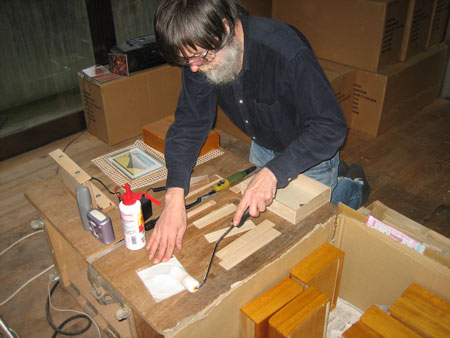
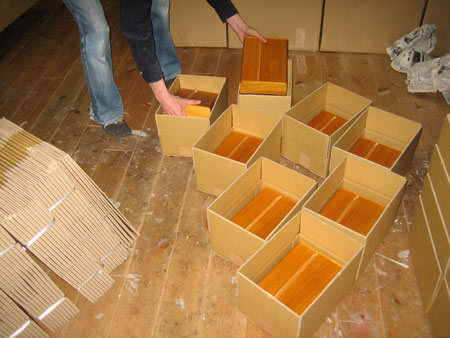
With the glue now left alone to make a first 'set', I turn to the other workstation, put the jig in place on the case body ...
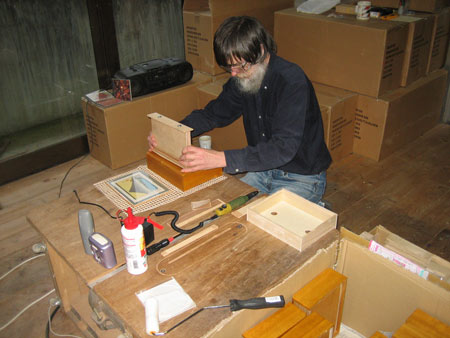
...and start cutting:
Let's move the camera so you can see what's going on. It just takes a second - lower the cutter into place ...
.. and pass it carefully along the length of the slot.
Remove the jig:
Make a single pass with a very soft sandpaper, to take the sharpness off the new edge:

Test the fit:
Replace the drawer, and put it onto the 'out' stack:
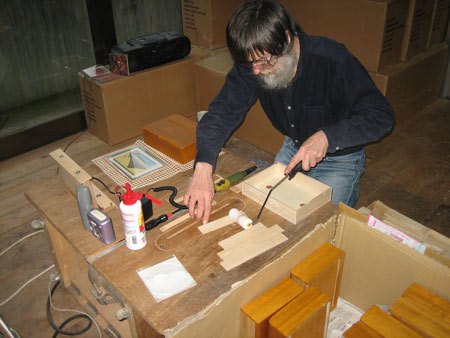
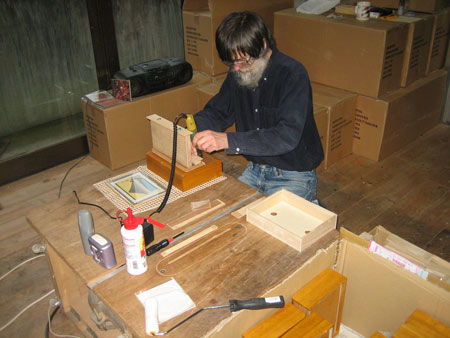
That little 'shelf' behind me has room for eight cases, so each time it is full, I end that batch.

Rather than put them back into the original large cartons, I get their own shipping boxes ready:
They are of course not ready for shipping yet. The print, wooden stand panel, acrylic sheet, invoice, cover letter, etc. etc. all will come later.
To do the batch of eight took exactly 24 minutes, start to finish - three minutes each. That's working at a nice relaxed pace, no danger of damaging any of them ... The pile begins to grow ...
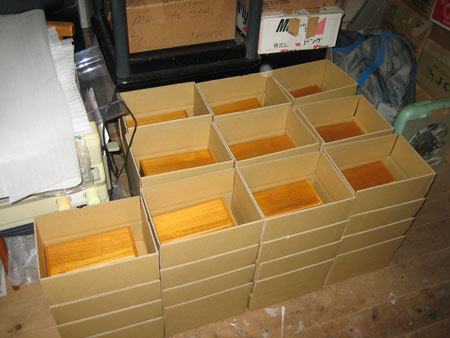
So ... say a half-hour for each batch of 8, gives a total runtime of around 13 hours for all 210. I'm writing this at dinner-time after doing five batches of 8 so far. I'll do some more this evening, and will then try to get them all finished tomorrow, if there are no distractions/interruptions.
The day after that will be print trimming, checking, signing, sealing, and mounting. I'll print out all the story sheets, fold them over the mats, then collect the other components; invoices, etc., and start wrapping!
Thunderbirds are go!
Posted by Dave Bull at 4:24 AM
| Comments (6)
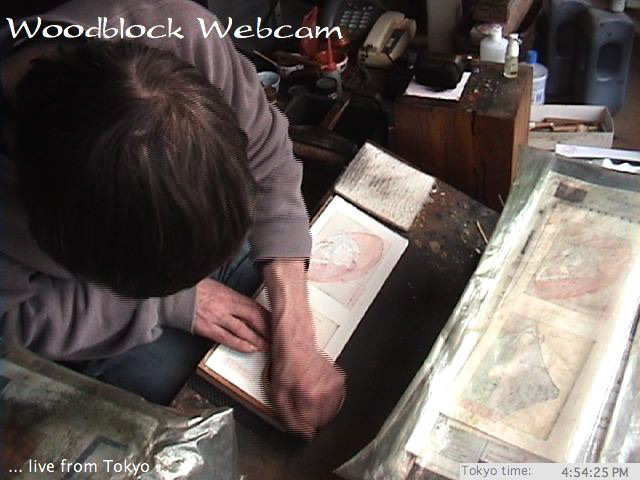
Mystique Series - printing the 'karazuri'
Remember seeing the 'karazuri' block a few weeks ago?
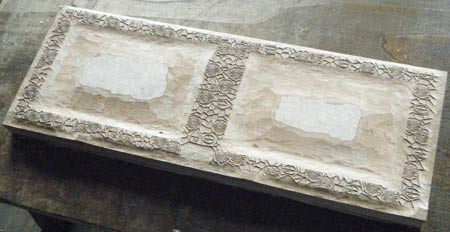
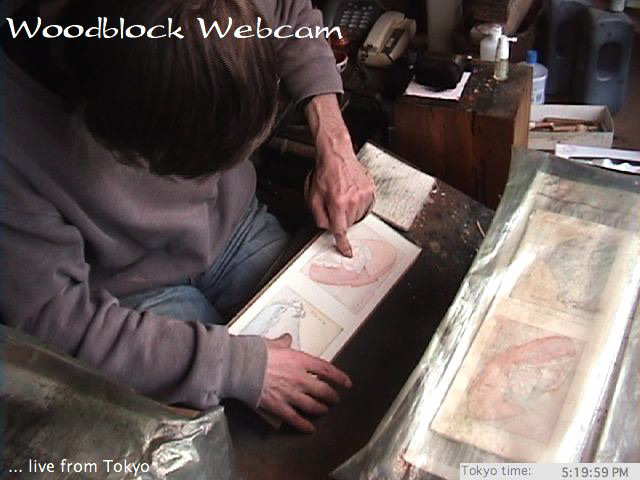
Well, today it came front and center, to print the embossed pattern around the edges of the first two prints of the Mystique series. Let's step through the process ...
Paper out of the stack, and into the registration marks:
Holding the paper firmly but gently with a few fingers pressing on one of the 'islands' on the wood, I print the pattern by beginning in the center:
Then running out to the left ...
And to the right. All the time, keeping the paper firmly in place with my right hand.
But I can't get to the bottom right corner, so I temporarily hold the paper on the other island:
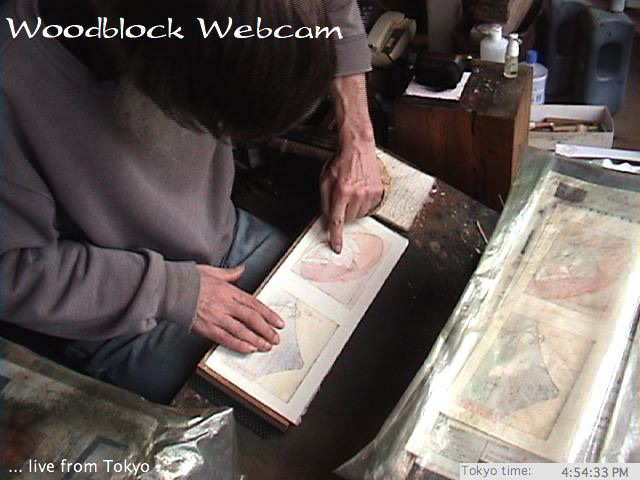
And switch my right hand to an angle that allows me ...
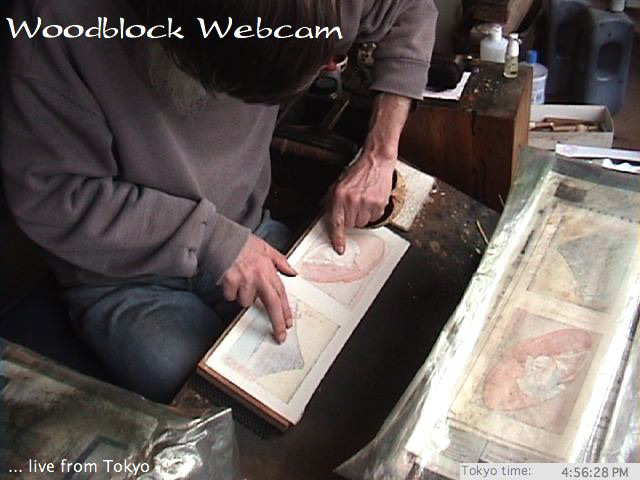
... to reach the edge of the paper:

Then switch yet again, to holding with my thumb, allowing me to reach ...
... that final strip below my hand:
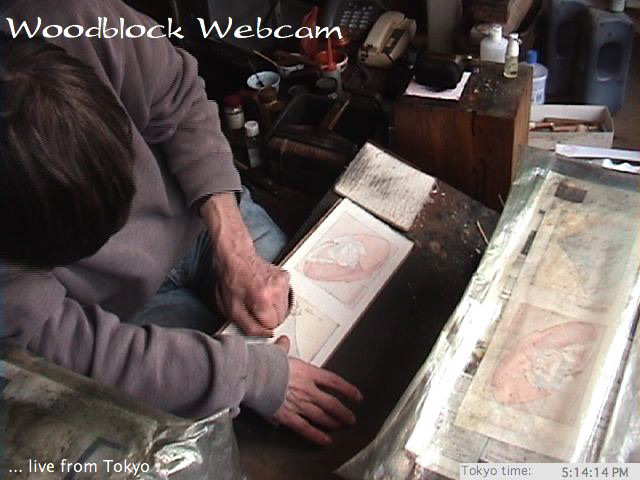
And a final check, to make sure all areas got covered. I have to put some of them back on the block to touch-up places I missed, or printed too lightly.
The sheets are drying now, and I'll scan one in the morning, and update the Mystique web pages then.
Posted by Dave Bull at 5:30 AM
| Comments (4)
We've had a few days of very difficult cold and damp weather - even setting a new record for the latest recorded snowfall in Tokyo.
But this morning is different! Here's a shot from my workshop window:

If I climb all the stairs up four flights to the top floor, we can look down on it:

This next one isn't 'from my window', but is a parking lot about 15 seconds walk from my front door:

I have no idea what these are. These were at their peak just about a week ago, but I was too tied to the bench to get out here and take a snapshot ... (and anyway, it was too rainy ...) Here's a bit closer ...

In the other direction from my front door is a house with this in the front yard:

It's a 'Weeping Cherry'. They have a smaller one off to one side of their property, with a tiny roadside shrine in front of it:
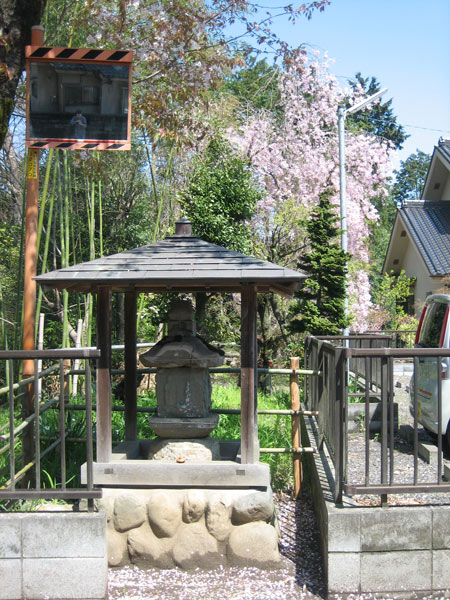
And there's Dave, in the mirror ...
Now back to work, for the final impression on this pair of prints ...
Posted by Dave Bull at 4:38 AM
| Comments (2)
Mystique Series - Yet more fun and games!
Yes, yet another entry in the 'Fun and Games' department!
The acrylic sheets for the Mystique cases were delivered yesterday afternoon. I ordered them from the same man who did the acrylic display stands for the previous Treasure Chest around five years ago. He did a good job that time ...
Here's a paraphrase of the start of our conversation yesterday:
He: Here you are; this is the first 100 or so, as you requested. All polished up, and ready to go.
Me: (opening the package and taking one out). Looks nice - that's a very good shine on the edges; I think the customers will be very happy with this!
He: The reason it takes such a good polish is that these are the more expensive 'cast' acrylic, not the standard sheet stuff like the sample we discussed earlier. I had a bunch of this in my stockroom, so decided to give you the extra 'service' and used this instead.
Me: Looks good, but how does it compare when it comes to scratching and maintenance ...?
He: Don't worry, no difference there at all. It also feels more 'solid', as it's a tad heavier.
Me: Yes, it does have a good solid feel to it ...
He: That's because this cast stuff isn't 2.0mm thick, like that cheaper sheet stuff; it's around 2.3 instead.
Me: (sudden silence)
He: What's wrong?
What's wrong is - of course - that the cases were made based on a 2.0mm thickness for the acrylic. And I demanded - and the makers complied - that the parts should fit together just ... so! With no wobble or looseness.
This extra thickness has screwed that up. These acrylic sheets can be forced into place, but only by pushing and jamming them into the slot. And once they are in there ... even more problems surface.
Here's our original sample, with the 2.0 standard sheet acrylic:
And here's what it looks like with a sheet of this (beautiful) new stuff jammed into place:
The squeeze at the bottom forces the top apart, giving an ugly spread to the parts. And what is even worse, the acrylic now casts a shadow down onto the mat and print:
He and I looked at each other, thinking about how to get out of this jam, but there really isn't much thinking to do. We can't possibly afford to toss these and start again, and there is no way that he can 'thin' them down, obviously. The only solution is for somebody to open up the groove a bit. And that somebody will have to be me.
0.x mm wider, on 210 boxes ... Smoothly and evenly, without scratching or damaging them ...
Fun and games!
Posted by Dave Bull at 4:19 AM
| Comments (15)
Time for an (overdue) update on what's going on around here!
Spring has sprung here at the Seseragi Studio ... beautiful warm sunny spring days one after the other!

The exhibition closed a week ago. Collector Doi-san came over just before closing time, and the two of us got everything off the walls and into boxes ready for the Rent-a-Truck guy to take away, managing to finish just a few minutes in front of the 5:30 deadline. (The next exhibitor was waiting outside to come in and begin his setup, just as I had been waiting a week before ...)
How was the show? Mixed. (Again.)
Many of the Tokyo-based collectors came by for a visit, and I spent lots of time chatting with them and getting reacquainted. (There's a 'story' about that here.)
Although I had sent out hundreds of media packs, there had been no response at all, and without any TV/radio/newpaper/magazine coverage of the show, 'new' visitors were thin on the ground. As this gallery opens out onto the street, I had been very interested to see what kind of 'walk in' business there would be, but there was actually very little. Passers-by ... passed by! (There's a 'story' about that here!)
There were orders though, mostly from current collectors telling me 'OK, I'm in!', as well as a few previous collectors 'coming back for more'. Current collector count is now 93, within striking distance of the 'making a living' level. And as there is a small but steady stream of back issues of other print sets still going out, I'll be OK.
Cash is insanely tight just now though. What with paying for the gallery, the trucking, printing, promotion, etc., not to mention the huge bill for the cases for the Mystique series (that alone is over $5,000 ...), there isn't much breathing room. But I'll chew away at the unpaid bills bit by bit over the next few months, and by somewhere around mid-summer I should be back 'even' again ...
**
Plenty of emails and phone calls recently along the lines of "You said 'early April' for the start of this series, so where is the first print?"
Well, it's still on the blocks! As you saw in the previous post here on the RoundTable, I began the printing just as soon as I got cleaned up after the exhibition, and it has been moving forward every day, bit by bit.
At the time I produced each of the Solitudes prints, I uploaded a step-by-step colour progression for them, but the long narrow paper size for this series means that the sheets don't fit on my scanner, so it's not so easy to do that this time. There is also the question of whether or not I should show them openly; I am making them 'two-up', so the 'surprise' of the next print would be spoiled if I do that ...
Anyway, this week is far too busy to worry about that; priority right now is getting this pair finished. The packaging material is coming together too - the mounting boards are all trimmed to the new size, the acrylic sheets should be here later this afternoon, and the story just came back from translation by Sadako, so I'll begin to print out the wrapping sheets later tonight or tomorrow. And I put in an order the other day for the cardboard boxes for this first shipment; I got two sizes, one with just a centimetre or so of clearance, for shipping within Japan, and one with lots more clearance - which I will fill with bubble wrap - for shipping overseas. These are scheduled to arrive tomorrow.
I chatted with Iwahara-san from the woodwork shop yesterday, and he said that in a couple of days they'll be sending the slips of paulownia for fixing the cases. He wants to make sure the wood stock is exposed to the air for a while after being planed to the proper thickness, so that they can cull any pieces that warp strongly. If we don't do that, the drawer itself may warp after they are glued in place, causing still more problems ...
So I'm not sure what to offer you for a ship date. This printing should be done by the end of the week, and after drying/signing/sealing/etc. they should be ready for packing soon after. The main question is going to be how long it takes me to do the glue job on each of the boxes ...
In any case, things are indeed rolling along ... so please be a bit more patient!
**
And I would be amiss if I didn't give an update on the final print of the Solitudes series, the Seacoast in Spring. We've sent out about half of them by now, but Ichikawa-san is getting through the sewing of the books only very slowly. The main problem is that she has to take her father-in-law back and forth to the hospital pretty much every day, and that is eating a lot of her productive time.
But they are getting done, and they are flying away, bit by bit. If you are still waiting for yours, please just hold on a bit longer ...
Posted by Dave Bull at 8:22 AM
| Comments (1)
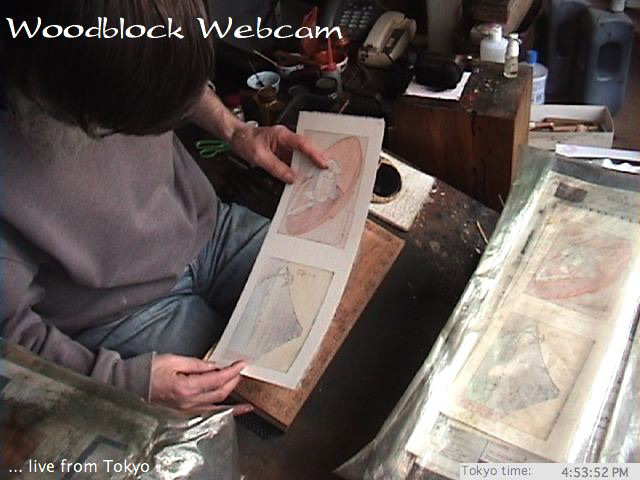
Mystique Series - printing begins ...
Mixed in with all the case adjustments, I've been proofing the blocks for the first pair of prints, and I think I'm ready to start printing.
I don't remember if I wrote about the paper earlier, but for the first four prints (2 sets) I am using paper that I have in stock here. That will run out in July, so I've ordered a fat batch from Iwano-san to arrive sometime that month.
The paper of course has to be cut to the proper size before printing, but that's actually not so easy. The problem comes from the wooden frame that Iwano-san uses to form the sheets. These are very expensive to have made, so he tends to use them longer than would perhaps be best. As a result, they are a bit old and rickety, and don't hold a perfectly rectangular shape. Each sheet of paper comes out a bit different from the others. This would seem to be irrelevant, as I trim the edges anyway, but because this type of paper has clearly visible internal 'lines', I have to make sure my trimming is parallel to those, or the finished prints will all seem 'crooked'.
Not sure if it will really be visible in this photo, but see how the top edge of this sheet is not parallel to the lines:
I have to put each sheet - one by one - against a light source, and trim one edge properly parallel:
Only then can I continue with cutting them up to the proper dimension for printing (this is still larger than the finished prints; they will be cut to the final trim size after printing).

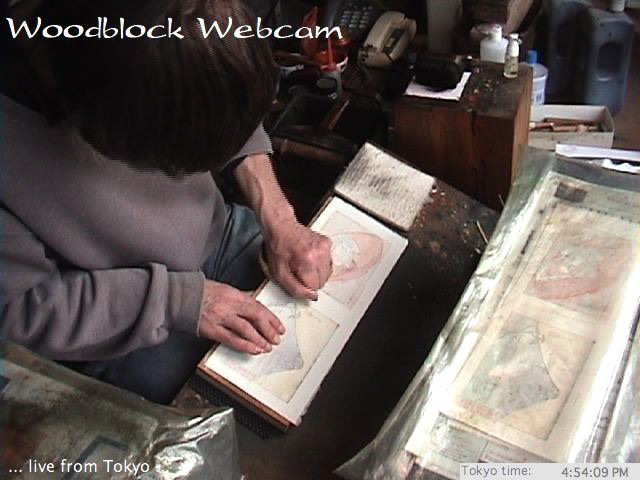
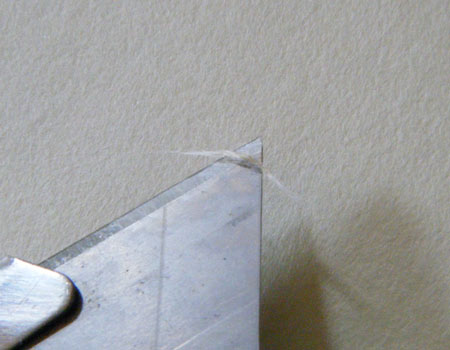
The next step is to carefully inspect each sheet, looking for problems with the surface, like this:
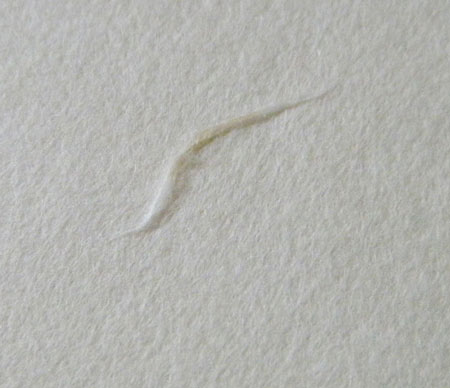
This is a little scrap of loose fibre that has to be removed before printing begins. This one came off easily, but others don't, and those sheets get rejected:
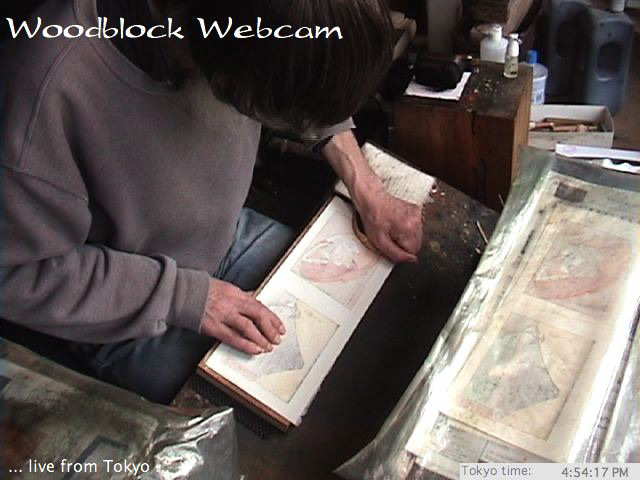
Trim one corner perfectly square for the kento:
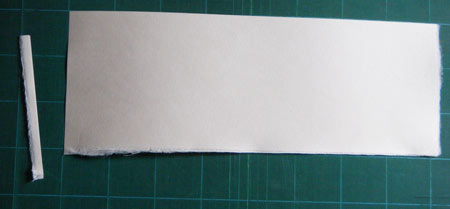
Toss these?
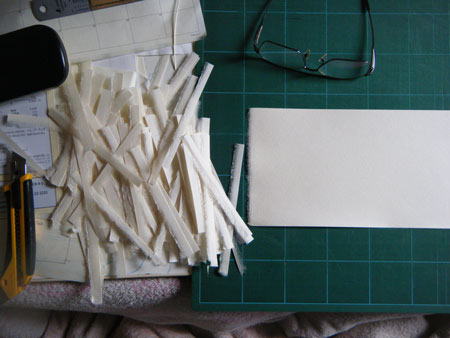
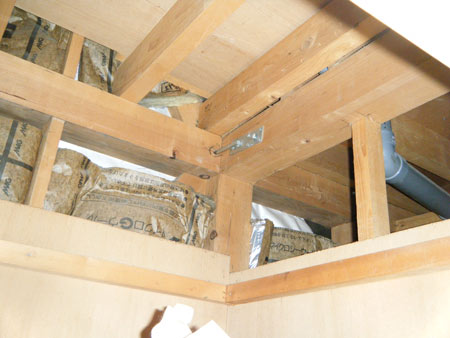
No way! Up above my library shelves is a kind of closet space:

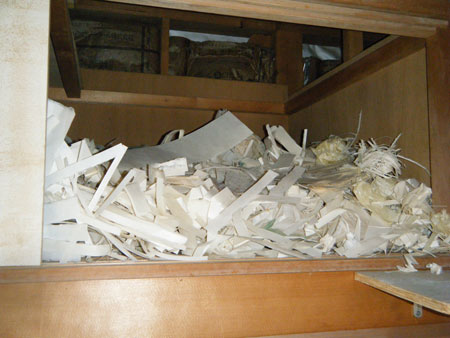
And all the washi offcuts go in here, building up over the years until there is enough to make it worthwhile recycling them.
While we're up here, take a peek at the internal construction of the house, visible because the closet has no ceiling. Look at how the insulation fits so perfectly between the framing ... And that stuff is 5cm thick thin ... I don't know why they even bothered. (The white 'Tyvek' you see is of course 'outside', under the siding.)
One more important step before taking the paper down to the workshop is strengthening the registration points with clear nail polish. These sheets are a bit long and narrow, and the 'distant' corner is quite a long way from the registration corner. I want perfect control, and keeping the corner of the paper stiff really helps a lot. Instead of watching the paper go into the registration mark while printing, I can feel and hear it lock into place.
In that photo you can see two red marks on the newspaper - they show me where to apply the nail polish. The sheets then have to be arranged carefully so that the wet polish doesn't touch any of the other sheets before it dries (in just a minute or so). One tiny dab of polish on the wrong place, and that point won't take colour properly ...
Then, downstairs we go, and the sheets get moistened:

I'm laying them up two at a time for dampening, with newspaper interleaving between every 20 sheets or so. This is happening in the afternoon, and later this evening I'll come down here again and restack them in an offset layout, so that the moisture can creep through the entire pile evenly.
Tomorrow printing begins. I'm going to be a bit late getting down here, because this weekend is our local festival, and it will be all hands on deck at 7:30 to pull the festival carts out of the garage and get them 'dressed'. I'm then supposed to get onto the ropes and help pull them around town this way and that right through until Sunday night, but I'm going to be a bad boy and duck out as soon as I get a chance ...
Posted by Dave Bull at 8:05 AM
| Comments (2)
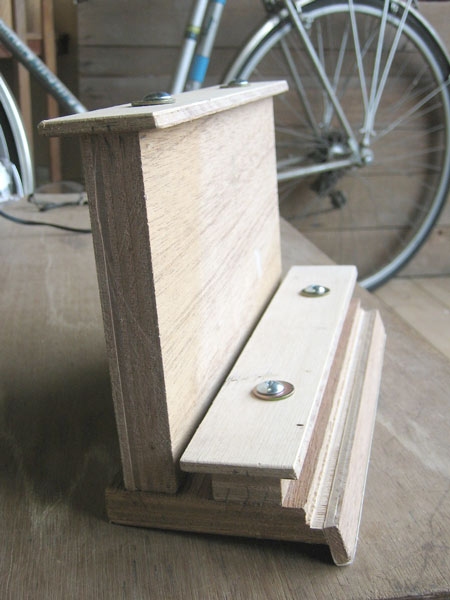
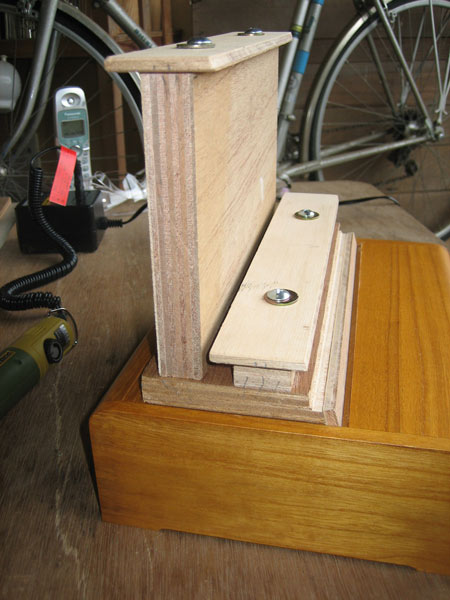
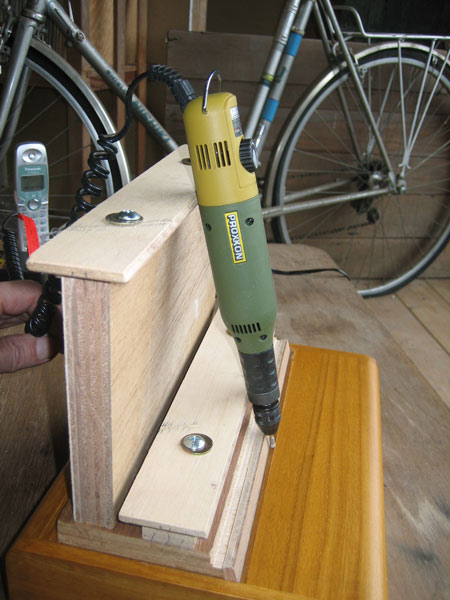
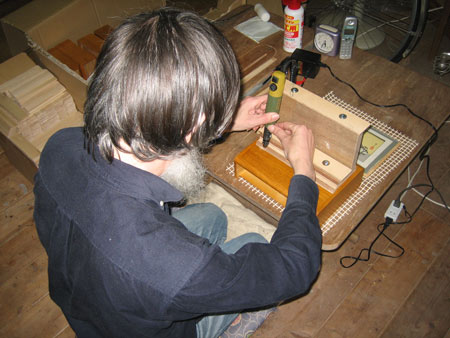
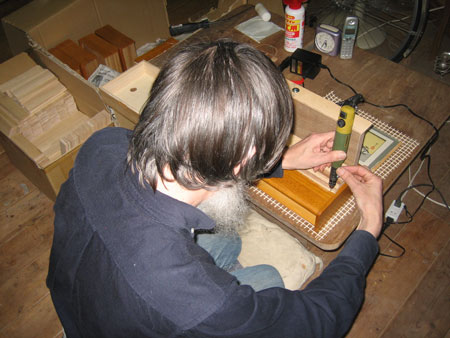
Mystique Series - More fun and games!
Well well well ... the best laid plans of mice and men ... Yes, it's time for Plan B! Or as they say, "Houston, we have a problem ..."
It's the case.
If you've watched the video of the recent exhibition, you saw me 'demonstrate' how the stand for the new series can be used in both a horizontal and vertical orientation.
Or so I thought.
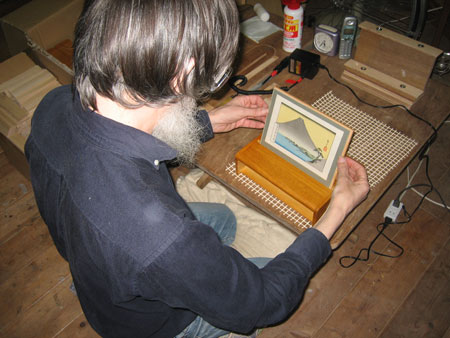
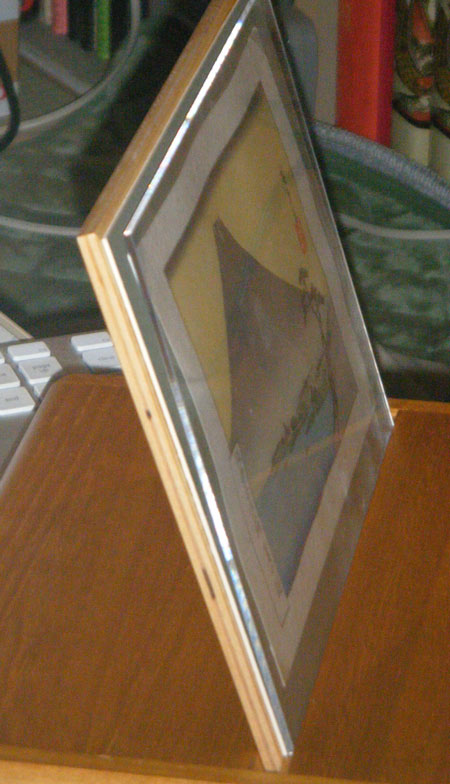
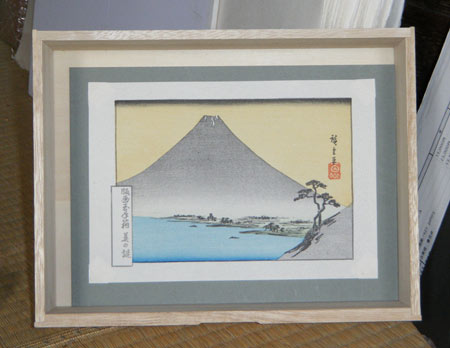
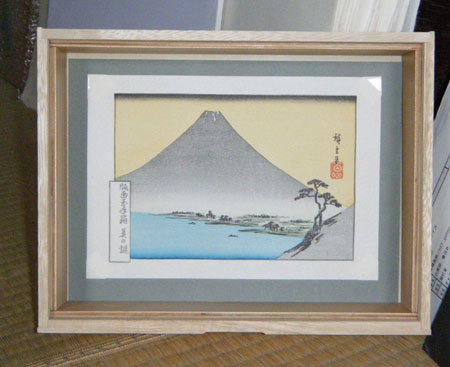
Most of the prints are horizontal, and as the mats are sized to match the dimensions of the stand after it sinks into its deeper slot, everything works perfectly:
Here's the problem though - when you have a vertical print (I haven't made any yet, but if I just turn this one around, we see what happens ...) it - of course - no longer matches the stand.
It's too narrow at the sides, and too tall at the top.
What an idiot I am! I never even once actually tried to place a mat on the stand this way, as I 'knew' it worked, so am only now discovering the problem ...
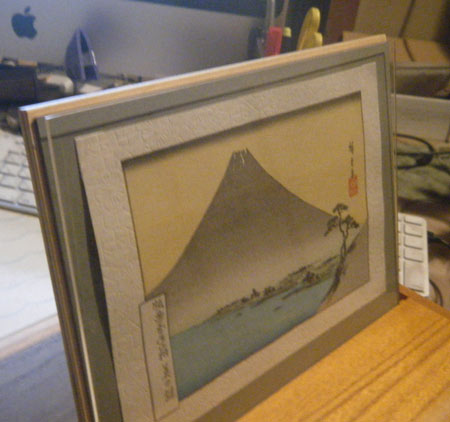
But as I said, there is always a Plan B! I have trimmed the mat (and the acrylic sheet) to a new size: 222mm x 162mm. It fits nicely in the normal horizontal style. It's no longer 'flush', but has a border all the way around. As they say, that's not a bug, it's a feature!
And when you turn it vertically, it has the same border:
And there is no overlap at the top either:
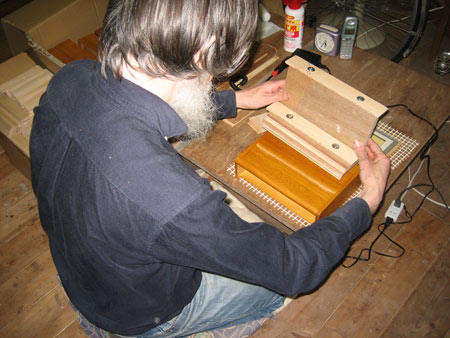
But ... (there is always a 'but' ...) Inside the drawer, there is now too much room. The stuff is going to rattle around like crazy:
So I made some trial inserts - 4 pieces of a thin plywood I had handy - and glued them in place in the drawer:
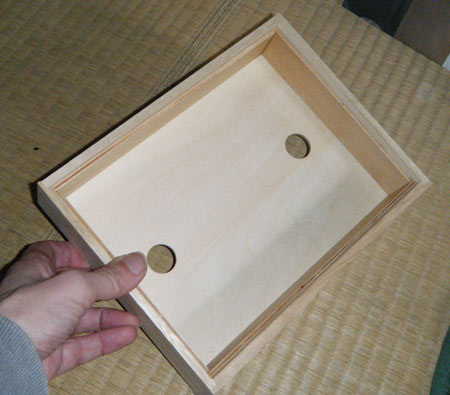
And the prints now fit nicely, no rattling:
As the inserts are 38mm high - a bit less than the depth of the drawer - the 18 prints and acrylic will go inside, and the stand will fit in the new 'ledge' on top:
No problem!
All I have to do now is cut 840 little slips of paulownia, and glue them all in place ... Fun and games!
Posted by Dave Bull at 4:54 AM
| Comments (5)
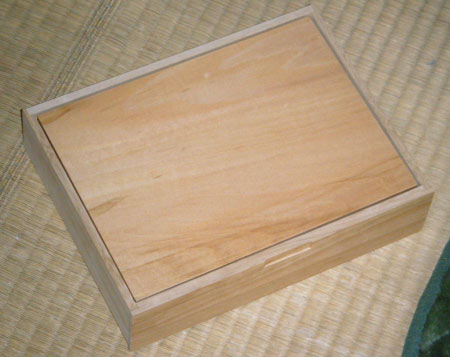
Mystique Series - Cases arrive!
The other evening, just as I was getting ready to close up the exhibition at seven, a phone call came from the young guy who is heading up the team working on the cases. I heard traffic noise; he was calling from his cell phone, "We're on the way. ETA at your place is a couple of hours from now ..."
They thought they were going to 'surprise' me, but unfortunately, they were the ones who got surprised, as I had no choice but to tell him that I had been invited to a yo-zakura (evening cherry viewing) party by one of my important collectors, and there was no way I could/would cancel out.
But there was also no way that they could/would turn around and head back to their workshop, as they had already been on the freeway for an hour or so. There was no other solution but for them to make their way slowly to my place and wait there until I arrived. When I was finally able to get home - just before eleven - they were snoozing in the cab of the truck ...
Anyway, we got the large cartons into my basement, and away they went.
210 cases makes quite a pile:

Here's a closeup of the carton we cracked open ...

The work seems to have been done very well, and I'm very happy with the result. The sample has been on display all week at the show, and the reaction has been very positive. The single most common comment has been kawaiiiiiiii! (the same word that you get from young girls when they talk about Kitty-chan).
Not sure if that's the image I had in mind, but I'll take any kind of praise I can get!
(Exhibition is over, and I'll post a bit about it later, maybe tomorrow. Today is a carving day! If I keep at it, I should be able to get the block set done by tonight ...)
Posted by Dave Bull at 4:06 AM
| Comments (1)
