« August 2009 |
Main
| November 2009 »
How the eBook photographs were taken
I kind of knew this would happen - more people are showing interest in 'how I did it', than in the eBook itself!
The photographs of the prints in the new David's Choice eBook are one of its most important features. The whole point of the book is that I wanted people to be able to experience seeing the prints as though they were sitting together with me right here in my own library. Scanning is useless, as woodblocks always come out flat and lifeless in scans.
I needed photos, and I needed special photos. And I couldn't possibly afford to hire a professional team, and - to tell the truth - I'm not sure that such a group would even have been able to produce what I myself knew could be done.
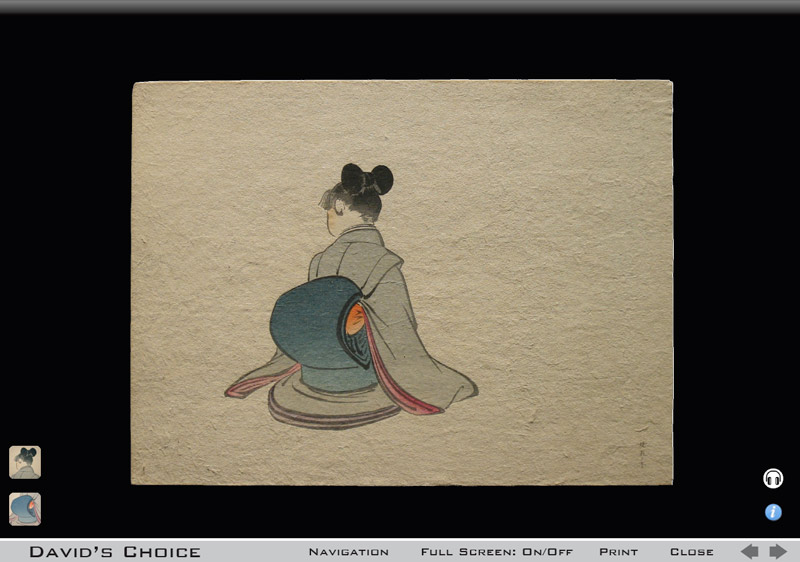
Before I explain my method, here's an example of one of the photos from the book. (This is 500 pixels across - in the book it is nearly five times as large: 2300 pixels ...)

Now this is pretty close to the 'real thing' that I see lying on the table here in my own room. Actually, it is better. The paper has the same good texture that I can see in the real object, but the lighting is much improved - being perfectly smooth across the surface of the print. When we normally look at things in our own room, the light is usually very uneven, coming from different directions and in different 'colors' all mixed together.
Anyway, here's a quick demonstration of how these photos were taken ...
When first thinking about how it might be possible to take photos like this, it was obvious that the light source had to be raking - the light had to fall at an angle over the surface of the print. But when I did experiments with this in my room, I always came up against the problem that the top of the print - being closer to the light - was always a lot brighter than the lower area. Even when it looked 'the same' to my eye, the camera knew different, and the images were unusable.
The light source obviously had to be moved back - and back far enough so that the difference in illumination between the top and bottom of the print became inconsequential. Distant light, yet bright enough for clear photography. I needed a spotlight.
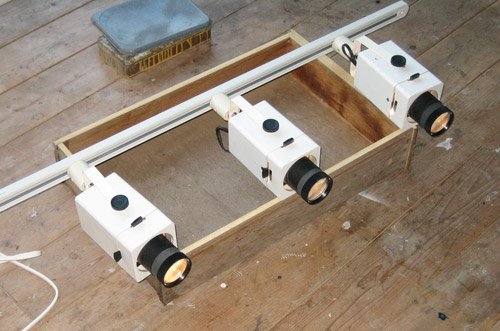
So a number of years back, when I saw an internet auction for a few spotlights being salvaged from a karaoke lounge that was closing, I bought them, thinking ahead to the time when I would try this.
Here are three of the little lights, mounted on a track (sitting on an unused desk drawer to keep them up off the floor a bit):
The first experiments shooting this way showed me that I needed to ensure that the print was exactly flat on the table. Even the slightest deviation made the resulting photos useless. I needed a vacuum table.
So here it is. A small wooden frame with a smooth perforated metal grill on the top. On one side it has a small plastic 'plug' (made from a film canister) which fits exactly the input tube of my vacuum cleaner (which has a power control on the handle).
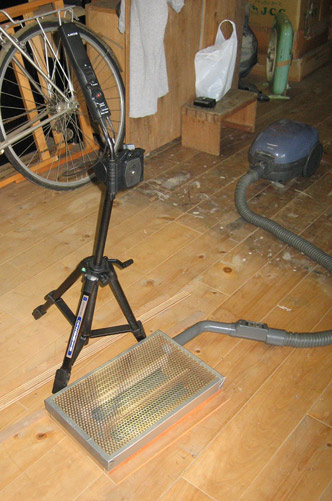
I couldn't lay the prints directly on the mesh, as this would show through the thin paper (especially once the vacuum pulled the sheet down tightly), so I wrapped the box in a grey t-shirt. A white shirt was too bright, but this more neutral colour seemed to work the best.
And here's the way - after some experimentation with angles, heights, etc - that I used these components to shoot the prints for the David's Choice book ...
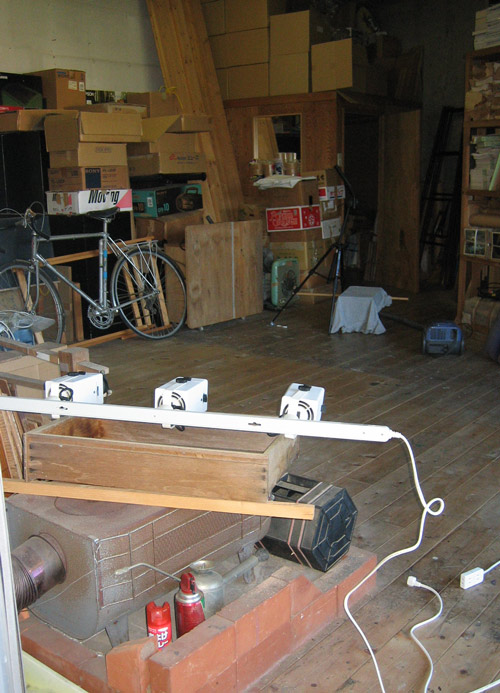
The light bar is pointed across the room at the vacuum table (about five metres away), which is sitting on a small wooden stand. (Getting everything up off the floor made it easier to make adjustments in the 'angle of attack'.) The lights have little 'shutters' (the little black knobs) that direct the output into a more/less tight beam, and I have adjusted these to get the light falling perfectly across the vacuum table area (although the spots are unplugged in that photo ...)
The camera is mounted on a strong Handycam tripod, of course nicely lined up with the plane of the print. Once each print is placed and lined up properly, I turn out the main room lights. I use the maximum resolution settings on the camera, and set the white balance control before each session, using a standard 'grey-scale' card. Without this, the colour in the photos will be all over the map, and nothing close to reality.
I can't give you the exact angles etc. of the lights and vacuum table here, partly because I have no way to easily measure them, and partly because they weren't consistent. Each print - with its different paper tone and texture - needed the angle to be adjusted individually, to find the best way to show the texture but without having it become too intrusive.
But even with all this careful preparation, there was still one major problem with the setup I used, and the photos will have to be redone later, when I can afford to buy a better camera.
The camera I used has pretty good resolution (pixel count), but lacks a very important feature. It will only save images in the compressed jpg format. And even at the 'best' setting of this camera, this compression results in a lot of ugly artifacts in the image that become apparent when you zoom in (as you can see in my finished book). So this kind of job absolutely demands a camera that will store images in the RAW format - uncompressed. Each image will be a huge file, but the quality is 'perfect'.
As I said though, that'll have to wait for a bit later ...
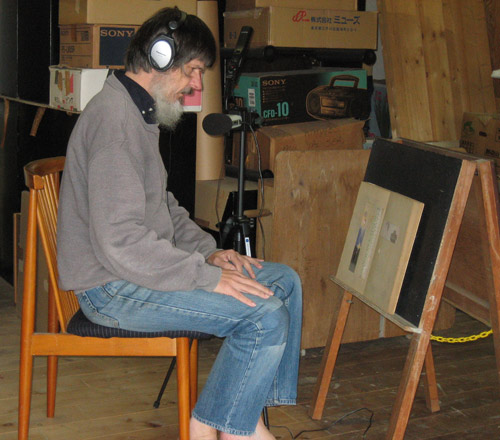
Also, about the audio. I posted a while ago here about the little Zoom recorder I bought, and of course I used that for this job. I mounted it on the same tripod, put the prints on an easel, turned it on ... and pretended there was a guest sitting there with me. Here's a shot from the session ... "recorded at a secret underground location somewhere in Tokyo!"
I had a lot of fun making this book, and now have to restrain myself from starting Volume Two right away. For the next month or so, I have to concentrate on getting my own new print out the door, instead of drooling over more of these old ones!
Posted by Dave Bull at 12:33 PM
| Comments (5)
New eBook on woodblock prints published today!
'David's Choice : An invitation to a viewing of prints from the personal collection of Tokyo woodblock printmaker David Bull'
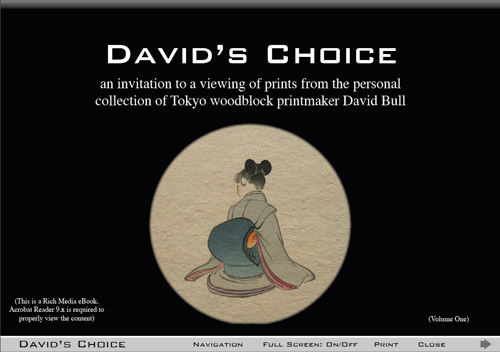
The eBook contains an introduction, an index, and 10 content pages. Each of those pages shows one of the woodblock prints in David's collection, photographed as clearly and beautifully as possible, in very high-resolution, with each print also being accompanied by a number of close-up views. The main content of the volume though, is the collection of audio clips - one for each page. These were recorded by David in the manner that he would use had you been sitting in his library together with him. He tells you about the background of the print, why he thinks it is special, and what you should look at ... The recordings are not lectures, but simple conversations with a friend. To experience the entire 'exhibition' will take the two of you together just about an hour ... Download the book, prepare yourself a mug of coffee, and enjoy the (spectacular) show!

The eBook is priced at $5, and is available for immediate downloading. When you place an order from the catalogue page, a personalized link will be automagically sent to you a few seconds after completing the transaction, and when you follow it, the book will be downloaded to your desktop.
***
In the meantime - news on the 'Your First Print' eBook published a week or so ago: the CDs are scheduled for shipment here within the week. The mailing envelopes are all prepared, and a few minutes after the boxes arrive from the pressing factory, the discs will be on their way!
Posted by Dave Bull at 1:20 PM
| Comments (1)
[Forest in Winter - 1] : Time to get started!
So, after taking a full month 'off' - and a very productive month it was indeed! - it's now time to get back to reality and get started on the design work for the next print in the 'My Solitudes' series.
This will be the 'Forest in Winter'. I'm not giving away any secrets when I tell you that the main 'ingredients' for this one will be ... snow and trees!
Now 'shin-hanga printmaking' and 'snow', go together like raspberry jam on rice pudding - there is just no better combination to be found anywhere, anyplace. Hasui et al popped these things out on an assembly line basis. This print should be easy.
Should.
As usual though - there are a number of things getting in the way of a smooth run through this one.
In the kind of printmaking that I do, white snow is always delineated by the white paper. So in that sense, creating a snow scene is kind of easy - just chop away areas from a normal landscape image, and presto, you get snow. Or you can go the other way, start with a blank sheet, and just touch here and there with black, leaving people with the impression that everything else is snow. Yoshida did one like that a long time ago:

Now that's OK of course, but for me it just doesn't 'pop' enough. On the day that I made the trip described in the story that will accompany this print, it snowed during the night, and I woke up to a world completely buried in snow. I had a little camera with me, and took a few snaps:
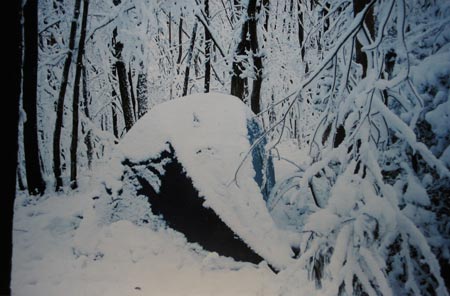
That photo - of my tent - was taken at daybreak, when it was still kind of gloomy - no nice sunshine yet. But that forest is so tangled in most places, that even when the sun did come up, it was still difficult to find nice 'bright' scenes.
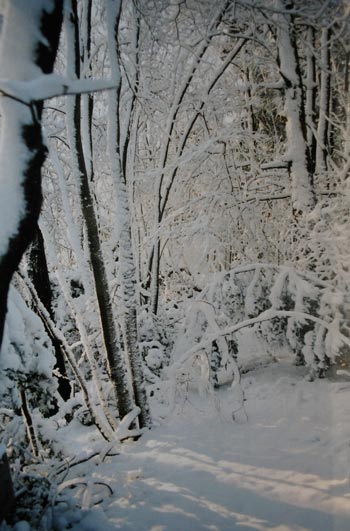
Now snow blanketing a wide landscape is 'picturesque' ... as is snow on a single tree seen against the sky. But snow like this to the extent that it blots out everything in sight, is nothing but a damn mess. So how did Hasui and the boys deal with this kind of thing?
Their main way was to avoid the question entirely. They never came into the forest - they stood back and looked at the overall scene. Piece of cake. (We had this same kind of problem when dealing with the Forest in Summer print - mid-range stuff is difficult.) For them, a snowy tree was either part of a 'mass' on the mountainside, or, as mentioned, a single element against the sky (done in either slate grey or bright blue, depending on the mood).
So my challenge is to find a way to create a composition within this snowy forest that will let people feel the overwhelming sensation of being buried in snow, yet which will also radiate the crisp brightness that I saw in those places where the sun managed to get through (and of course which will also be an attractive 'artistic' composition in its own right.)
Hmm ...
Well, to make white areas pop, you need to surround them with something dark. Finding the balance between the two - in an attractive composition - is the key here.
Stay tuned!
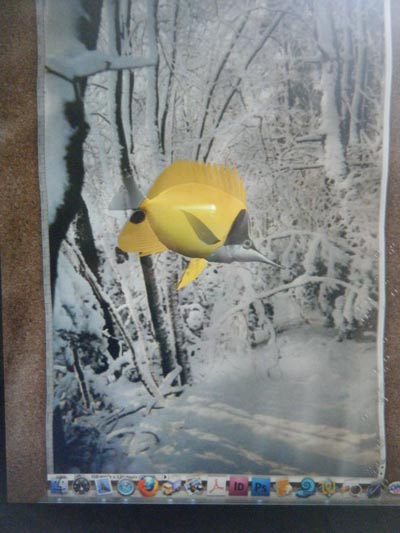
PS: I've of course been studying the snapshots I took that day, and have left a few of them scattered across my computer desktop. I came back from lunch yesterday to find that my screen-saver had kicked in. The screen-saver I use these days leaves the content of the screen as is, and overlays it with other things ...
Seeing this made me wonder ... the subsequent (and final) print in this series will be of the Seacoast ... Maybe I should combine these two!

The thread continues in [Forest in Winter - 2] ...
Posted by Dave Bull at 11:58 AM
| Comments (7)
Here we go! The 'Your First Print' RichMedia eBook is now ready to go!
Reaction to the trial versions that I passed around to a few friends and 'testers' over the past week has been very encouraging. They have found the book to be not only a very useful resource for this craft, but to be something interesting and attractive in its own right.
The book is crammed with multi-media - dozens of audio and video clips - in addition to a great many detailed photographs, covering every aspect of the process of making a print.
The book is nominally aimed at the complete beginner, but there are very few experienced printmakers who would not enjoy (and perhaps learn something from!) this volume.

For more information on the eBook, please visit this page of my Mokuhankan webshop. Linked from that page, you can find a sample file to download and try out, containing more than 20 complete pages from the book, including videos and sample audio files.
I have also created a 'support area' where owners of this eBook can access additional information, ask questions, and share their experiences of woodblock printmaking as outlined in the book. This support section - dedicated strictly to these Japanese traditional techniques - is already 'up and running', and can be found here.
I look forward to hearing what everybody has to say about this book ... it has taken quite a bit of work to put together, but it has been a lot of fun.
(Thanks also to [Baren] member Mark Mason, for his professional assistance with some of the graphics in the book. Meow!)
Posted by Dave Bull at 10:01 AM
| Comments (3)
Book Announcement : 'Your First Print'
Do you think the Woodblock RoundTable has been just too quiet for the past month or so? Well, it certainly has, but don't jump to the conclusion that this has anything to do with the 'procrastination' post I made a while back. Far from it.
Time for an announcement. (Trumpets!) I have spent most of the last month busy with keyboard, camera, audio recorder, and video camera, and am ready to let the results loose. My first, and very much long awaited (by me!) book on woodblock printmaking is about to be published.
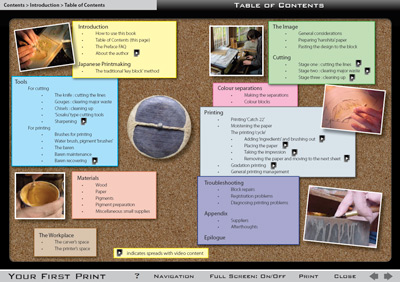
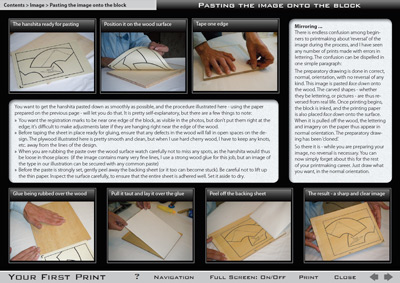
Is this my mythical 'Encyclopedia of Traditional Japanese Printmaking', about to come to life at last? Nope. You'll have to wait a bit longer for that one. The new book is entitled 'Your First Print', and is a complete guide to 'everything you need to know' to make a woodblock print using the traditional Japanese methods. Everything from information on the tools and materials, right through a very detailed step-by-step explanation of the whole process.
As you can see from the title page, I am issuing this as an eBook. But not just an 'ordinary' eBook - as a RichMedia eBook. Using modern technology, it is now possible to embed multi-media items within a .pdf file, and that is what I have done: the book contains the normal text and images that you would expect, but also has plenty of audio and video content too. You've seen the Harry Potter magic books where the images come to motion as you turn the pages ... well, here it is in real life! And it works on both Macs and PCs.
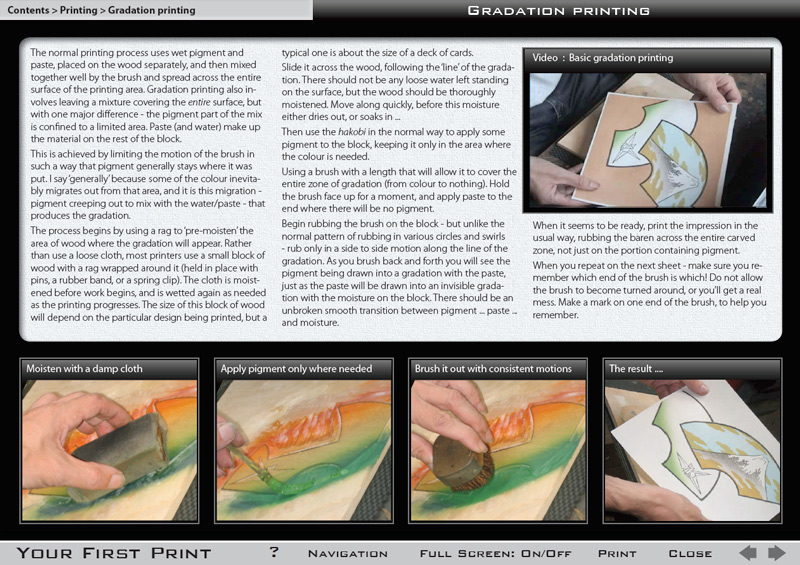
On this page, for example, which discusses gradation printing:

... the image in the top right hand corner is 'hot'. When you click it (not here, but in the eBook), it starts to play, and you watch (and listen) as I narrate a session of gradation printing.
There are videos on each step of the carving process, of course on the printing, on sharpening, and even a visit to my workroom as I spend a day carving one of my own blocks.
For more information on the eBook, please visit this page of my Mokuhankan webshop. Linked from that page, you can find a sample file to download and try out, containing more than 20 complete pages from the book, including the videos on sharpening and gradation printing that I just mentioned. Give it a try!
I'm not taking orders for the book just yet, as we are still in the final stages of editing, but I'll let you know when it's ready for downloading. Soon!
Posted by Dave Bull at 10:27 AM
| Comments (14)