Posted by Dave Bull at 10:22 AM, August 7, 2009
Continued from [Forest in Summer - 18] | Starting point of the thread is [Forest in Summer - 1]

With the first batch of prints now dried and ready for signing, here's a 'roundup' of some things that might be of interest; first, a few links:
- the slideshow illustrating the entire printing process is now online here
- a hi-res enlargement of the finished print is here
- the web page of the print, with links to story excerpts, etc., is here
Now. Given that this print obviously has its roots in a photograph, I thought it might be interesting to show you how it came together.
The story being illustrated is the 'Forest in Summer' chapter in the 'My Solitudes', so when trying to come up with a design, I spent a lot of time up at my camping spot (it's only a few minutes walk from home) strolling around looking for inspiration.
It's not the most beautiful forest. The whole area was clearcut around 60 years ago, and it has grown back in fits and starts, with the different landowners handling maintenance in different ways (or not at all). And as I mentioned back at the beginning of this thread, it was very difficult to come up with an attractive concept - there are no 'vistas' in these woods, just a whole bunch of trees all crammed together fairly tightly.
This means that there are lots of photogenic details, but no 'views'. So the idea came to mind to focus closely on one of the more interesting trees, to try and make an interesting composition out of it. I walked and walked, but didn't come across anything that really jumped up and said 'look at me!'
But one day, when I was having a lunch break down at the river park near my home (I'm very nicely sandwiched between river and hills), I came across this specimen of keyaki tree (Zelkova Serrata):

As it happens, it stands right next to one of the posts that measures distance down the river to the sea. The sign reads "Left bank of the Tama River; 61 kilometers from the sea."
Now this is a tree with character, and lots of possibilities. The first problem is that it 'lives' down by the river, not up in the forest where I go camping. Well ... what can I say ... I cheated ... I 'moved' it up to my camp area.
First step was to take a few snapshots, put them on my desktop at home, and think about it for a while. The longer I studied it, the better this looked, so I went back down there, checked out some different angles, and came up with this view:
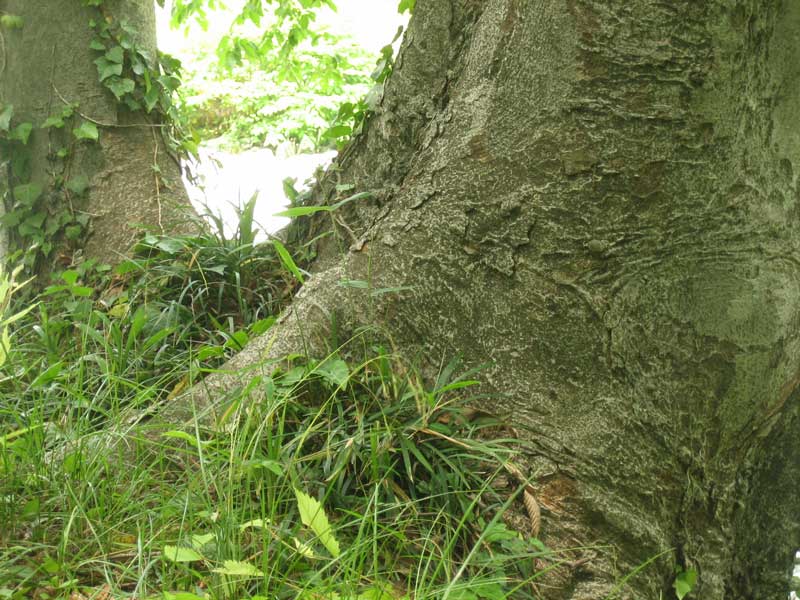
That's interesting, but not good enough - the lower right corner doesn't 'work' at all. It just 'falls off the table'.
Photoshop to the rescue though, and with the help of this shot of the same tree taken from a slightly different angle:
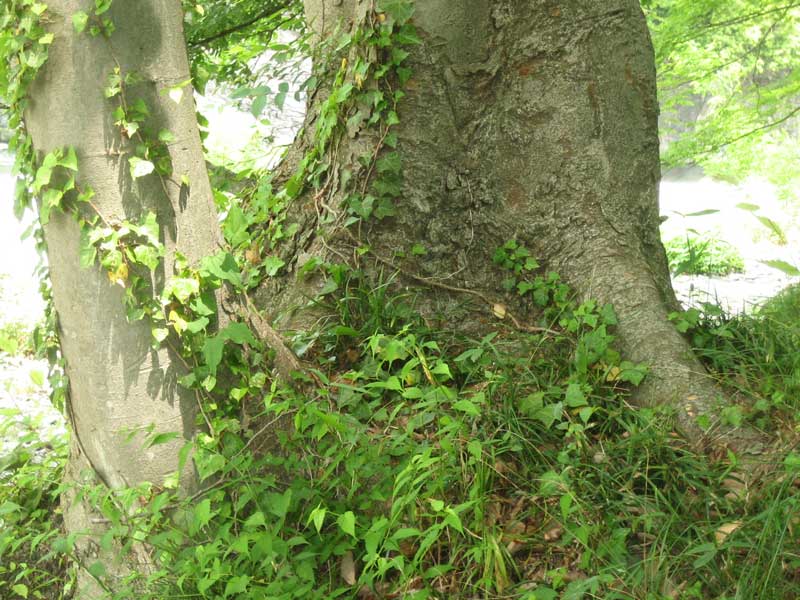
... I 'built' a new tree design, fixing the problems in that corner:
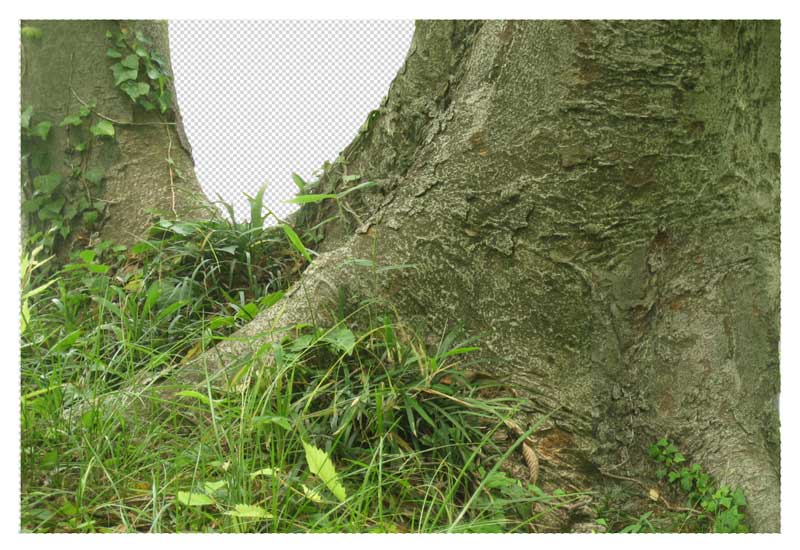
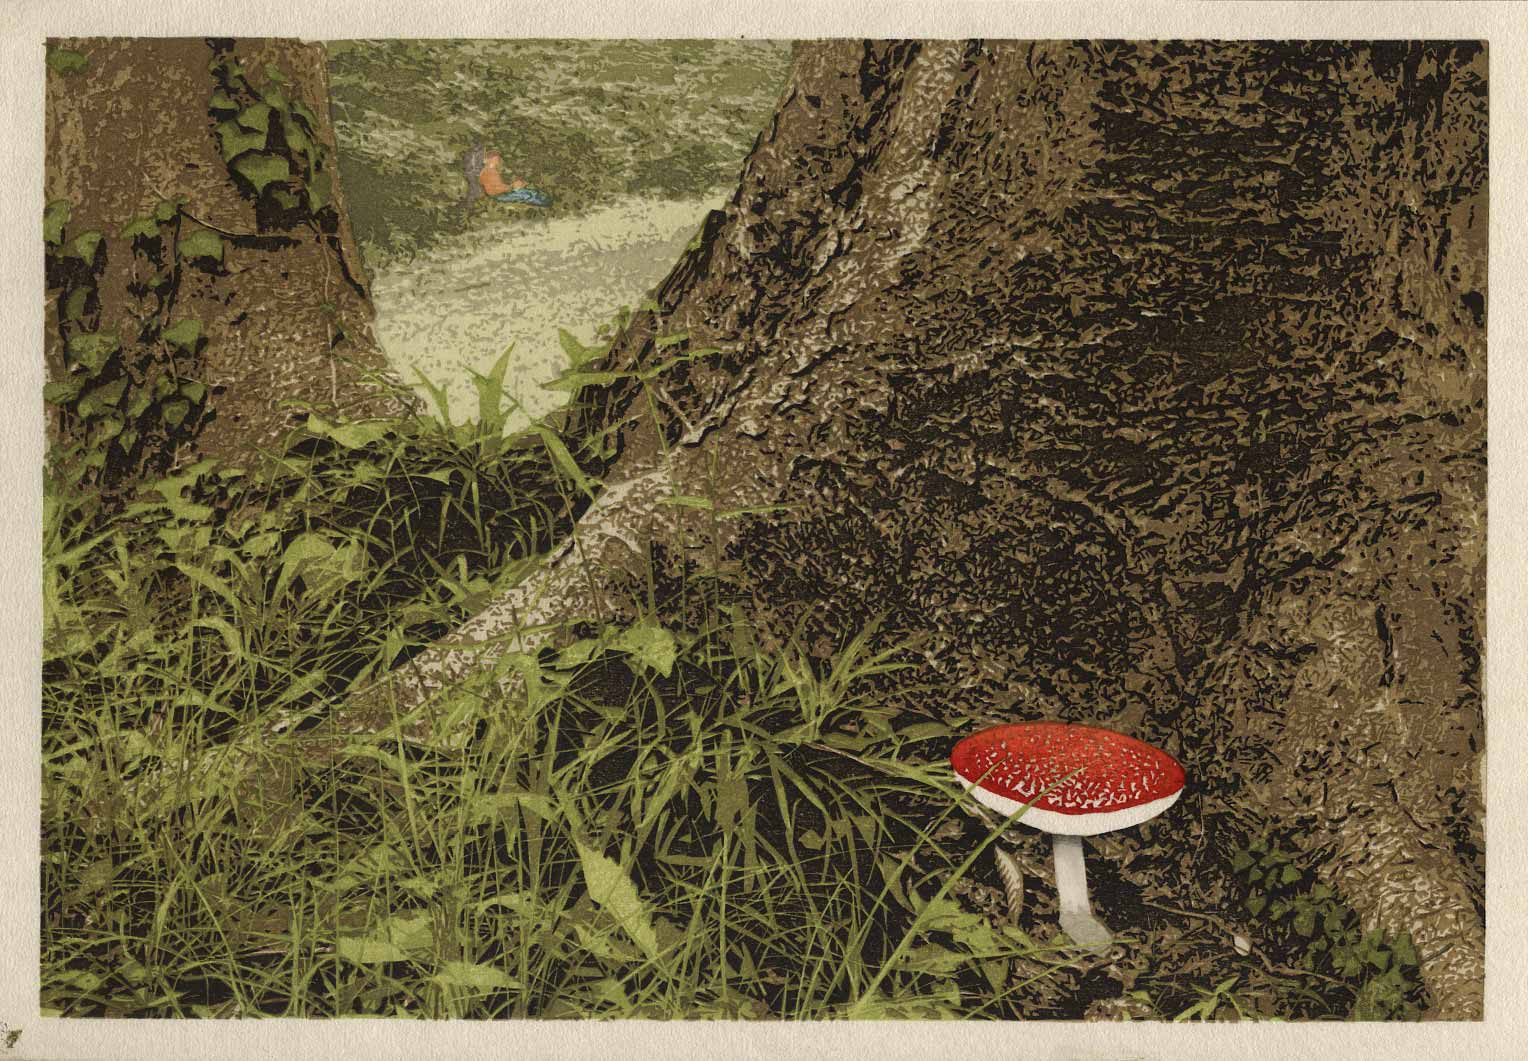
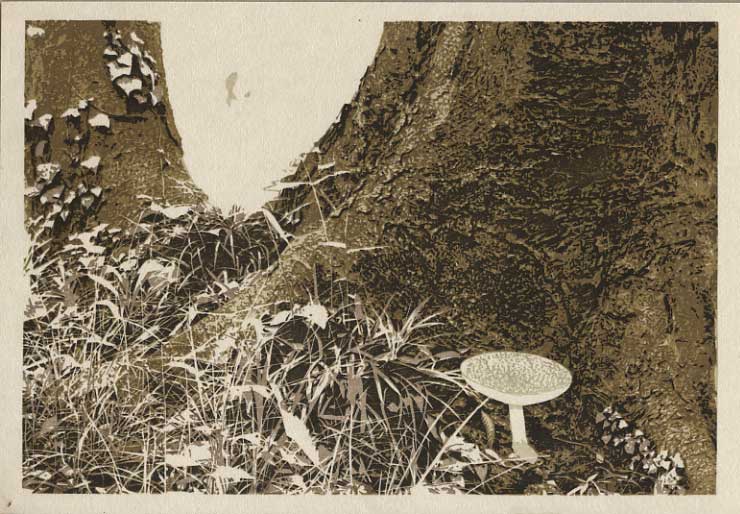
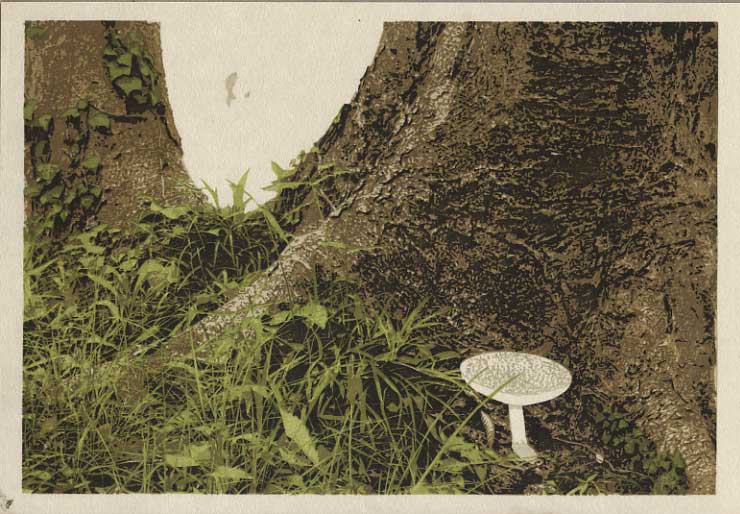
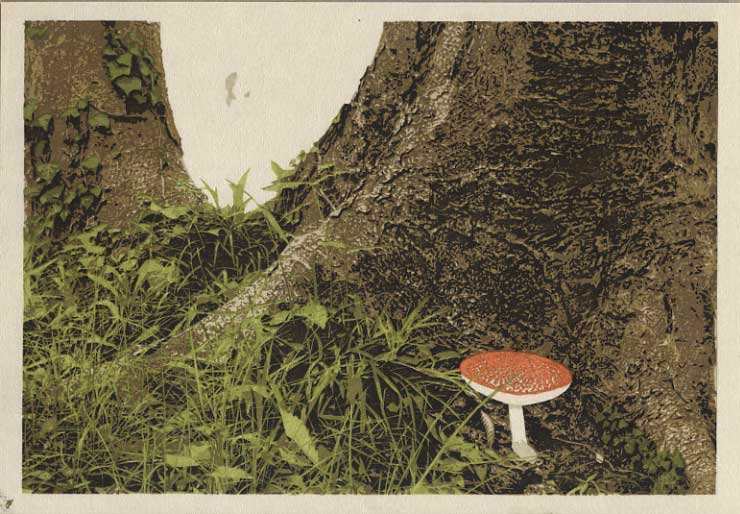
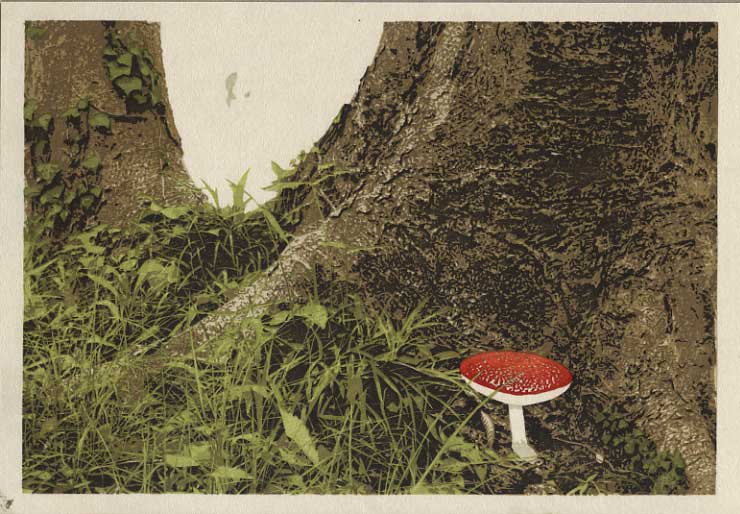
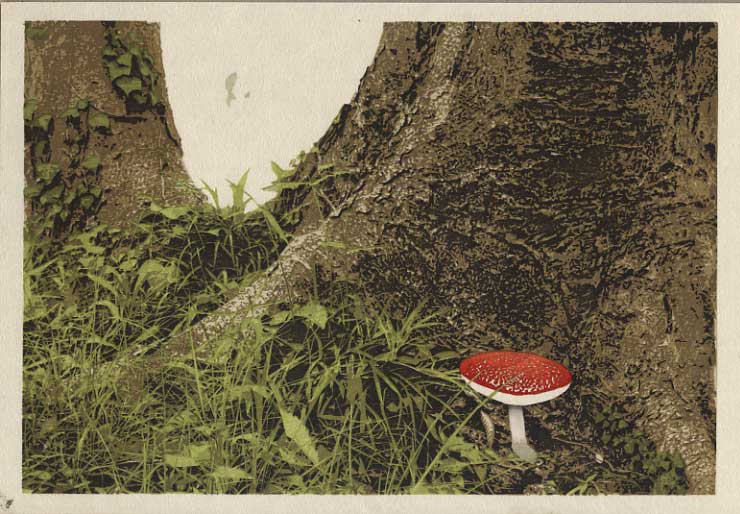
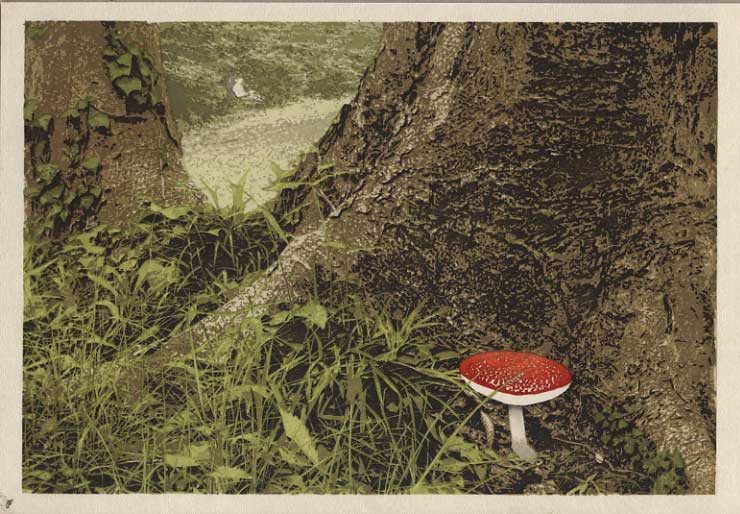
Now that's much improved, with lots of interesting texture and detail, but it does still lack a good focus point. So I hunted through my stack of mushroom shots (you can't walk two paces up in the woods during the damp summer without coming across a mushroom or fungus of one type or another), found a very nice shot of a (poisonous, I believe) red toadstool, and smoothly transplanted it snugly up against the trunk:
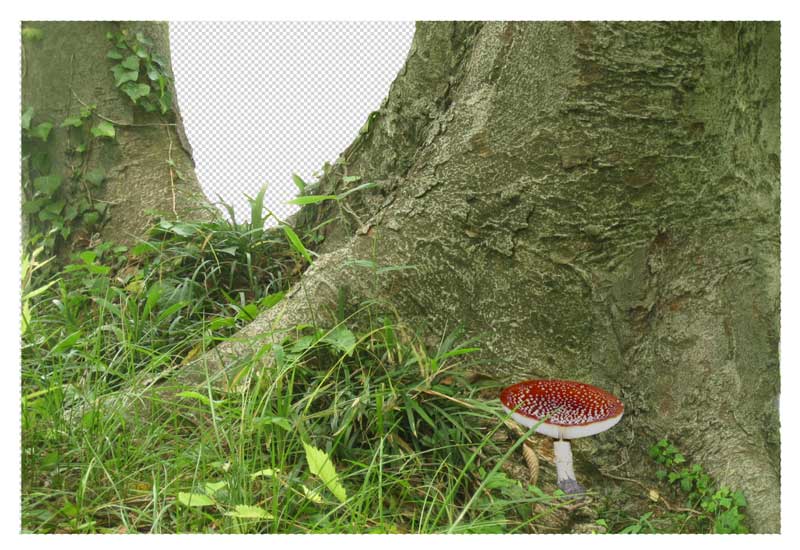
Woo-hee, we almost have a print here!
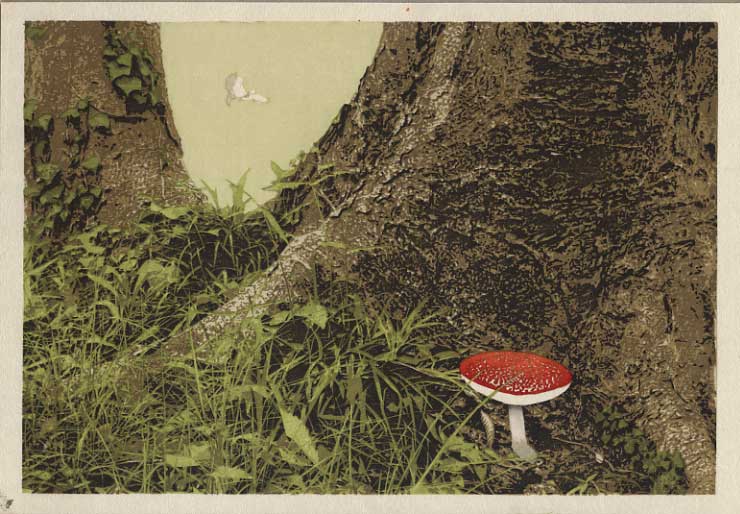
But, what to do about the missing background? As I mentioned, it is very difficult to get 'distance' in these woods. There are some small glades here and there though, and actually one of them features in this chapter of the book. Here's a small snapshot taken there:
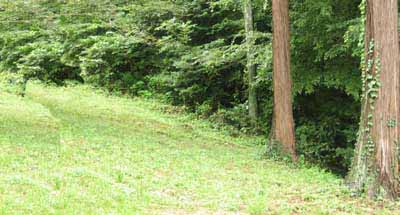
Hmm ....
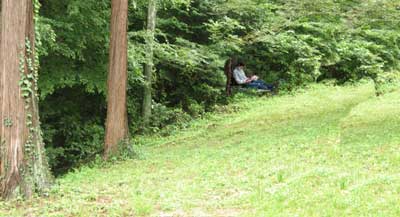
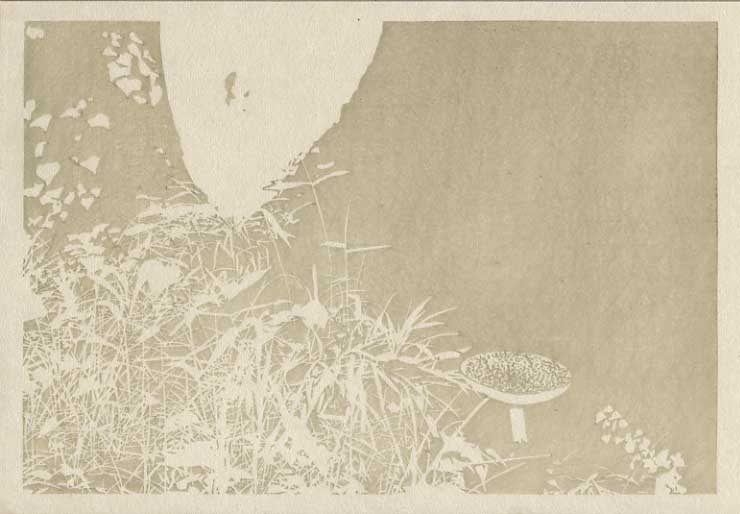
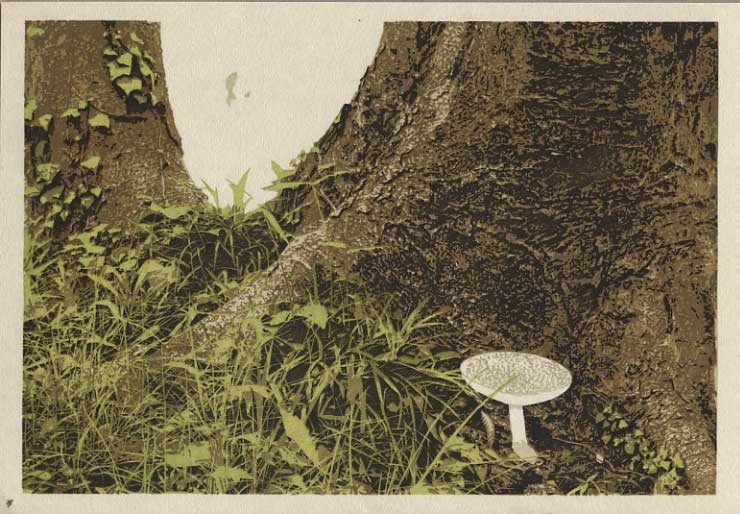
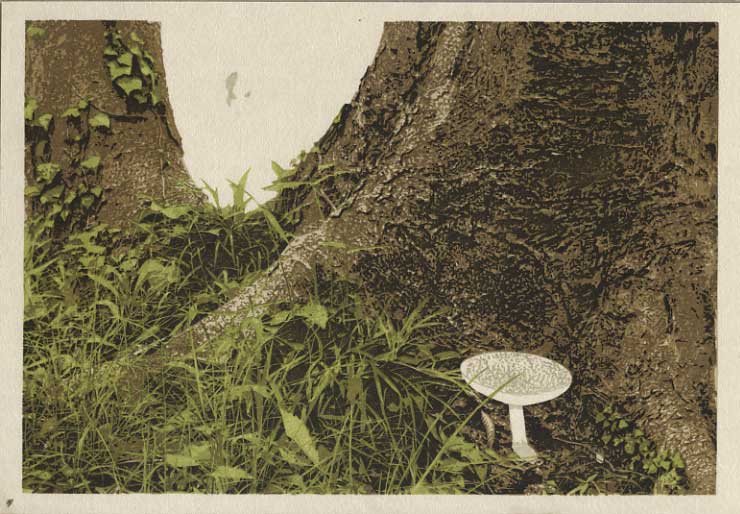
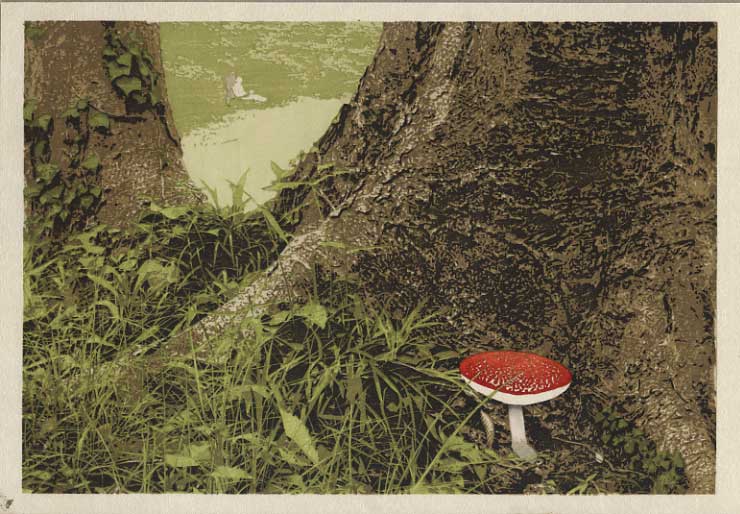
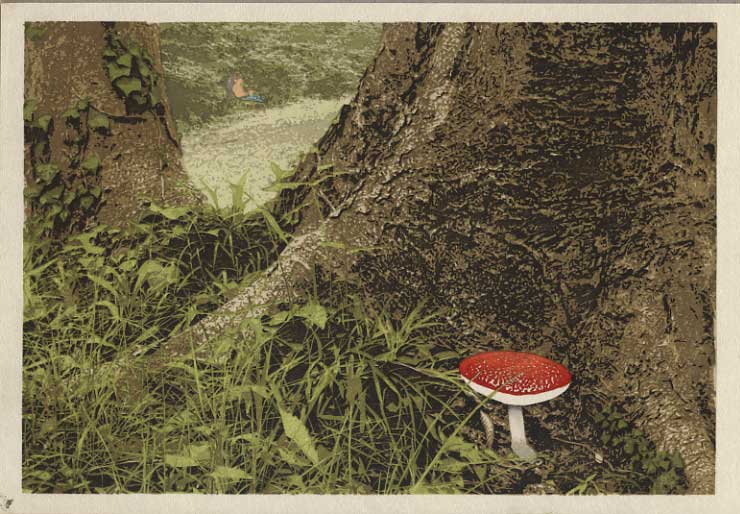
Once I flipped it over, it did indeed fit right in place, filling out the background area of this design. But I found that without any recognizable objects in that area to provide 'scale', it was impossible to tell if the background was six feet back, or sixty feet back. So - as I mentioned the other day - I went to this page, stole that image, and dropped it in:
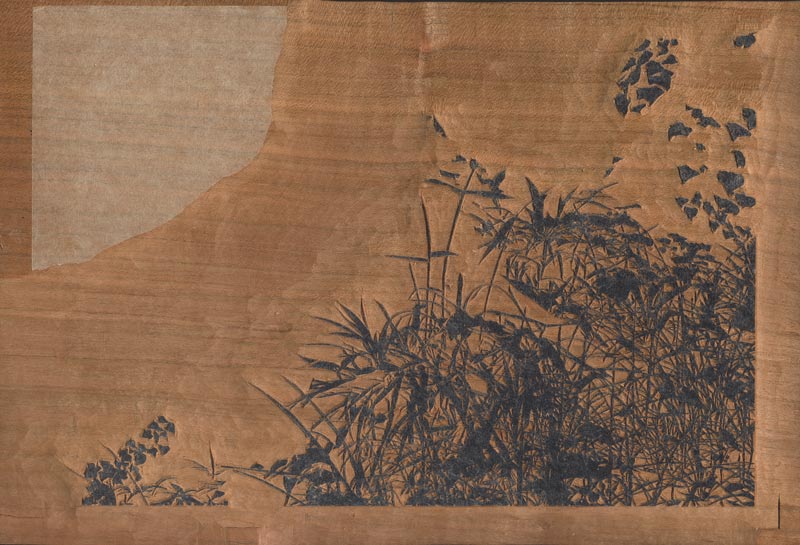
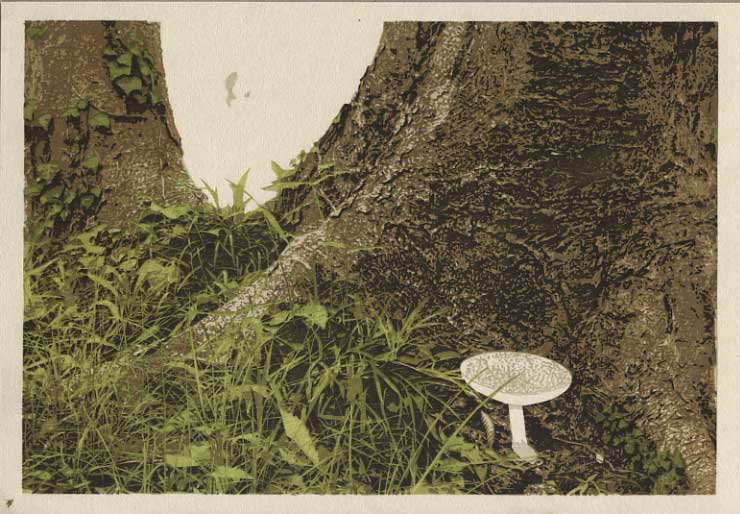
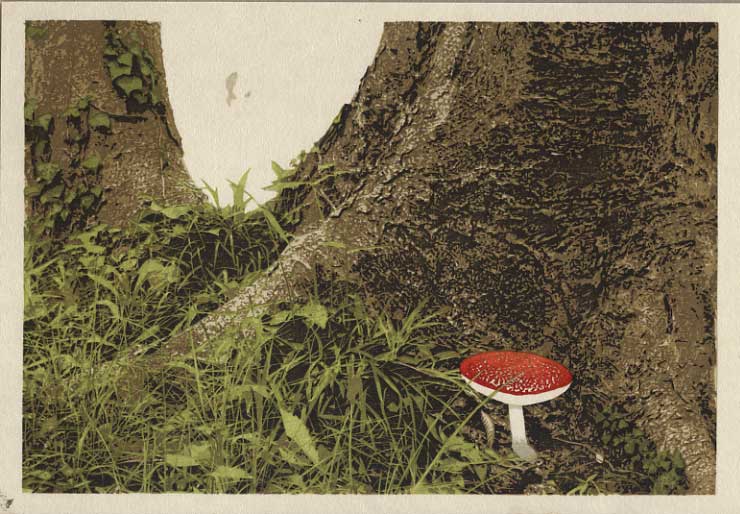
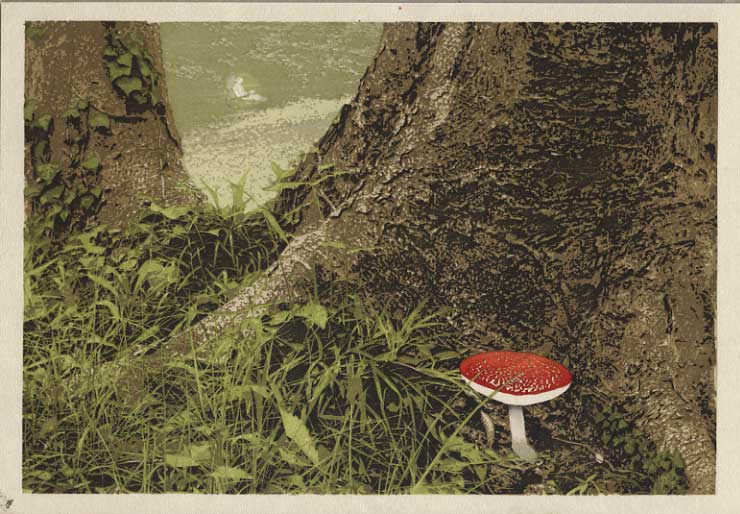
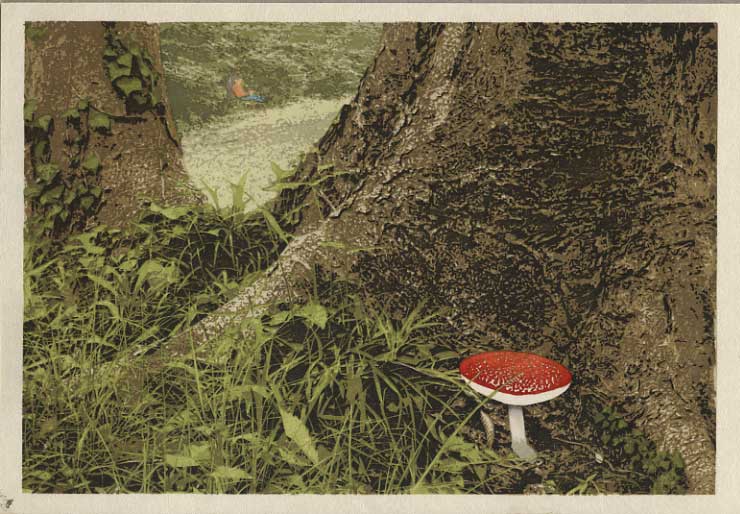
So there we have it; all put together, it came out like this:

As they say, "And now you know ... the rest of the story!"
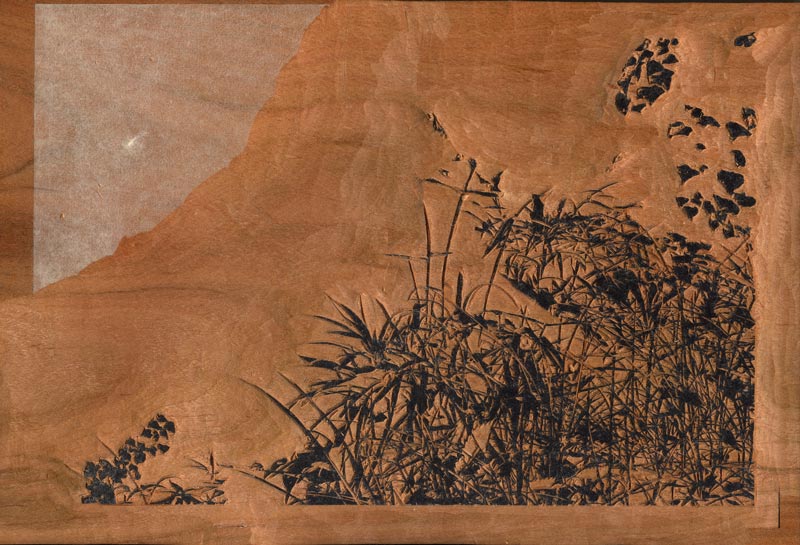
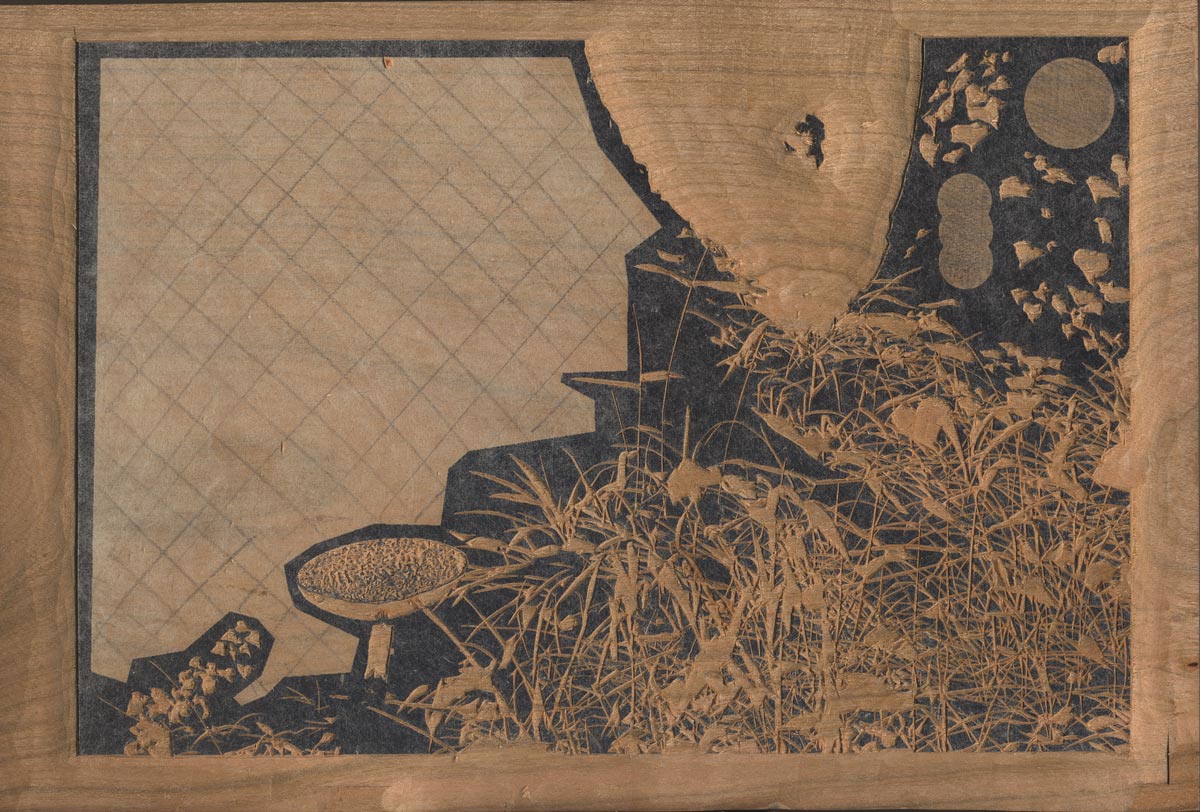
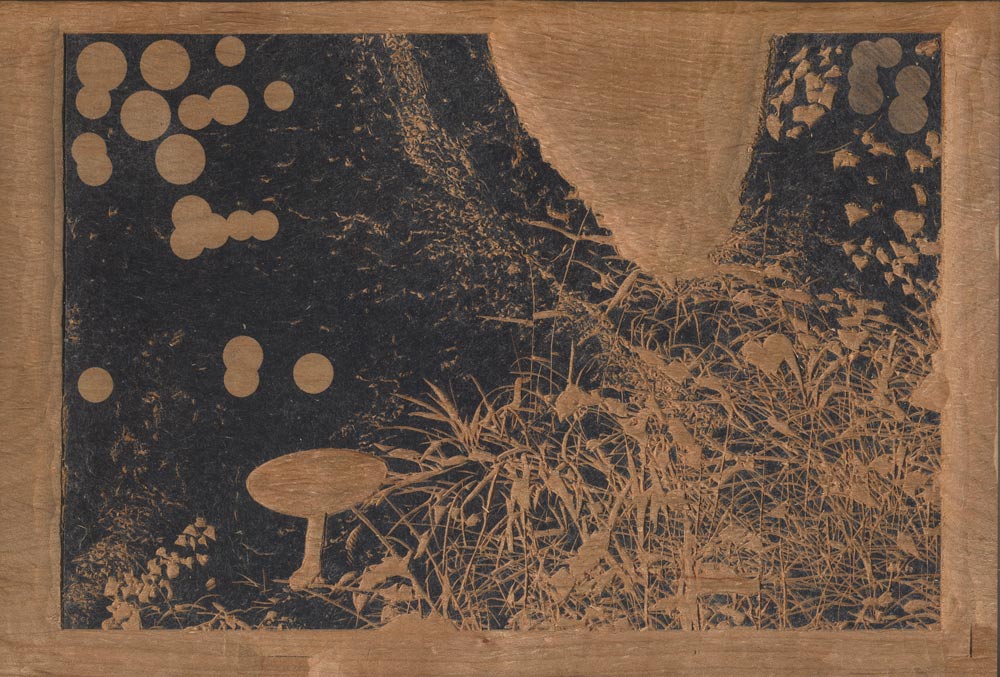
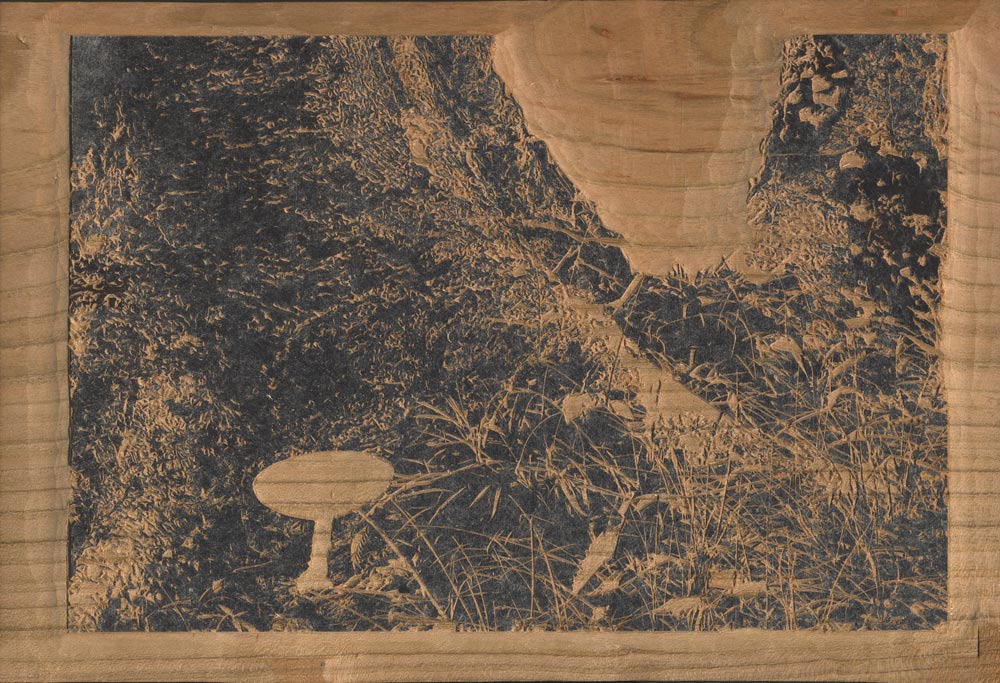
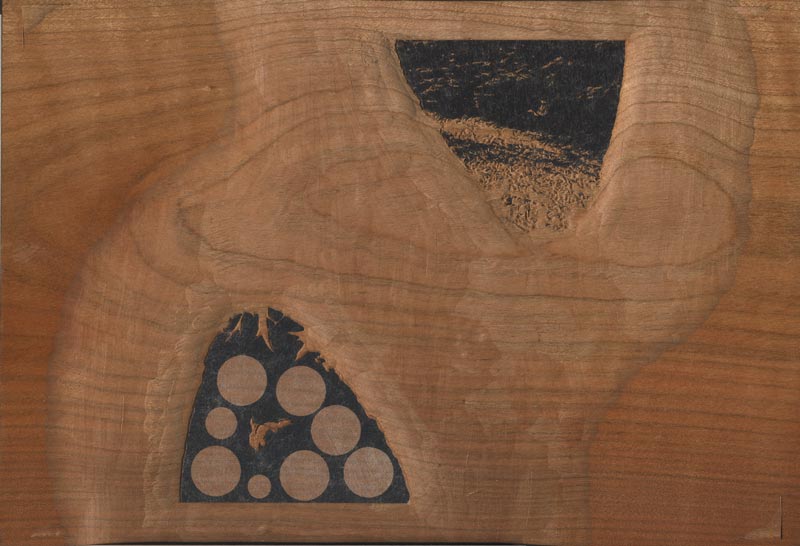
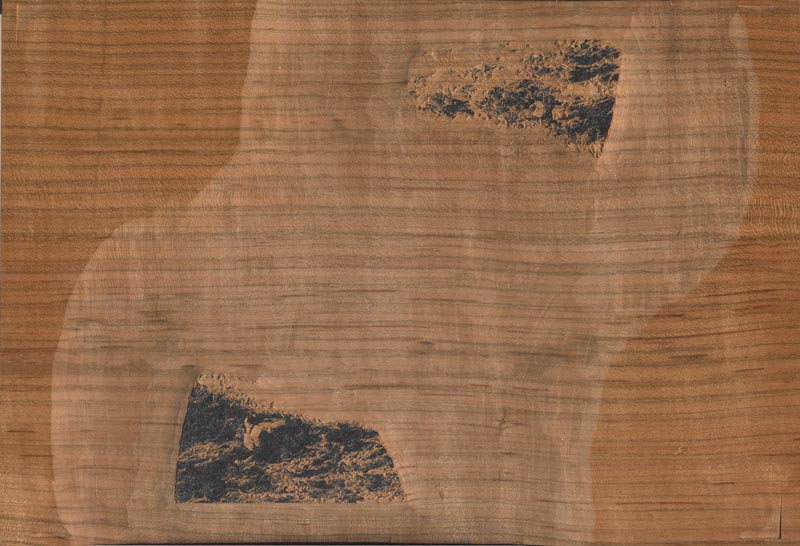
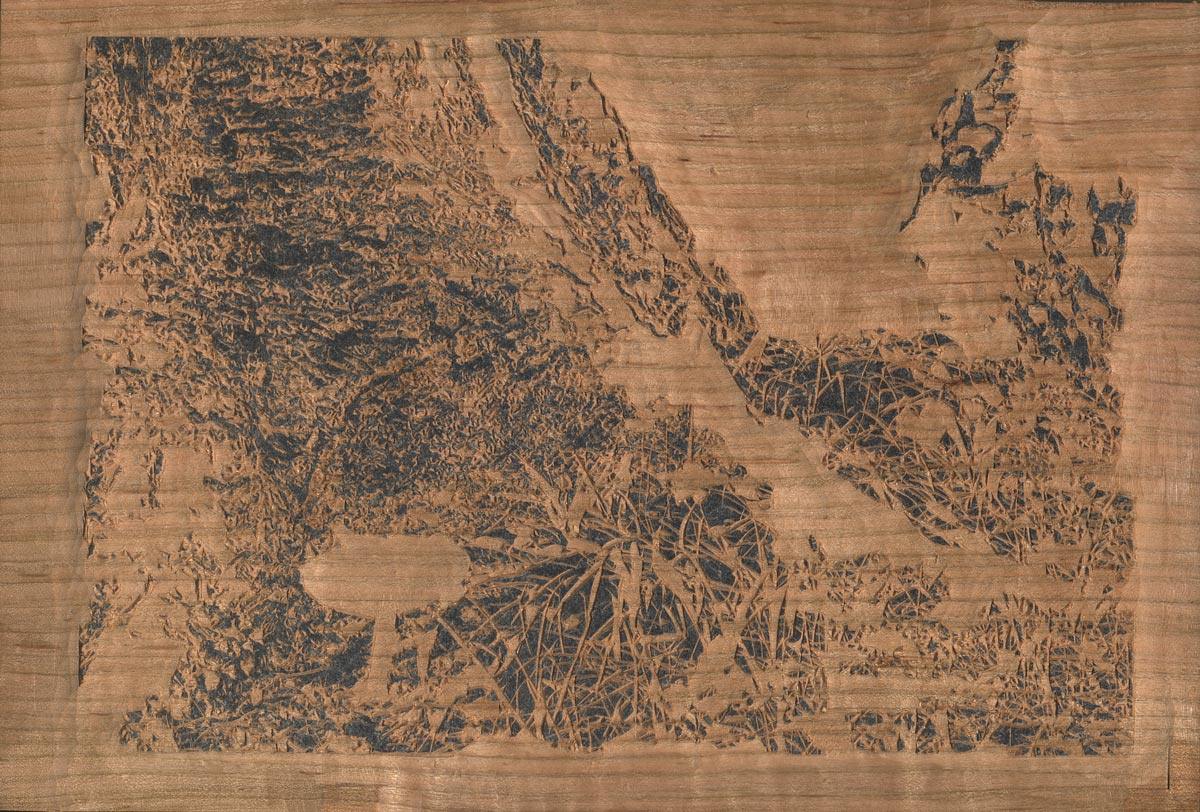
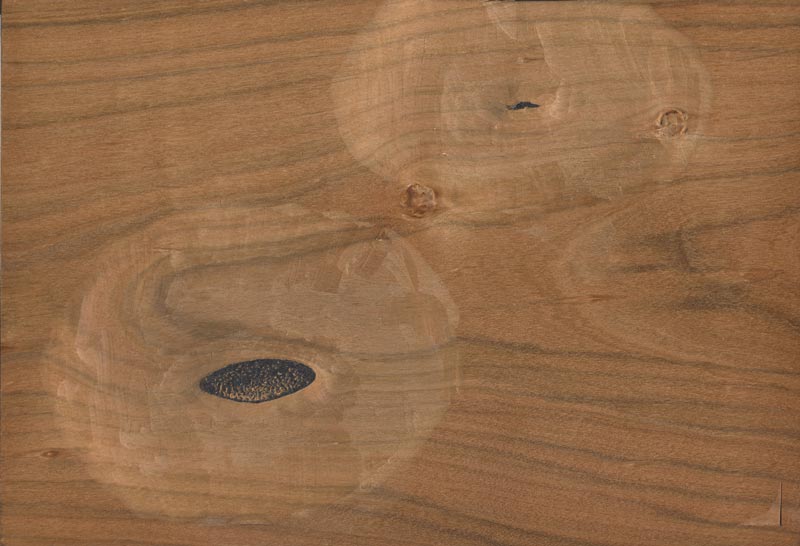
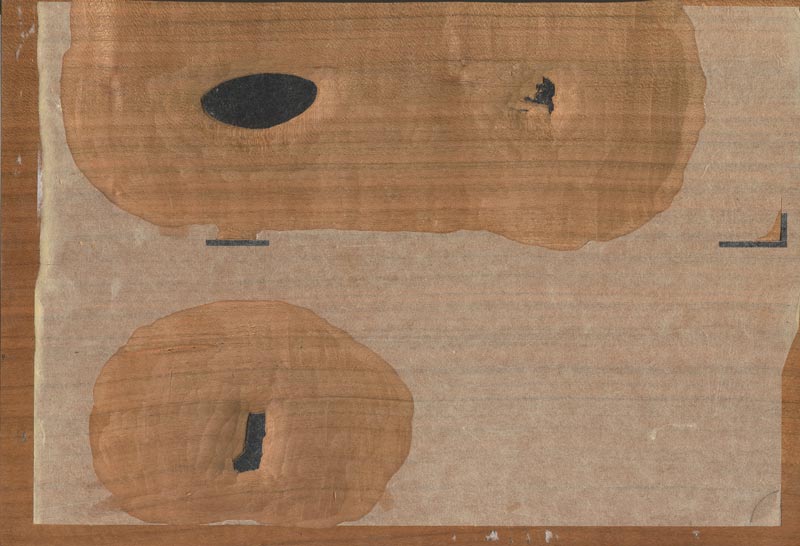
But I also promised one more thing - a tabulation of the time it took to get this thing made. Here's a recap of what I posted earlier covering the carving time:
| Hours | |
| 1st block (image) | 17.5 |
| 2nd block (image) | 17.0 |
| 3rd block (image) | 15.0 |
| 4th block (image) | 22.0 |
| 5th block (image) | 32.5 |
| 6th+7th blocks (image | image) | 9.5 |
| 8th block (image) | 49.5 |
| 9th+10th block (image | image) | 1.5 |
164 hours, spread out over 31 different days.
And here's a table of the printing hours for the first batch of prints - 112 sheets. The paper in the stack is divided into six groups, containing 20, 20, 16, 20, 20, 16 sheets respectively. (I very much like to keep things tightly organized, and each sheet stays in its proper place in the order throughout the entire process.) So in this table, when I say that I printed Impression 1 (1 ~ 2), I mean that during that particular time period, I got through the first two groups of paper (the first 40 sheets), before packing it up until the next work period.
| Date | Work | Hours | |
| Sat, July 25 | Cut paper | 2.0 | |
| Sun, July 26 | Apply nail polish | 1.5 | |
| Mon, July 27 | am | Moisten paper | 1.0 |
| eve | Impression 1 (1 ~ 2) | 2.0 | |
| Tue, July 28 | am | Impression 1 (3 ~ 6) | 3.0 |
| pm | Impression 2 (1 ~ 2) | 2.0 | |
| eve | Impression 2 (3 ~ 6) | 3.0 | |
| Wed, July 29 | pm | Impression 3 (1 ~ 4) | 3.0 |
| eve | Impression 3 (5 ~ 6) | 2.0 | |
| Thu, July 30 | am | Impression 4 (1 ~ 3) | 2.5 |
| pm | Impression 4 (4 ~ 6) | 2.5 | |
| eve | Impression 5 (1 ~ 2) | 2.0 | |
| Fri, July 31 | am | Impression 5 (3 ~ 6) | 3.0 |
| pm | Impression 6 (1 ~ 6) | 4.0 | |
| Sat, Aug 1 | am | Impression 7 (1 ~ 4) | 3.5 |
| pm | Impression 7 (5 ~ 6) | 1.5 | |
| Impression 8 (1 ~ 2) | 1.5 | ||
| eve | Impression 8 (3 ~ 6) | 2.5 | |
| Sun, Aug 2 | am | Impression 9 (1 ~ 6) | 1.5 |
| Impression 10 (1 ~ 2) | 1.5 | ||
| pm | Impression 10 (3 ~ 6) | 2.0 | |
| Impression 11 (1) | 1.0 | ||
| eve | Impression 11 (2 ~ 6) | 1.5 | |
| Mon, Aug 3 | am | Impression 12 (1 ~ 6) | 2.5 |
| pm | Impression 13 (1 ~ 6) | 2.5 | |
| eve | Impression 14 (1 ~ 6) | 1.5 | |
| Tue, Aug 4 | mixed | Impression 15 (1 ~ 6) | 3.0 |
| Wed, Aug 5 | am | Impression 16 (1 ~ 6) | 2.5 |
| pm | Impression 17 (1 ~ 6) | 2.0 | |
| Impression 18 (1 ~ 6) | .5 | ||
| Thu, Aug 6 | am | Impression 19 (1 ~ 6) | 1.0 |
| Impression 20 (1 ~ 6) | 1.0 | ||
| Impression 21 (1 ~ 6) | 1.0 | ||
| pm | Dry prints | 3.0 |
It seems that it took me about 71.5 hours, which is a bit more than I would have estimated if I had been guessing before I started. The second batch won't take quite as long, as there was quite a bit of 'fooling around' with pigment mixing, re-checking tone levels, etc., that won't be happening next time.
So, adding it all up:
| Hours | |
| Carving: | 164.5 |
| Printing (112 sheets): | 71.5 |
| Printing (112 sheets): | (est) 60.0 |
| Total: | (est) 296 |
Given that I will be 'keeping' 200 sheets for the saleable edition, it looks like I will have about 1.5 hours per sheet as a basic labour investment. Considering the complexity of the print, I think that's fantastic! Remember, this is the single most inefficient print I have ever made - I spent 50 hours carving one block!
It demonstrates pretty vividly just how efficient this technology is, which should be no surprise, considering that it was used for all image and text reproduction in Japan for nearly three hundred years, until the machines finally took over in the early 1900's. And the craftsmen in those days were of course far more effective than Dave here, who really just 'pokes along', at a pace that would be an embarrassment if they were watching ...
Interesting ...