Posted by Dave Bull at 12:34 PM, February 12, 2009
Continued from [Seacoast in Winter - 11] | Starting point of the thread is [Seacoast in Winter]

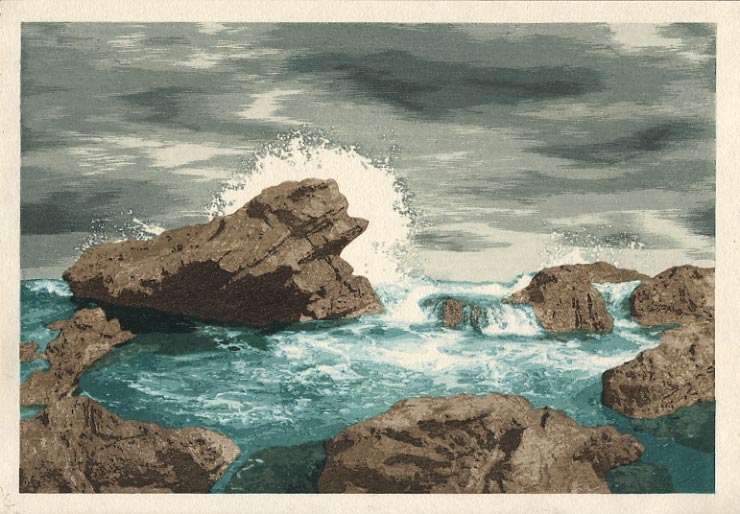
Step #14 - Now we put some shadows onto the rocks, bringing them to life!

That'll be it for the rocks I think. I think I could have laid the black on a bit heavier, as the shadows could certainly be a bit darker under the main large rock, but that would probably make the other parts a bit too dark. By doing the rocks with only 4 blocks, as opposed to the six for the water, we're a bit limited in how much subtlety we can catch ...
Step #15 - And the final touch on the water, bringing out the transparency on the underwater rocks.

Let's have a couple of close-ups, to see how that works:


The 'base' blue_brown tone of the underwater rock doesn't change between the two steps. What does change are the surrounding tones - the darker they become, the lighter the original rock area appears to become, even though it actually doesn't change ...
I'm now off downtown for some other work that will interrupt this, but later this evening, I'll be back at it - there are two impressions left - one for the sky tone, and an embossing for the foam spray area ...

The thread continues in [Seacoast in Winter - 13] ...
