« [River in Summer - 8] - First colour blocks ready | Main | My Solitudes project ... Mystery pattern ... »

[River in Summer - 9] - Colour block oiling ...

Posted by Dave Bull at 6:52 PM, May 17, 2007

Continued from [River in Summer - 8] | Starting point of the thread is [River in Summer]

This will be the routine for quite some time now ... day after day of work on these detailed colour blocks. Here's a set of photos showing the drill ... First, the block with the kyogo pasted face down:
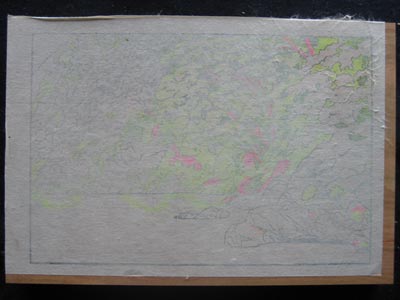
The lines are not so clearly visible. In the 'old days' the carvers used an extremely thin paper to make these transfers, but I have learned that I just don't have their skill at getting thin kyogo pasted down without distortion.

So I use a somewhat thicker paper - it's a type called hodomura. It seems quite dimensionally stable, which is the most important thing I want at this point. Any stretching, expansion/shrinkage, or other distortion of these sheets between the time they are printed and the time they are pasted down, makes subsequent registration impossible.

I also watch the weather. I printed these on a bright sunny day, spent the next day or so working out the separations and colouring in the required areas, and then got them pasted down before the weather changed. If I wait too long, and the weather becomes rainy, the sheets will expand from the extra humidity in the air, and I'll be in trouble.

The next step is to rub with moistened fingers, until the fibers of the paper start to pull off. (Actually, you can see in the top right corner of the previous photo, where I started to do this before remembering to take the photo first ...)

Again, this is slightly different from the procedure followed by the men in older times. They did this rubbing while the paper was still damp from being glued down; the moisture from the glue made the paper soft, and the fibres pull off very easily. Unfortunately for those of us with less skill/experience, when you rub with the glue still damp, it is very easy to cause the paper to slip slightly on the wood surface. You don't realize what you've done, but when printing begins ... oops!

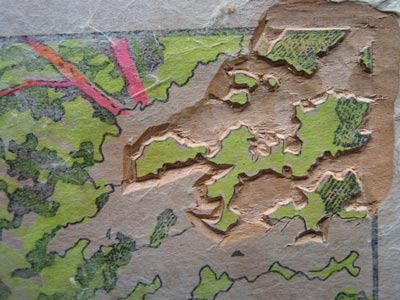
So I play it very safe; I let the glue dry thorougly first, and then peel later. It's more troublesome this way, as the paper now has glue in the fibres, but it minimizes problems later. Here's the same sheet after I've rubbed away a lot of the fibres:
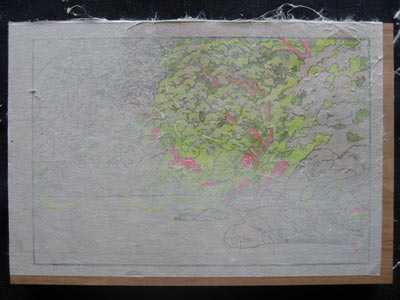
The lines are now much more clearly visible, but there is an additional step to take that makes things even easier for carving - I take a dab of camellia oil, and rub it over the area that I am about to carve:
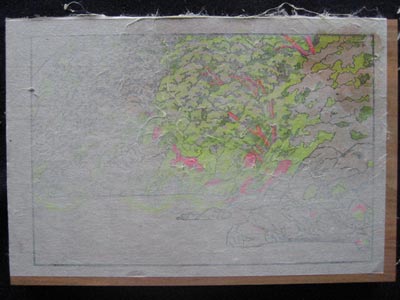
It's not such a good idea to rub oil over a larger area, because it just starts to get a bit messy, and it can also loosen the glue holding the paper down. Just work a couple of 'minutes' ahead of the carving. Here's a zoom-in on the corner where I will start carving:
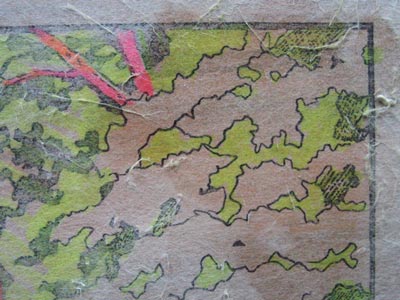
And here we are, after a few minutes work ...
The thread continues in [River in Summer - 10] ...

Discussion

Following comment posted by: Bette Wappner on May 18, 2007 11:12 PM

Very interesting. So the camellia oil makes the paper more transparent, yet doesn't make the wood too oily for water-based ink.

Your illustration is very nice. I enjoy seeing photos of your progress.


Following comment posted by: Dave on May 18, 2007 11:29 PM

doesn't make the wood too oily for water-based ink

No, not at all ... it's so light. Carvers use it quite a lot; it adds visibility, of course, but it also helps when the wood is too dry and brittle - a rubbing of oil helps the cutting go smoothly.


Following comment posted by: Tom Kristensen on May 18, 2007 11:29 PM

Dave, have you tried transferring your kyogo using a backing sheet made tacky with spray adhesive? the grip of the paste will allow you to easily peel away the sheet with no distortion of the kyogo.

I print my designs onto standard gift wrap tissue paper and they make it through the A3 printer and onto the block without a problem. I paste down the sheet with the inked side up.

Thanks for the adventure!

Tom


Following comment posted by: Dave on May 18, 2007 11:38 PM

have you tried transferring your kyogo using a backing sheet made tacky with spray adhesive?

You mean like this? Yep!


Following comment posted by: Tom Kristensen on May 19, 2007 7:03 AM

Need I have asked? The only thing I can add to your excellent description of printing onto tissue, is that the copy machine has now been replaced with the home printer.

Your keyblock artwork is extremely detailed, I can see why you stick to the traditional method of working directly from the keyblock impressions.


Following comment posted by: Jacques on May 19, 2007 12:01 PM

Wow! This is all wonderful teaching material Dave!

The only thing I'm still wondering is: what type of glue are you exactly using to paste the kyogo and its colour derivatives down on your woodblocks? Is it plain nori (rice paste)? Or some other type of glue?

The reason I'm asking is that - in my admittedly very limited experience- I've found that the paper would come off the block while carving...


Following comment posted by: Dave on May 19, 2007 1:08 PM

what type of glue are you exactly using

Two kinds. For general use, when there are no small areas or fine lines involved, I use a mucilage type glue based on gum arabic. I get this from the stationery store; it's similar to the honey-coloured glues we used to use in school.

But for the hanshita - the sheet that carries the outlines - and any kyogo that also have small delicate areas, I use white glue (normal woodwork type glue). This is tougher to wash off after the carving is done, but it alleviates the pulling-off problem you describe.


Add Your Input


Remember Me? (with a cookie ...)

(you may use HTML tags for style)

Back to the Main Page