Posted by Dave Bull at 1:59 AM, May 24, 2011 [Permalink]
In the previous 'episode' of this quest to find good materials for the paper sizing, I talked about some glues that I obtained from overseas. I mentioned that I would use them in some tests, and can now report (on the first glue).
It's going to be 'no go'.
When I ran the second batch of the Mystique #13 print, I used my normal nikawa for most of the paper, but took the opportunity to also test one of the imported products. After sizing the first 50 sheets, I cleaned up the left-over size, mixed up a fresh batch using the jelly-like hide glue ...
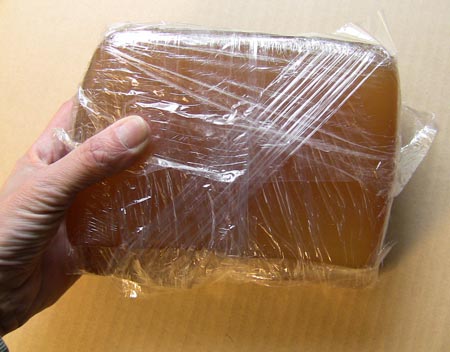
... and used that for the final 10 sheets.
I had no idea how to formulate the mix, as the strength of this 'concentrate' was completely unknown. I assumed that because it was jelly-like, and fairly soft, it must be quite a bit more dilute than the hard granular nikawa, so I doubled the amount (measuring by weight) to: 1 liter water, 85gm jelly, 9gm alum.
It melted very easily and smoothly, in just a few seconds (at 50 degrees centigrade). The overall appearance of the liquid was quite different from the usual nikawa mix (on the left); this was a bit milky (the bottle on the right), not the usual light brown.
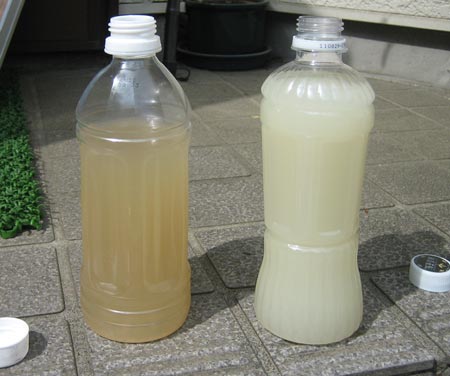
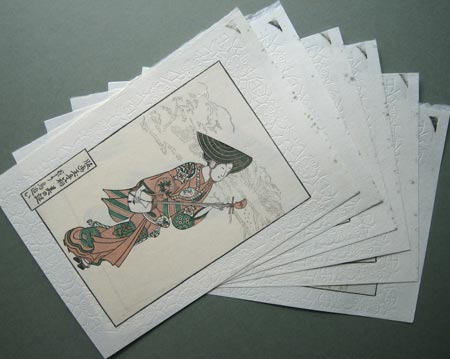
But it felt reasonably 'sticky' to the touch, so I went ahead with it. After all 60 sheets were dry, I cut them in half (lengthwise) to make 120 printing sheets, put nail polish on the registration corners, and prepared them for printing. (The ones done with the experimental sizing were identified by a small mark I made on the back, and these were positioned as the final 20 sheets in the stack.)
As those of you who watched the Webcam during those sessions know, there was a very dramatic difference in the way that those sheets behaved during printing.
They 'took' the water in pretty much the same way as all the others in the stack, but when it came time for the first impression, it was clear that these were going to be different. They were soft. Soft. Soft. Soft.
(At one point later in the process, this message flashed by on the webcam Message Board:
... hope we don't get another episode of Dave saying, "Whoa, that's soft!!!" ;-)
But as excessively soft as the paper was, it still took the impressions ... and perfectly. Only a very light touch on the baren was needed, and the pigment was taken up very smoothly. The paper was a bit difficult to handle, but the nail polish did its job, and the registration was also perfect.
So at that point, the experiment was looking like a complete success. The glue was working, and it would be easy to adjust the mix next time to perhaps make it a bit stronger, if that seemed to be necessary.
We step ahead to the third day of printing. I came down to the workshop as usual, mixed up the colour for the green impression, and began work. The first 100 sheets (the ones with the 'normal' sizing) passed by with no trouble, but when I flipped over the interleaving newsprint to expose the final group of 20 sheets (the ones with the experimental size), I saw trouble. Big trouble.
The sheets had become moldy overnight. Not 'all over', but just at the far left and right edges, well away from the printing area.
First thing to do was protect the rest of the stack, so I instantly took out the 100 earlier sheets, wrapped them in fresh newsprint, and got them upstairs into the freezer, where they could wait safely while I figured out what was going on with the others.
It was really quite puzzling. Mold normally begins to form (if you have been careless with time/temperature/etc.) on areas of the sheet that have received heavy impressions. And it is nearly always detectable first by smell, well before it becomes visible.
But this fit neither of those patterns; there was absolutely no odor, and the mold was limited to the extreme edges of the sheets. Now although these sheets were at this point 'dead', and could never be issued as prints, I quickly went through the rest of the impressions with them, and set them aside to dry. The next day, after cleaning up around the workbench, I retrieved the other sheets from the freezer, let them defrost, and finished them off. They showed (and show) absolutely no trace of any kind of mold, nor have any odor. I think they are 'safe' to go out.
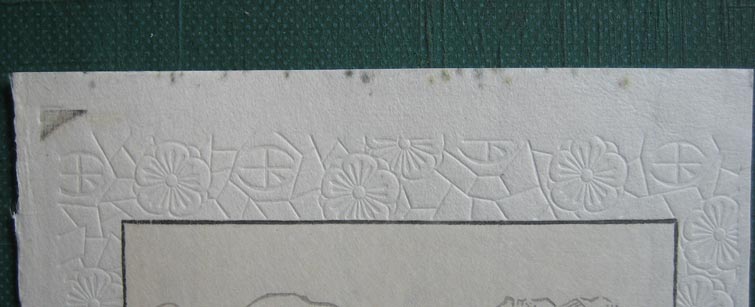
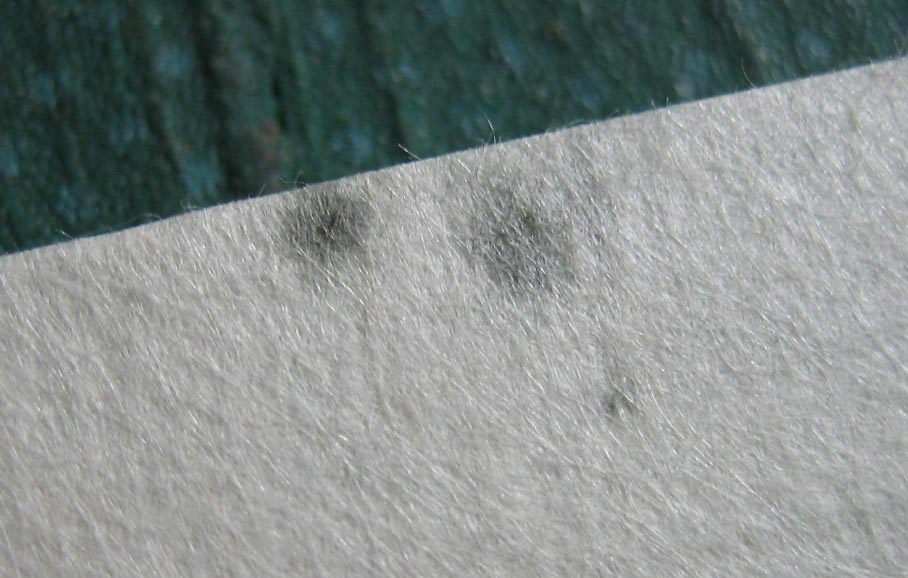
So let's have a look at some of the bad sheets. Here are the worst ones:
A bit closer (clickable):
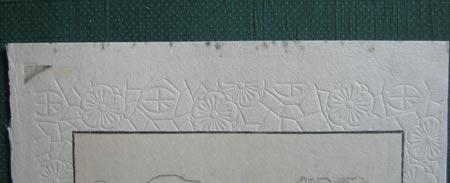
And ...
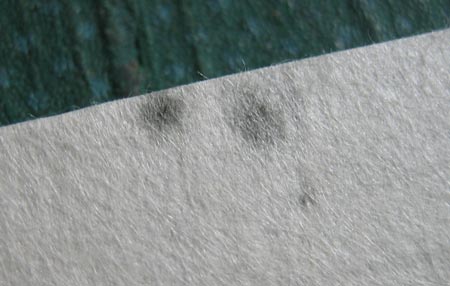
When we look closely, we see that the mold seems to be coming up from inside the paper; it is not something lightly dusted on top. It is clearly not coming from the newsprint. And given that none of the sheets in the rest of the stack show any traces, it is pretty clear that our hide glue must be the cause.
The most reasonable assumption would be that whereas the Japanese nikawa is prepared in a fairly hygienic environment - which would make sense given that the makers know that it will be used in the preparation of what are intended to be long-lasting works (prints and paintings) - the hide glue from overseas - which is intended to be used as glue - was perhaps prepared under 'standards' that are fairly loose. Hygiene is probably not important to the people who prepare this product, and it seems that the block of jelly is actually full of mold, and who knows what else. There is no practical way to sterilize it, as the use of high temperatures (boiling, etc.) would destroy its function for sizing.
So out it goes.
Next month, I'll run another test, using the granulated form:
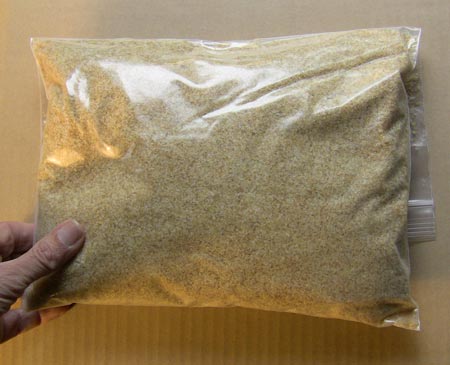
But I'm going to be very much on the lookout for trouble, you can be sure!
Hi David and all-
Mold can be a real pain. I think that it is safe to say that you did import that mold with your gelatin. I have also noticed that the rabit skin glue does look a little milkier when mixed. As a result to mold when I have made dosa I often put an anti-microbial in it. Have you ever used Thymol or Formalin? I always put some into my dosa. Also a healthy hit of Isopropyl alcohol will kill most microbes and 100% flash off in hot water. I get my Thymol from a place called art craft chemical in Albany NY. It comes in crystals. I dilute it in Isopropyl alcohol until the solution is 100% diluted. (Little crystals are left at the bottom). 15 drops of this will keep a liter of gelatin clean and clear. 5 drops of formalin will do the same. Formalin is a little more dangerous but for the initial dosa at such a low dose does not seem to bother me. I always wear gloves while using anything with formalin, and in a ventilated area. I get formalin from a local exotic fish store.
What are your thoughts about this?

Perhaps the low melting point of the second batch of size meant that there was no pasteurisation of any contaminants, while the batch prepared at higher temperature was effectively sterilised. Why would all the spots appear so quickly and virulently, but only on one margin of the print? I would be interested to see if the mold continued to grow over the print surface given more time. Are you completely sure it is mold? I don't suppose you have a careless apprentice cleaning your brushes.
Could you explain (or provide a link explaining) what you mean by "soft"? Too wet?
I find it amazing that proper sizing material has disappeared. Is the modern age driving the print arts toward extinction as well?
UV is sometimes used in mold remediation here in the US. If you could come up with an appropriate UV light, you could try sanitizing the solution after you dissolve the glue, but before you apply it to the paper. I don't know what sort of light or what intensity would be required to do that, but it might be worth investigating.
Dear James-
I have been a professional printer for the last 25 years in all the media of printmaking. I have seen plates, acids, papers, films, machinery, chemicals, emulsions and print shops all vanish in front of my eyes while in the middle of an edition. It is frustrating to say the least. Yet new things take there place. Welcome to printmaking! Japanese woodblock will never go away. If it does, it will not be because of nikawa. Forums like this help. We should all thank David for his insights and his connection to the printers of Japan. In a little time I would not be surprised if that factory re-opened as Japan has a way of protecting its culture. But for right now we, look for alternatives.
Looking at the images above it is interesting to see that the mold is only on one edge, at the top along with what looks to be some misprint from the block. R U sure it is not just some speckling that has happened from ink being kicked up from the brush???? I have seen mold in my day but it has never grown in a triangle.
never grown in a triangle ...
It's mold. That triangle is a printed mark left by the block - I leave a corner uncut to support the paper. That area will normally be cut away when the prints are trimmed before shipping.
I have used formalin on occasion, when doing print runs in the summer that may take too long ... I put it into the original moistening water, and then also mist it over the newsprint sheets partway through. I have never put it into the sizing mix, because I have felt no 'danger' there - the sizing is done and finished within a couple of hours.
Thymol is also commonly used here, and Numabe-san swears that by using Goto-san's 'patented' solution of it, he can do a run of Binnie prints lasting weeks on end, even at the hottest part of the year, and have no mold problems.
As for just why this mold should be only along the very edges of the sheet, I am pretty much stumped. Many of the sheets have no sizing right along that edge, due to the way that I cover them with a plastic sheet while wiping with the brush (explained on this page). I am going to play some games with a few of these sheets, moistening them again and letting them sit to see what happens (well away from my workshop). Perhaps I have this backwards, and the gelatin is protecting the paper from becoming moldy, and those exposed edges - completely 'raw' paper - were attacked easily.
More experiments to follow ...
Hi Dave-
If you put the solution of Thymol or formalin into the size there can be absolutely no spores alive at the time of sizing your paper. Anytime I use gelatin for any reason now I put 15 drops of thymol into a measured liter (just makes sense). In my experience when then wetting the paper you have 2 days of the paper being moist with no mold. I never though thought of the freezer, that is a nifty trick! Thanks
No need to point out that formaldehyde products while effective at killing bacteria are also a health risk to us larger organisms. I think it is very likely that the gelatin products destined to be used as glue would have a biocide included. It would be a very cheap insurance against customer returns. I wonder if the Nikawa might also be similarly protected. I must say that I have never had any of my Japanese washi go moldy - touch wood. I have had gum Arabic go moldy, and of course the nori, but never the paper. I am pretty careful not to push my luck by letting the stack get warm, or stay damp for day after day, but even so, now that I think about it, I should have had more mold. Perhaps the size really is protecting the paper.
Hi David and All-
I have been doing some research adding to my information on dosa. As we are all aware dosa is made of gelatin and alum. Dosa does several things to our paper that effects our printing. 1 st the gelatin seals and forms the paper giving it strength and binding the fibers of the paper together. If the dosa is weak the paper will be called soft. Soft paper will let the ink penetrate the paper deeper making a more subtle print. Weak dosa will also let the long fibers of the paper grow and shrink with the ratio of water to it somewhat changing the size and registration. If your paper is undersized also your paper can get over wet, while printing this can lead to white speckle. This is where the ink from the block is absorbed into the nap paper too fast.
I almost always am carful when applying dosa to the front of the paper to get an even coat. I do not want to soak the paper to the back side. On the back side which I do second I double up the mixture to add protection to the paper from the baren. When applying I make sure never to soak the paper and let the mixture penetrate the front of the paper.
When you oversize the paper the ink does not penetrate into the fibers of the paper and often sits on top. This can lead to serious baren suji.
Gelatin is a simple thing. Boiled down animal protein. Often the connecting tissue, hoof or hide of an animal. Nikawa was what? We do not know for sure, yet it is not the only animal protein glue out there. Man has been refining animal proteins for thousands of years. Using them for different applications (woodworking, photography). The durometer or hardness for gelatin is called bloom. Different gelatins have different blooms. I have heard several times that nikawa was fish skin glue. Fish skin glue is available at Talas. Raw animal protein wet will rot and mold quickly if not preserved.
The second part of our dosa is alum. Aluminum potassium sulfate, potash alum, KAl(SO4)2·12H2O is probably the best for our uses. It does several things. It is an Astringent, flocculant, and hardener. Astringent meaning that it will cut down on mold and rot for our purposes. Flocculant, which this is used in paper making to have the pigment leave the water and bind to the paper. And a hardener which will increase the bloom of the gelatin.
So David, since we have to refomulate a dosa that works, everything that I am reading is to add a higher ratio of alum to your dosa that you just made. You might not need a new gelatin. It will harden your dosa and keep the mold away.
In response to Tom's comments. You are absolutely right. Formaldehyde is a dangerous chemical. It needs to be handled with respect. I would never tell anyone to print with it out of a wet pack. I have done that and got a nasty headache. I have also spilled a little on my hand and got a nasty burn. But, the quantity that I prescribed and how to use it was relatively. Wear protection, leave the ventilated room when finished. In my studio I have hydrochloric acid, nitric acid, lacquer thinner, photo chemicals, acetone, paint stripper, powdered cadmium red, thymol, formaldehyde and worst of all potassium dichromate. It would be best if I had none of these. All are deadly in their own right. I could not do my work if I did not have them. I tell my students as well as my co-workers you have to treat all these with respect, like your working with snakes in the reptile house in the zoo. Caution, Caution Caution.
Also, never seen gum arabic rot. Put a stick of nikawa in a glass jar full of water on your window sill. Wait a week, get back to me. :)
Wow ... wonderful information, Chris!
It's all getting a bit mixed up now, so when this has moved on a bit further and I've done more tests, I'll be getting all this information together in one place, probably over on the Encyclopedia section of this site.
If your paper is undersized also your paper can get over wet
I suspect this is the key point to this episode. I had two different 'types' of paper mixed together in the batch of 120 ... 100 sized 'normally', and the last 20 sized very weakly. But the moisture through the stack was equal of course, so that last group was overly wet. If they had been in a package of their own, I wouldn't have needed to use as much water when moistening, so perhaps they would have 'behaved better'.
So many factors ...
Nice work Chris, I think you are onto something with the alum acting as the mold deterrent in the sizing. Add more alum drive out the excess water and fight off the mold. Of course extra alum adds a stiffness that makes the paper difficult to print.
At the moment I am wrestling with Niishinouchi paper that is very soft and full of sizing defects, mainly extensive creases in the paper surface where the soft paper has buckled when handled wet. There is no trouble with the impression, but the corner is too weak for return trips to the kento cut. I am trying Dave's nail polish trick, but at this stage my Revlon Colorstay Top Coat is dry, but not quite invisible. Dave, do you have any tips on nail polish application? Perhaps I should size the back of the whole sheet with an alum-rich mix. But I'd rather be printing... Oh to be able to buy perfect paper. It seems that a nicely sized, yet soft paper is hard to come by.
extra alum adds a stiffness
It certainly does, and anybody considering raising the alum quotient, please do some good testing first on a small batch. Paper can become impossible to print with too much alum - the pigment simply won't go down into it.
I have no experience at all with having a stronger alum mix on the back of the sheets. Sounds interesting ...
tips on nail polish application ...
Har har ... ask your lady friends!
Are you trying to apply it to wet paper? I've never done that ... only to the dry paper before beginning. If you apply too much, you get a 'blob' on the corner, which doesn't help matters, so just enough to stiffen up the paper.
I use a clear 'top coat' which does indeed still show at the end of the process, but if you keep it to a small area, it won't look any worse than a normal kento corner ...
One thing I did learn was to keep my hands absolutely clean of the stuff. If you get it on your finger, then anywhere that you touch the paper will end up with a trace of it, and that spot won't print properly.
I write as I wait for my nail polish to dry... Yes, Dave I am putting it onto damp paper only because I realised too late that it needs to be done. Seems to work OK. The slight discolouration of the paper is an acceptable price for tight registration. There is no way this paper can handle ten impressions without this corner hardening. I have never needed to do this before, but then I have always worked with over-sized paper.
If it won't dry because of the moisture, then perhaps some other substance might be a better replacement? Epoxy glue, etc.?
In the old days, there was no nail polish, and we are told that they used urushi - Japanese lacquer ...