Posted by Dave Bull at 10:24 PM, December 22, 2007
Continued from [River in Winter - 1]

Lots of carving done the past couple of days ... It always takes a bit of time to get back in the groove again; unlike 'real' carvers who do nothing but this every day, I lose a lot of my touch for this job during the weeks of printing and other work ...
I'm trying something a bit different for parts of this print. When I was involved with the production of the Aspen Grove print for Mokuhankan last year, I was quite intrigued by the set of blocks that Mike created for it. He used Photoshop to break a photographic image into tone levels, and then used a computer-controlled tool to cut the resulting patterns onto a set of woodblocks, like this:
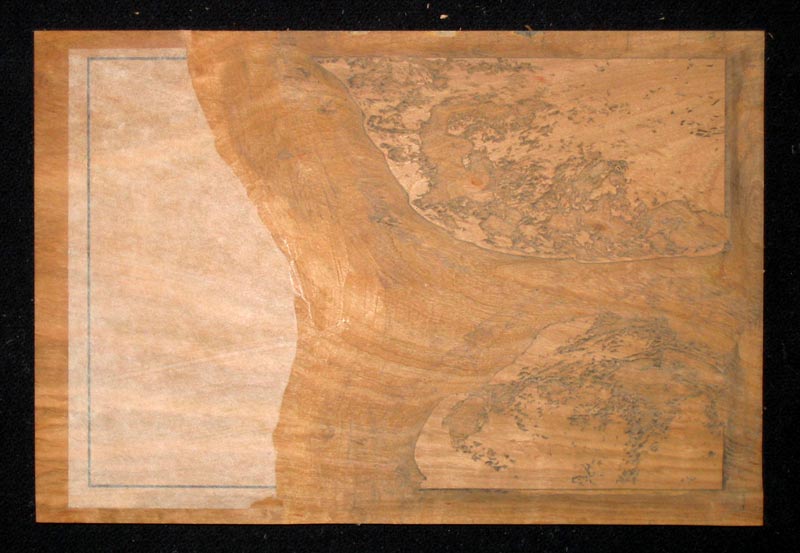
Now, I'm not interested in making a print that looks just like a photograph, nor having it cut by a machine, but I thought this idea of tonal breakdown was something worth playing with, so I took a photograph of the stone in this design and broke it down into levels. Mike used eight levels for his photograph of that grove of trees, but I just used four for this stone. I also did the same thing for the zone of splashing foam, and then put the Photoshop output onto a set of four sheets of thin paper to see if they looked 'carveable'. Here's one of them ...
Whoo-hee! Look at all those little black dots! What do you think?
Well, those of you who checked in at the Woodblock Webcam earlier today know what my decision was!
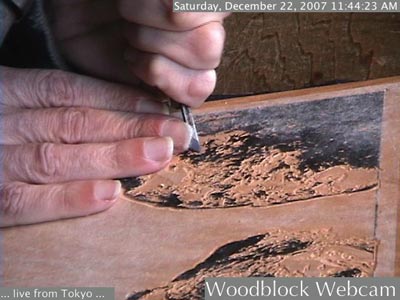
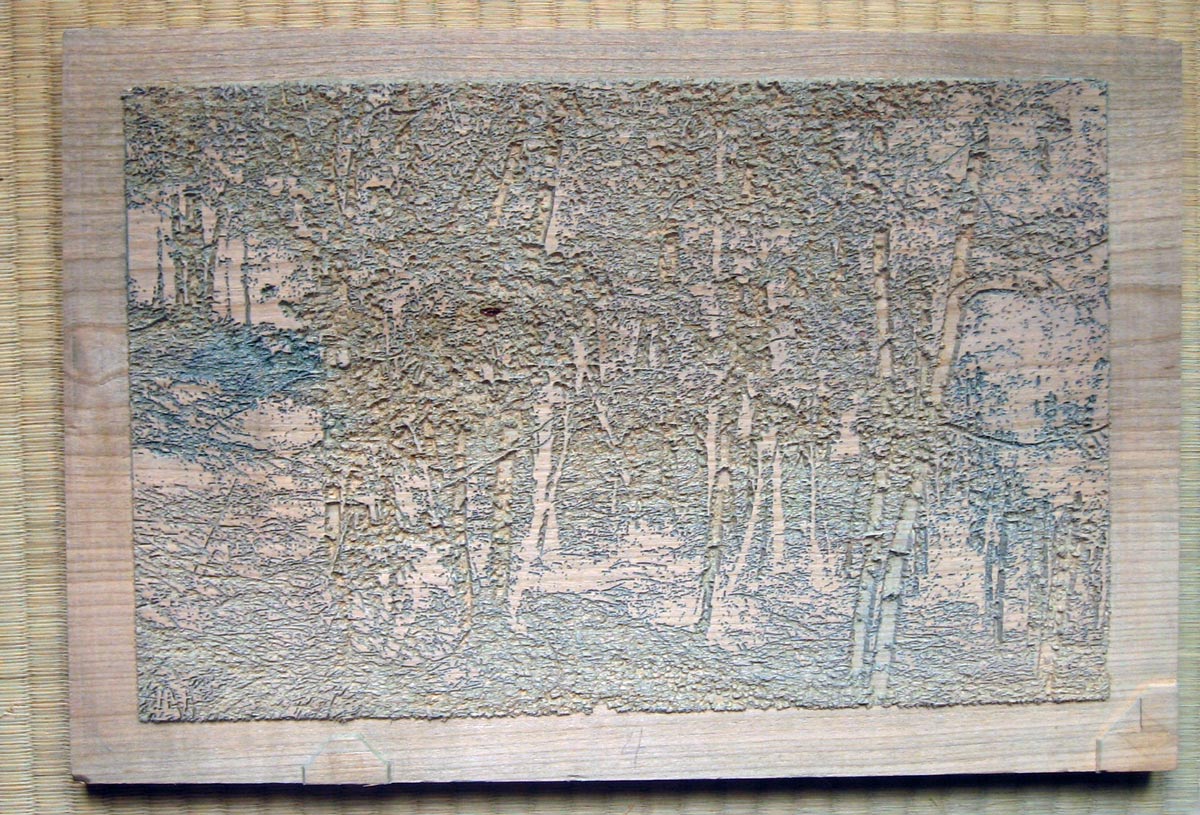
And here ... after pretty much a full day of work at it, is the block that matches that image. (The stone and the foam will of course be printed in different colors; they simply share the same piece of wood because there is enough distance between them ...)

So one down, three to go! (But I do have to admit that more than once during this endless - and kind of 'mindless' - process, I've asked myself "Is spending so much time sitting at my bench cutting tiny little dots really a sensible way to use so much of my precious time on this planet?)
The thread continues in [River in Winter - 3] ...
Yes, the time is well spent as the results are so amazing! I am anxious to see this one!
I am making doll clothes for my grandkids...time also well spent.
Barbara
Hey, you're one of my heroes for exactly this sort of thing. Time well spent indeed.
What a nice surprise to see this today! I'm honored to have been so kindly referenced, Dave.
Suggestion, of couse, since you're experimenting in 'my' direction -- early on, I experimented with this sort of 'straight' translation -- impossible to carve (for me) many tiny pixel-details which really are just so much noise to me... Bit maps don't lend themselves very well to carving, as they generally reproduce tone through a sort of dithering, especially when using few (like four) values.
One approach to help make the process more mindful and less tedious while still producing beautiful results and more appealing to eye and hand: reduce the 'noise' and eliminate uncarvable (or very difficult to carve) elements by simplifying the bitmap to eliminate all 'pixellation'.
An easy and very direct way to do this is via the filter/median tool in PhotoShop. Consider the pixel-density of the image when you apply the median filter (before 'posterizing' into values). For example, if your source is 200dpi, consider a 10 pixel radius for median filter -- that'll more or less eliminate elements less than a tenth of an inch in diameter. But median also 'blurs' the image in a way I don't find very appealing. There are infinite ways to sharpen the image before applying median -- and posterization isn't the ONLY way to rapidly translate an image into a manageable number of values (posterization separates values exactly evenly throughout the range of black to white values -- for four values, 0-63, 64-127, 128-191, 192-255). But you can also 'manually' optimize the breaks using 'threshold' and there are many other approaches which may produce more pleasing and less 'automatic' results. Also experiment with PhotoShop's various 'artistic' filters -- these reduce pixel complexity in a more intelligent way and can enhance sharpness before applying median to get rid of the uncarvable 'noise'. That can make carving much easier and more pleasant and also enhance the image, I feel. Once the design is 'set', the carving is no more or less 'mindless' than carving through any other hanshita design, at least to MY mind.
I have been using my CNC machine for... GAWD! Three and a half years already! Time sure flies! Anyway, I began using Photoshop to design hanshita for woodcuts in 1996 (and for monotypes and lithos beginning around 1991 or 1992). So I've had a lot of time to 'tweak' my process. To me, there's a tradeoff between carvability and complexity -- larger and simpler and fewer shapes are easier to carve, tinier shapes are much more difficult and take much longer. There was a limit to my patience when I was hand-carving -- I wanted to PRINT the things! I've been a lot more willing to include lots of dense and tiny elements in my blocks since I began having my machine do the work -- it doesn't seem to mind sitting there plugging away 24/7 and NEVER feels like it's time to get printing (nor anything at all, really).
By the way, I've ordered a second machine this week. The first can tool an area 4x8 feet. The new one's 6x12 feet (I seriously considered 10 x 20 feet, but just can't (yet) justify the cost of such a monster)! I'll use the old one for block carving (I have a solo exhibition of woodcuts coming up in spring of 2009 at the Beach Museum in Manhattan, Kansas) and the new machine for drawing and painting projects which I'll be able to carry out in tandem. GULP!
Merry Christmas and Happy New Year! And all best wishes to you, Dave! I ordered three sets of your short stories (I thoroughly enjoyed your 'sample stories') to give as gifts this holiday. Your Lulu store is pretty awesome!
Mike
ERROR -- my new machine is not 6x12 feet, it's 'only' 5 x 12 feet (60 x 144 inches). Here's a picture of the new baby:

-- Mike
posterization isn't the only way
Thanks for the extended comments Mike ... Lots of information here for anybody trying this kind of thing.
I actually didn't use posterization - I wasn't working from a greyscale image, but a colour one. I used Photoshop's 'indexed colour' function to find those four levels, which are thus not so much 'levels', as colour zones.
I played around with the radius, but ended up going with the detailed version, as other methods just ended up too 'blocky'. There are only four blocks (one of them 'blank' anyway), so it won't take all that long to cut them, and it should be interesting to see how it comes out.
I won't be doing the water this way; that'll be a more standard set of overlapping zones, with quite a lot of kasure (scratch carving) ...
I seriously considered 10 x 20 feet, but just can't (yet) justify the cost
Love that 'yet' ... :-)
But where the hell are you going to get quality paper of those dimensions?
I ordered three sets of your short stories
Lulu records tell me that was the single biggest order ever placed for my books ... Thanks! (Hope the people enjoy them ...)
I stumbled upon the The Aspen Grove print today and was fascinated by the idea of using C&C to carve a wood block from a photograph or digital source. It's exciting. I would love to see some of my photographs "printed" that way.
I can understand the problem of the milling machine following or interpreting a pixel based image. I wonder if you have ever tried raster to vector conversion to ready a photograph for milling?
When I think of how color or tone is constructed from more than one layer of transparent color to get the correct saturation and tone, I am unsure how that could be done if converting straight from a photograph. Each color and area of the image becomes a block for printing that color.
I think the cutout filter in Photoshop should be a good candidate for simplifying an image.
I am impressed with your craftsmanship in your reproductive prints, the water/river print shows a lot of growth and i am impressed.