Continued from [Seacoast in Autumn - 1]

Most of those photos in the previous post were taken around ten years ago, when I first started visiting this cove. Among the changes since then is a major rockfall from the cliff sometime recently, scattering some very large boulders across the sand.
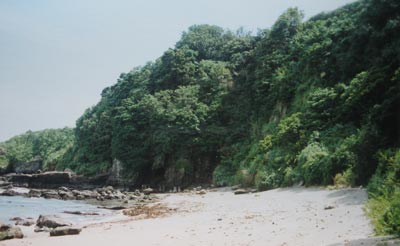
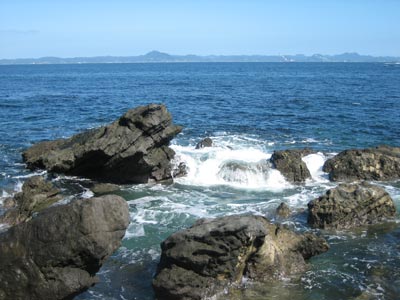
Here is one of those photos again, taken looking south, showing a clear open sandy area (this is summer, at low tide):
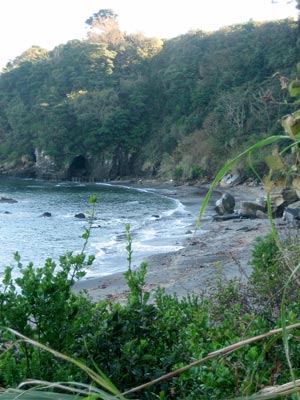
This next photo is taken from a spot farther back, in autumn, at a higher tide level. You can see the fallen rocks, which are actually quite near the spot from which the previous photo was taken ...
But anyway ... about the image concept for this print ... I want something that will give people some sense of the entire place - a view that shows the sweeping curve of the beach, the sea, and the cliff behind. But if I were to use an image like the one in those photos - which are mostly filled with the tangled dark mass of vegetation on the cliffside - we would completely lose the feeling of being in a wide open clear space. It almost feels claustrophobic!
It's a problem - I want to show the geography, but I also want to have a wide open clear feeling. How do I reconcile those two apparently contradictory requirements? Let's try taking a hike ...
If you look at the skyline in that second photo, you can see a tree poking up right up at the top of the cliff. There is no pathway to climb directly up there, but by going around 'the long way', I am able to get to the top, and the view I see while standing under that tree - looking down at the cove facing north - is the design I will use:
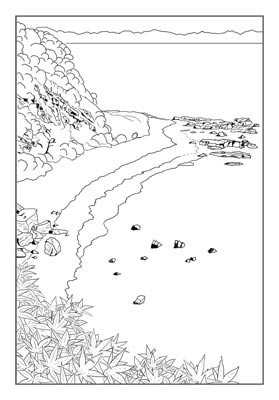
What kind of print do I hope to make from this design? Well, here's a short quote from the accompanying story:
Down on the beach it is wonderfully fresh and clean. The sun is beaming on the bright sand, and a brisk breeze is blowing. The weather report this morning was vague, promising a bit of everything over the next 24 hours, but at the moment only a few white clouds patch the sky here and there, and don't threaten to spoil the mood. Out on the open water there are occasional flashes of white as the breeze pulls the tops off small waves, but the fishing boats out there are steady on the surface, not lifting up and down on a swell. ... All in all, I am surrounded by a wonderful sensation of space and openness.
The colouring on the beach ... the sky ... and the sea - most of all the sea - is going to be where this print lives or dies. At present, the water is just an open empty area on the design, but what is cut and printed there will determine the complete character of the print.
Got your own ideas about how it should look? As always, I'm eager to see how other people would approach this (even though I've got a pretty good idea about what I will be doing with it) so you are welcome to try a 'Colour Your Own', if you wish.
Instructions:
- Download a transparent .png file of the drawing from here.
- This can be opened in any common image editing software (Photoshop/Illustrator/etc.).
- Create multiple 'layers' (positioned beneath the transparent line drawing) to make it easy to brush colour across the required areas of the design (Adjusting the opacity on some of your overlapping colour layers will make the print more closely resemble the kind of print I will be producing ...)
If you send me your result, I will be happy to post it on this page for public comment.
The thread continues in [Seacoast in Autumn - 3] ...
Posted by Dave Bull at 7:54 PM | Comments (0)

