
November 23, 2006
That printing example I posted yesterday was from the current batch of 20 sheets. The shot was taken a few days ago, and yesterday I actually finished up the main part of the printing on that batch. I say 'main part' because it is turning out that I have to handle part of the printing in a special way - I am going to have to do the final three impressions on dry paper. It's a bit of a long story ...
Back at the planning/carving stage I had to face the question of how I would handle the metallic pigments on this large print. I have used metallics any number of times for prints in my Surimono Albums series, but because of the generally small size of those prints, I faced no special problems with this. Sometimes the metal was mixed in with the pigment itself, sometimes applied to the block in powder form, and sometimes dusted over the face of a print that had been partially printed with a glue mixture.
I did a few experiments for this one, and determined that I would use the 'dusted over glue' method for the two main metallic areas - the 'gold' and 'silver' floral patterns. (I put those two terms in quotation marks because I am using metallics that give those colours, rather than using those elements themselves.) Then, before I started carving, I had to make a decision on whether or not they would be printed on dry or wet paper. Because the paper changes dimension quite dramatically in accordance with the amount of moisture it contains, the set of blocks has to be carved with this in mind, and if one of the impressions is going to require dry paper, the tracing must be shrunk in size to match the shrinkage of the paper when it is dried. I thought that I would be able to print these metal powders with the paper in the normal damp condition, so I carved the blocks at the same dimension scaling as all the others.
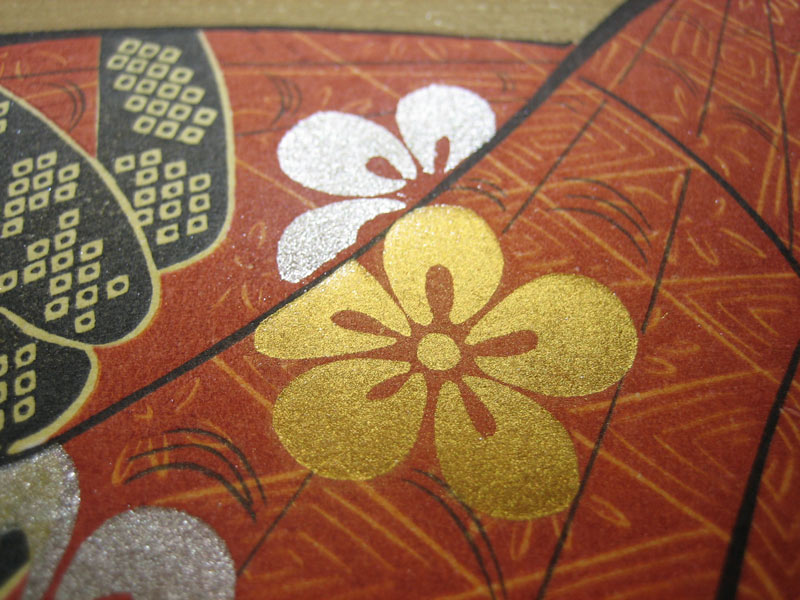
It seems now, that this was perhaps a mistake. Here are two photos ... the first taken of a test impression made on dry paper ...
... and the second of an impression (the gold only) made on wet paper:
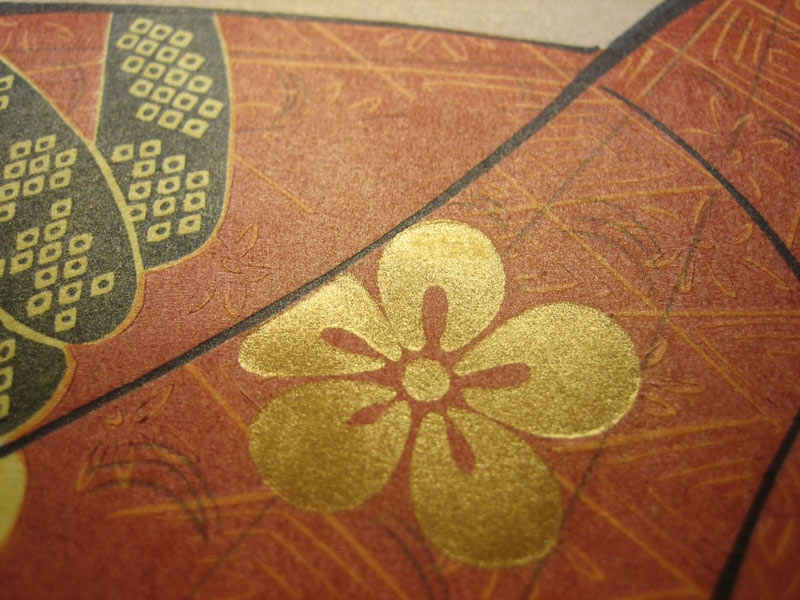
The one on dry paper is fairly clean and sharp, but the one on wet paper shows an unacceptable amount of 'brush over' - metal pigment that has remained stuck to the paper in areas surrounding the actual pattern. I've fooled around this way and that way, trying to avoid this problem, but have had to face the fact that this particular material just needs dry paper ...
When I printed the first batch of 20 prints earlier in the month, I 'fudged' it a bit by using partially damp paper, and printing those two blocks multiple times, adjusting the registration for each partial impression. But the extra work (and chance of error) involved with this is really not acceptable, so yesterday, when I got to this stage of printing for the second batch, I set the paper out to dry, and got to work on a new pair of blocks for these two impressions - scaled so that the pattern fits in the proper parts of the image with the paper in the dried (and shrunk) condition.
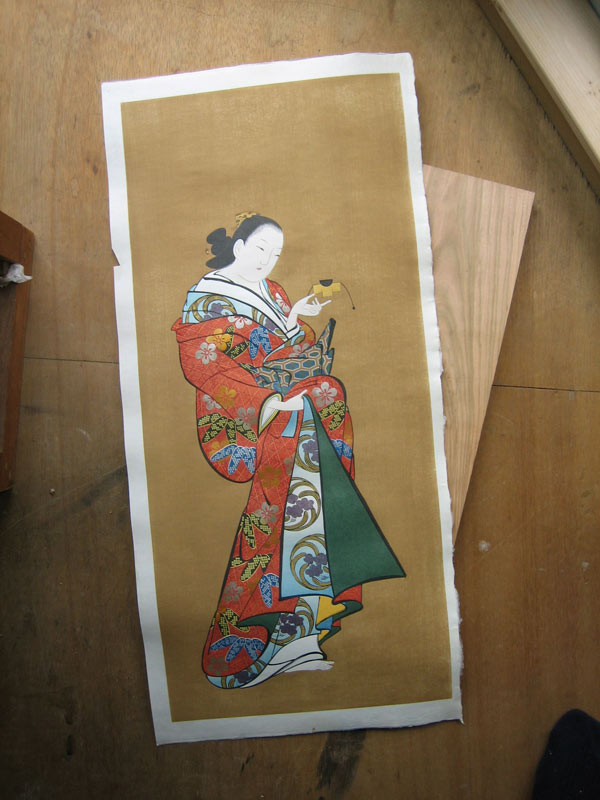
How to prepare the tracing for carving these two new blocks? Simple ... take copies of the completed - and carefully dried - print from that first batch, and paste them face down on fresh pieces of wood. Here's one of them waiting for the sacrifice ...
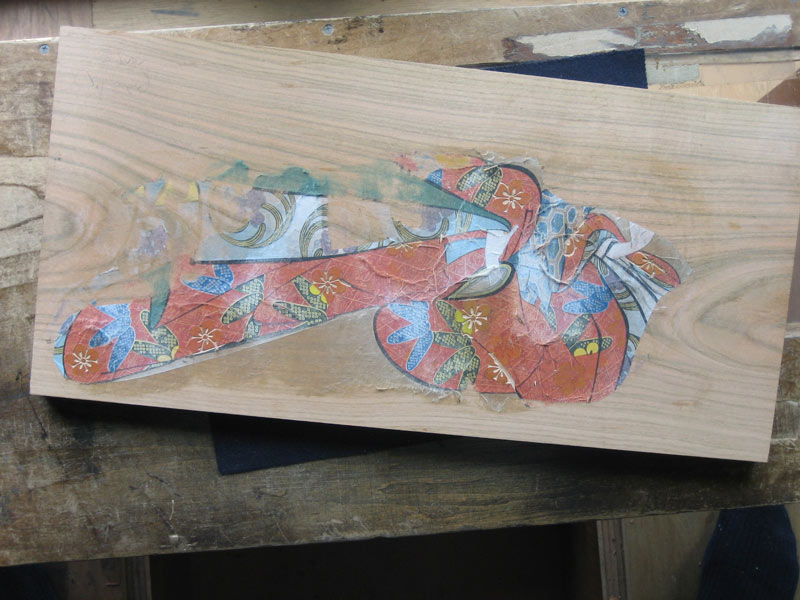
And here it is a few minutes later - pasted down, peeled off, and with the carving under way!
Here's a closeup ... one of the floral patterns being carved ...
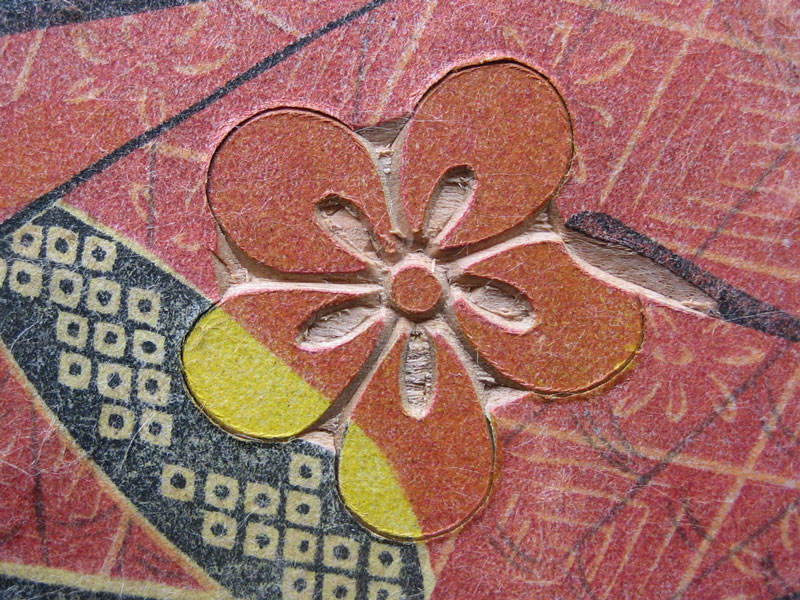
Once these two blocks are done, it should be possible to print the metals from them on dry paper in perfect registration, and with next to no brush-over ... We'll see!

![]()
![]()