« More carving ... and we have a winner! | Main | Mystique Series - key block done ... colour separation »

Paper arrives ... a new world of problems ...

Posted by Dave Bull at 4:17 AM, July 20, 2010

It's difficult to remember what I've written about here on the RoundTable - did I mention the sizing problem before? Well, for readers who aren't up-do-date on that situation, some info is in a recent Story A Week episode.

That story mentions 'mid-summer' as the crunch time, and here we are ... The packet of paper arrived the other day, 400 sheets of hosho from Iwano-san, enough to last to the end of the Mystique series:
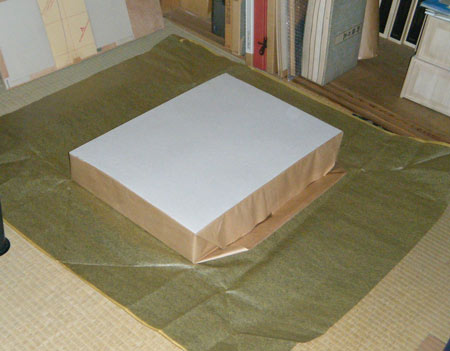
It is, of course, unsized, which I had requested, but it is also trimmed, which I had not. Back at the beginning of the year, when talking (face to face) with Iwano-san about this order, I very carefully gave him my requirements for the dimensions, going to far as to draw a diagram of what I needed - a rectangle with the dimensions (a size adequate for four of my print pairs), surrounded by the 'mimi', the selvage. But somebody in his workshop misinterpreted this, and trimmed the whole stack, removing all the selvage.

Does this matter? Yes, of course! When applying the sizing, the paper has to be hung up to dry and this is normally done with clips hanging from cords strung along the ceiling. These clips leave marks in the paper, but as the paper is (normally) oversize and gets trimmed at the end of the process, no problem.

But this paper is trimmed to the exact dimensions I need on the blocks, and is unsized. And what is worse, most of the prints in this Mystique series will not be printed right to the edge of the final dimension - which could help flatten out any marks - but have an embossed pattern around the edges. Any tiny marks left in the paper by that drying stage will be absolutely and clearly visible in the finished print. So clips are 'out', and I'm going to have to find another way to dry them ...

Um ... after I learn how to do the sizing, that is!

More on that, as it takes place over the next couple of weeks ...

This thread about sizing continues here.

Discussion

Following comment posted by: Tibi on July 20, 2010 11:59 PM

How about double sizing? You can size the paper, hang them to dry. When the paper is dry, size again locally where you have the clamp marks and hang it from the other end (the dry one).

Maybe you can also size it in two steps, first one half of the paper, dry it by hanging from the unsized part (if possible), then the other half and dry it by hanging from the already sized and dry part.

You might also want to try to use pins to attach the paper to the string; you'd have to puncture the paper in 3-4 places with a pin, somewhere near the edge, and then stick the pin in the thread used for hanging -- this might leave some mark on the "back" side of the paper if the pin is too short and the paper touches the string. But, at least, the pin marks are way less visible, and you might even be able to put a bit of sizing on each pin hole to cover it.


Following comment posted by: Lee Oldford Churchill on July 21, 2010 1:46 AM

Hi Dave,
When I tried sizing I followed Walter Phillips' book, and some very helpful suggestions from you (I think though I can't find the email at the moment...). I think the Phillips' recipe was 1/8 tsp alum, 1/4 tsp gelatin powder and 2 cups (?) water.
But I didn't hang the sheets: I brushed them with gelatin, stacked them to equalize, then laid them out on scrap paper to dry. I have no idea if they would be up to the quality you need but it worked fine for my prints. I didn't see any differences in uptake across the sheets. They cockled a little as they dried initally but when I remoistened them for printing they relaxed fully flat.
I'd love to read about your experiments as you do them.
Good luck!
Lee


Add Your Input


Remember Me? (with a cookie ...)

(you may use HTML tags for style)

Back to the Main Page