Posted by Dave Bull at 7:31 AM, April 5, 2011 [Permalink]
OK, let's wrap this one up!
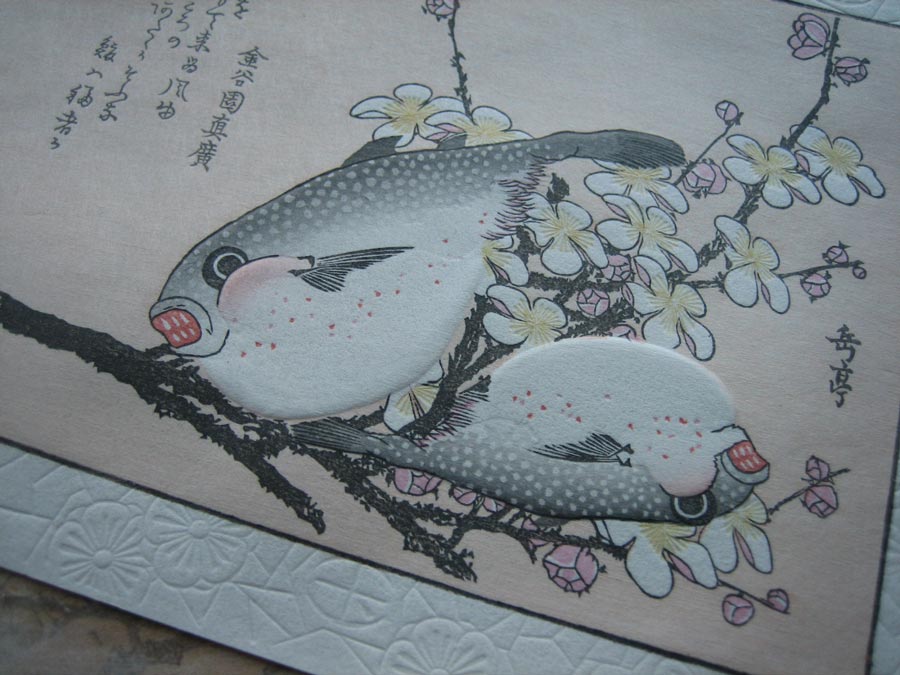
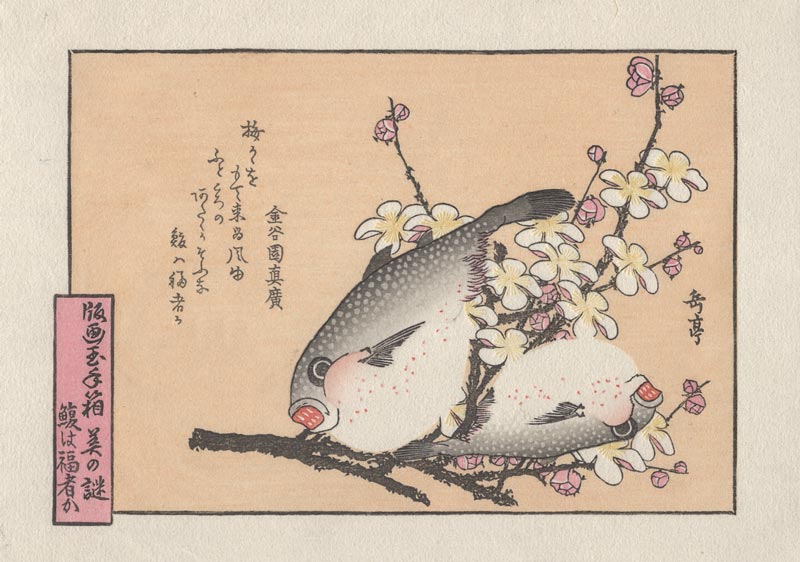
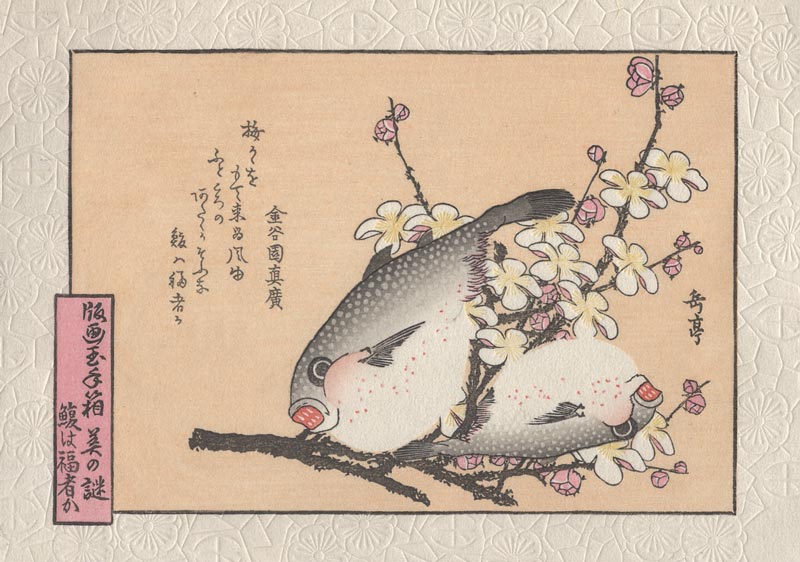
As I mentioned previously, I have included one of the two poems from the original surimono on which this print is based. And no, I'm not going to make a translation, sorry. These old kyoka were really created 'for the moment', and that moment was nearly 200 years ago. The allusions and wordplay are all pretty much gone now, and although a specialist can extract some of the original meaning, it would probably take a full essay to bring it to life. Game is not worth the candle. Just enjoy the visual object. (And incidentally, the same thing goes for most contemporary Japanese, who cannot read the archaic script either ...)
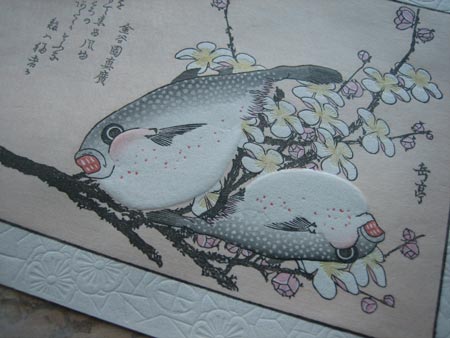
Just two more impressions left, neither of which are going to use any pigment. First, the surrounding embossed pattern:
This is a karazuri, produced by placing the paper face-down over the carved pattern, and rubbing the back with the baren. Note that the back of the paper stays flat, and that the 'raised' parts of the embossment are not actually raised. They are untouched paper; it is the surrounding parts that have become flattened.
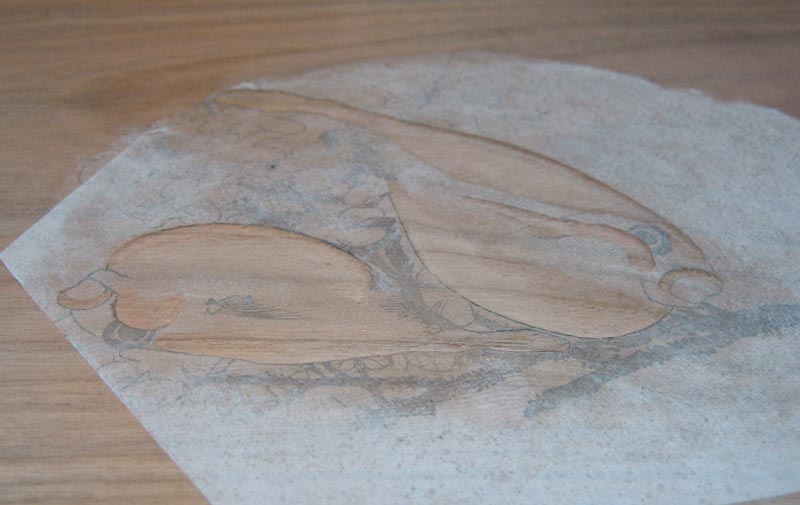
That's quite different from this next step - also 'embossing' - but which is the kimedashi:

For this, shallow depressions were cut in the block surface:
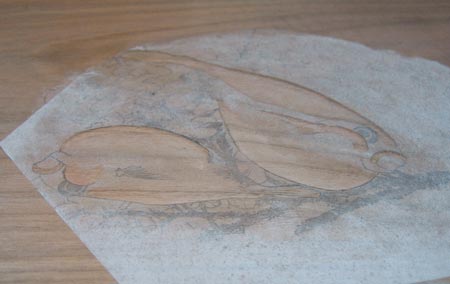
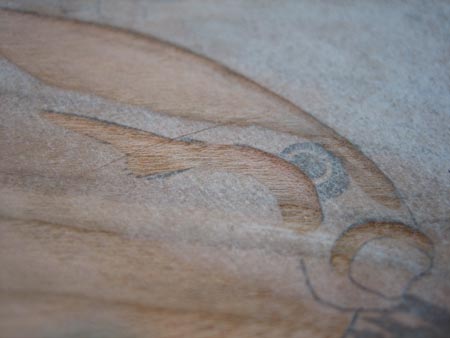
The paper was placed over this face down, and then pushed down into the recess. For this you need a smooth and firm tool (boar's tooth was apparently commonly used for this in the old days.) I used the smooth and firm end of a plastic pen, something the 'old guys' didn't have available!
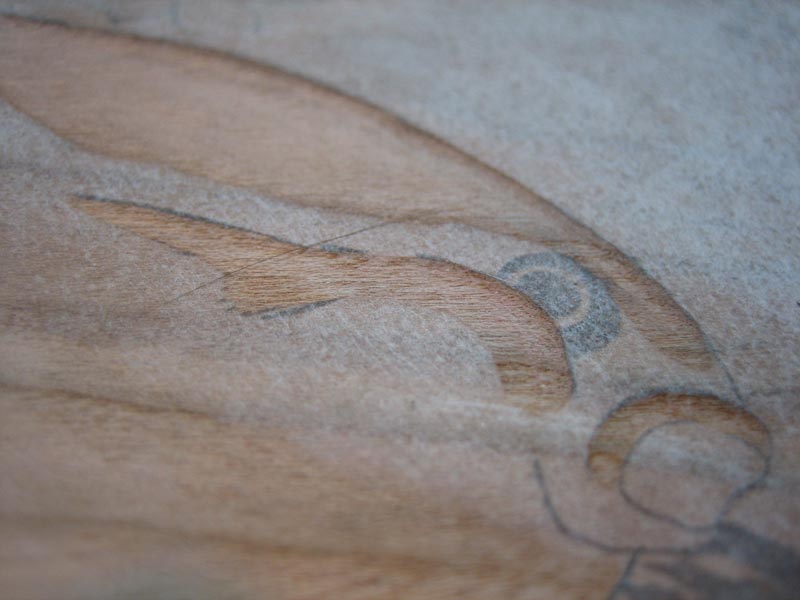
Here's a quick snapshot of the result, in front of a window under raking light.
So she's done! Nice one I think ... 'quick 'n easy!' 
The next few days for me are going to be a whirl of other work: postponed desk jobs, web site updates, a quick hospital visit to a friend/collector I haven't seen in a year or so, a hanami party on Friday night (yes, we are still doing those here in Tokyo this year!), and a 'coming-of-age' party for another long-time friend/collector on Saturday. I also have to get this print checked, signed, sealed, trimmed, and ready for shipping, along with doing the associated bookkeeping (collectors, watch out for your invoice in the mail tomorrow!)
And I almost forgot! Carver Sato-san phoned to let me know that the key block for the senshafuda print set is almost done, and that he wanted a meeting to organize colour distribution. We've setup to meet over at Tetsui-san's place (the young printer hired for this job) to work it out together, on Thursday morning ... [Later update: the meeting took place as scheduled, and a report is here.]
Just when I will be able to get back to the bench to begin work on the second batch of these prints I can't say ...
Just another passing note here ... Cleaning up in the workshop this afternoon after running the end of the batch, and looking at one of the prints just finished ... (just as in the last photo above, under the natural window light).
Three weeks ago, this thing didn't exist. There was a bunch of blank washi in my storeroom upstairs, some blank wood also waiting, and an 'idea' in my mind that, "Well, I guess it's time to get started on the Gakutei print that I have been planning to do ..."
And here, just three weeks later, we have a stack of 120 of these beautiful objects. As I have written before - and will many times again - this kind of washi is stupendously long-lasting, and these prints will last easily 200 years, and probably a lot longer. And they will get progressively more beautiful as they age!
And during that three weeks, I've done a bunch of other stuff: worked on the senshafuda project, posted here on the RoundTable, kept up with Story A Week, roughed out a website for my Barenforum friends, and enjoyed the wonderful sunshine we've had this month (to the extent that my parents were worried on Skype why my face was so red! They were thinking it might be something to do with the nuclear plant problems, and I'm not sure they believe me when I tell that it's because I sit out on the front stoop to eat my lunch most days ...)
What am I trying to communicate? Not sure myself actually. It's something that comes up pretty much every time I get a stack of these things completed, and flip through it. This much 'beauty', and it just came out of a pile of blank raw materials, after a few days' easy and peaceful work. There is something there that just doesn't seem to add up!
Apologies for the digression ...

That karazuri is fantastic! What a difference it makes to the print, and so beautiful. Happy hanami.
What you seem to be saying in your comment is that you love your work. Be Happy!
Pufferfish! They puff! (Why I wasn't expecting that, I don't know. But the kimedashi has suddenly made me excited about this one.)
Hi Dave,
For the kimedashi, I have to presume that the paper is still damp during this part of printing so that the paper will 'stretch' and fill in the shallow depressions that you have carved into the block. However, you still have to dry the prints, and when you put them between your absorbent sheets and then press them so that they will stay flat when dried, wouldn't all that pressure flatten out the work you have just completed? In any case, the kimedashi really looks terrific and I am eagerly waiting to see the real print!
Sheesh, I'm trying to write the newsletter this morning; don't get me distracted ...
The flattening is a concern, but not such a major one as you might think. The paper isn't stretched all that much, just a fraction of a millimetre really, and it would actually be difficult to flatten it enough to remove all traces of the kimedashi, even with heavy weights.
But yes, putting them back into the damping sheets is not possible - this has to be the final step of the process. The prints come straight off the kimedashi block onto a stand for the first stage of air drying. I then watch them carefully, and (batch by batch) scoop them up before they get wrinkled and put them under the final drying boards. I don't place any heavy weights on top, just enough to keep them gently flat.
It was a bit difficult this time because there are two impressions that had to come 'last' - the kimedashi and the surrounding karazuri. So people who were watching the webcam saw me alternating between the two blocks: I printed the karazuri on one sheet, quickly switched the blocks, printed the kimedashi, set the paper aside, then switched blocks back again for the next sheet.
(This same problem was another factor in the decision not to use metallics for the flowers. That too, needs to be the final step, as the metallics lose lustre if placed back into the wet stack. Two I can handle, three would be just too much ...)
I just got mine! The kimedashi is lovely.