Yoshida - Japanese Woodblock Printing : Chapter IV : Part V
Japanese Wood-block Printing
Hiroshi Yoshida
CHAPTER IV
(concluded)
Order of Printing
As has already been explained, there is no strict order of printing universally observed. The order for various reasons naturally differs with each print. However, this much may be said: usually the outline drawing is to be printed first and then the different colours are to be filled in by successive printings. There is another way which begins with the colour block, which ordinarily would come about the middle, and gradually builds up the finished print. Of course, some prints have no outline block, using one of the colour blocks as a key-block. In others, lines are put in at the end, not as a key-block, but as a colour block. If the top part is printed first, then the lower part should be printed next. If the middle part is worked out, then both sides should receive attention next in order to equalize the moisture of the paper. This general principle should be the guiding principle for the order of printing.
Block printing is in a way similar to an artist painting on canvas. The order of applying the colours depends upon the individual: each has his own reasons for the order he may follow.
The experience and taste of the artist will formulate the order of printing. The colour which the artist desires to make prominent should be printed last, for each colour has a tendency to bury the colour previously applied. The outline drawing is generally printed first in order to guide in applying the different colours. But there are cases in which the artist wishes to have the outline stand out clearly in the finished print. Then it may become necessary for him to print the outline twice, the second time at the end.
The printing of the outline again at the end requires great skill. One who has mastered all the technique may be able to do it correctly; the artist usually fails to get the outline to register exactly.
It is natural to print the body colour first and the transparent colour last. Of course if the print requires a soft effect, when vagueness is desired, then the order may be reversed.
It is not because I wish everybody to follow this order, but to guide beginners in this branch of the art, that I give below an order of printing which may prove useful.
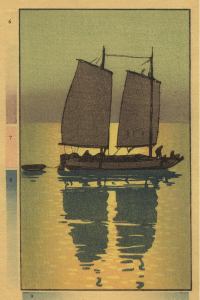
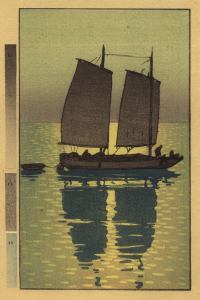
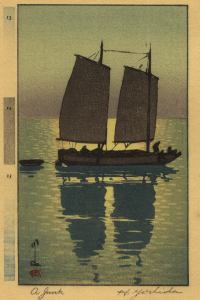
The process is difficult to explain in words, so I have decided to show it by means of prints, hoping that the reader will understand the order. Note the front as well as the back surface of the paper where the marks of the baren may be observed.
Of course, I am not concerned about criticism, from the art standpoint, of the print used here; I am concerned merely about the printing, the order and how to work it. These examples will show, not only the order of printing, but the analysis and different ways of cutting as well.
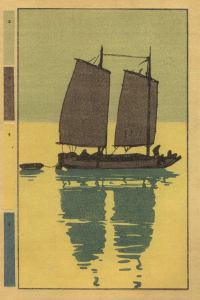
"A Junk"
In making this print the following twelve blocks were employed, the last three being for the special prints:
- I. Sumi, or outline, block.
- II. Sail block for the sail and boat.
- III. Boat block for boat only.
- IV. Reflection block.
- V. Nezumi-ban, or grey-block.
- VI. Sky block.
- VII. Water block.
- VIII. Red block on water.
- IX. Indigo block also on water.
- X. Lights block.
- XI. Beta-ban with lights and reflections cut out.
- XII. Beta-ban (flat block) over everything.
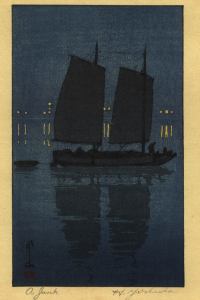
This analysis was based on the intention of producing "A Junk" (in the afternoon) and also its special edition, viz., "A Junk" (at Night), Plate V.
The following will show the order of printing "A Junk" (in the Afternoon) and various uses that were made of the different blocks:
Plate I
|
|
Plate II
Plate III
Plate IV (Finished)
Attention may be called to the fact that the colours in the print, as they are applied one on top of another, do not in many cases appear nearly as strong as their samples shown on the margin, revealing the effect of the colour combination in printing on the value of those colours.
Plate V (Special Print)
For the production of "A Junk" (at Night) many of the blocks employed for "A Junk" (in the Afternoon) were used, while some were omitted, and three extra blocks (X, XI and XII) were introduced. The following will show the analysis:
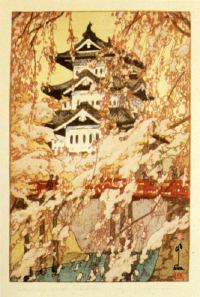
"Cherry and Castle" (Frontispiece)
The following blocks and impressions were used for this print:
In "A Junk" and "Cherry and Castle," shown in this book, there is a limitation as to the size and the number of colour blocks used and the impressions taken. In ordinary art prints the blocks are more generously used and a much greater number of impressions is taken. When the tone is weak, another impression will be added to it to give a deeper tint and richer tone, and the extra application of the "grey-block" produces all sorts of variations.
"Cherry and Castle" is an example showing how a print may be built up with thin tones. But three or four soft tones are not enough in artistic prints. Take, for instance, the figures on the bridge which received only one colour in this print, though a different effect was obtained by printing other colours on top of it. In single sheet art prints, a greater variation is necessary.
A careful examination of the list given in the Appendix will give an insight into the analysis of each print. What is given above is the analysis of what has been done, but the first analysis is that of the picture in the artist's imagination. It is difficult to make it on that account. Yet the print to be made must first be definite in the artist's mind, and the analysis must be thorough and definite before he proceeds with the work.
