Barens ...
It was natural for me to choose the Baren as the symbol for my woodblock printmaking activities, for this incredibly simple and incredibly complex object stands at the very heart of the printmaker's art. We know absolutely nothing about how it evolved, or where it came from - and it bears no apparent resemblance to printmaking tools in other countries. It seems literally to have just 'popped' into being. Made from nothing but scraps of paper and shreds of bamboo skin, it is one of the most sophisticated tools available to craftmen anywhere.
Entire books have been written on this tool, but until the day comes when they can be translated from the Japanese and posted here, this short summary will have to suffice ...
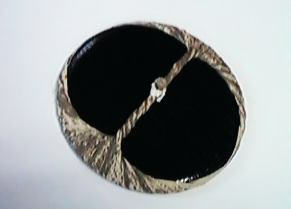
Note that this summary deals only with the 'hon' baren, the traditional type. There are many newer alternatives - I will discuss those on another page ...
The traditional baren consists of three main 'parts':
- The 'baren'
- the coil of braided bamboo whose angular projections are what actually press the pigment into the printing paper. - The 'ategawa'
- the disc that cradles and supports the baren coil. - The 'takenokawa'
- the sheath of bamboo skin that holds everything together.
Baren
'A coil of braided bamboo' ... in those five simple words what incredible complexity is held! Selected skins of 'shiradake' (white bamboo) are cut into strips approximately 15cm long and approximately 10mm wide (this depends on the width of the skin). Strips from the outermost and innermost section of the skin are discarded. The skin of the remaining strips is then separated into 'inner' and 'outer' layers, and the inner part is discarded. The remaining layer is then split into fine strands the width of which is chosen in accordance with the desired 'strength' of the finished baren - about 2mm is typical.
A huge heap of these strands (15mm x 2mm) is softened by wrapping them in a moist towel, and the braiding process then begins. A nail is set in a plank and four strips are tied together at one end and looped over it. (The photos that follow are of Mr. Kikuo Gosho's hands ...)
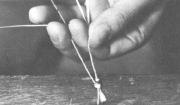 What happens next is impossible to describe in words - the strips are twisted together two at a time in tight spirals, and the two resulting spirals are then twisted together.
 The four starting strips were all chosen to be different lengths, and as each one 'runs out' it is 'replaced' by a new strip laid into the developing spiral cord.
 The process continues, with the baren maker holding the four strands in his fingers, twisting each pair in turn, and then twisting them all together. I've tried this, and am ready to swear that one needs 12 fingers to do it - and then somehow must also find free fingers to pick up and insert the new strips as necessary. The baren maker continues until about 30 meters of the cord are wrapped around the dowels that project from the plank.
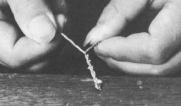 When enough cord has been prepared, construction of the coil itself begins. The little 'ends' that project from the cord where new strips were laid in are trimmed off with scissors. The halfway point of the cord is looped over the nail, and the baren maker starts to twist the two halves together into a fatter cord.
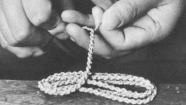 When this is done, about 15 meters of it, it would be ready to be coiled and sewn into a tight circular spiral, and would be a finished 'shi-ko' (four strand baren). These are not so common, and it is more usual for the baren maker to go back to the nail and twist two of these cords into a 'yakko' (an eight strand baren). This is the 'standard' type, but if an extremely strong baren is needed, two of these cords can be braided together into a 'juu rokko' (a sixteen strand baren). (It is also possible to combine an 8 and a 4 to make a 'juu nikko' (12 strand)).
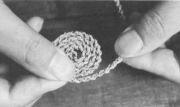
The reason that these higher numbered barens are stronger is that as the coil becomes fatter, the number of points of contact with the paper decreases. In the case of the fine 4-strand coil, many points per centimetre make contact, and the pressure is thus weaker on each point. In the 16-strand coil, far fewer points make contact, and the pressure is high.
To further complicate matters, the strength of the finished baren also depends to a great deal on the width to which those individual strips were cut. Wide strips (3mm) will result in a stronger 'heavy' baren, narrow strips (1mm) in a weaker 'fine' baren. I have a 12-strand (I think) baren given to me by an older printer that is the most fine and delicate baren I have ever seen - due to the fact that the original strips were cut to an extremely thin tolerance. (This also meant that many many more of them had to be used to make the coil - it must have taken an incredibly long time to make it.)
So it is this coil (the 'baren' itself) that actually does the work of pressing the paper onto the block. But by itself, it would be useless - the baren maker has a lot more work to do before things are ready to use ...
Ategawa
While the baren maker is busy with all the braiding, construction of the backing disk takes place at the same time. A wooden form is prepared, the upper face of which is carved in the shape of the inside surface of the desired disk.
 Over this is laid a single sheet of extremely thin 'washi'. This is moistened with persimmon juice, and another sheet is laid on top - with the 'grain' of the paper turned to face a different direction.
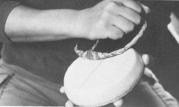 The two sheets are 'burnished' together (with a baren!), the edges are carefully 'tucked' over, and the form is set aside for 24 hours for the sheets to dry.
The next day the procedure is repeated - another sheet is laid on, again with the grain in a different direction. This continues for nearly two months until about 50 sheets have been combined. (The baren maker of course has a collection of these forms, and works on many ategawa at one time ...)
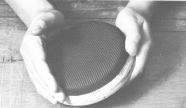 When the desired thickness has been reached, a layer of fine silk is glued on as the final layer. When this is dry, the exposed surface is carefully coated with the Japanese 'urushi' lacquer, and when all is dry and hard, the ategawa is carefully removed from the form.
The waste 'overhang' is trimmed off, and the disk is finished and ready for use. The multi-layer construction gives a disk that is incredibly strong, and which yet has considerable flexibility. When using the finished baren, one can 'feel' the woodblock right down through the disk and coil ...
Takenokawa
Not the leaf of the bamboo plant, but the skin 'sheath' that forms part of the stem, and which is shed by the plant each summer. Skins from the 'madake' species are used, and I have been told by the bamboo skin supplier that those from a particular hillside in a particular part of the country are in most demand.
As tying the sheath around the baren is a very complex and very important job and one that faces the printmaker on an almost daily basis, I will prepare a separate page elsewhere in the encyclopedia to describe that process.

