Carving the Hair on Ukiyo-e Prints (entry by David Bull)
'Comic' version of this tutorial is here ...
For carving the delicate hair lines on a typical ukiyo-e print, one needs three things:
- a very sharp knife
- a clear hanshita (tracing) on the wood surface
- a steady hand!
All three ready? Let's step through the process ...
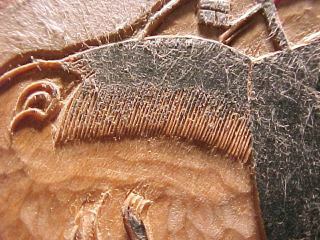
Cutting the hair is a 'five cut' process - this is how many knife cuts are needed to allow each hair to stand free of the surrounding wood. The first cut is made along the entire length of the hair region, perpendicular to the hairs themselves - about 1mm 'out' from the line where you wish the hairs to actually end in the finished print. Cut it about 1mm deep, and angle it slightly (bevel it 'towards' the hairs).
(When we were preparing the photos for this entry, my daughter and I forgot to take a picture of this line after it was carved, but you can see it on the right hand side of this photo ...)
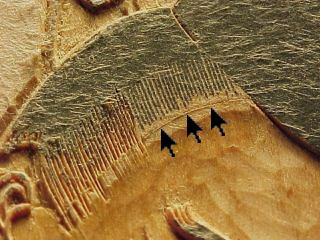
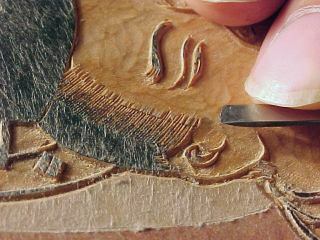
Then the actual carving of the hair begins. Keeping the flat side of the knife blade against the hair, make a stroke down the length of each hair, starting up at the 'top' of each line, and sliding down off the end of each one. Keep the knife almost vertical - don't attempt to bevel the side of the hair. Go through the entire 'set'. This is stroke number 'two' in the five:
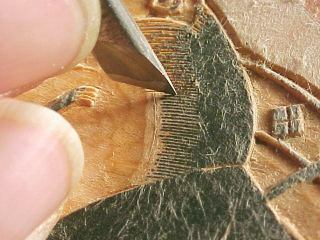
When they are all done (or one-at-a-time as you see in these photos), use the other face of the knife to cut the opposite side of the neighbouring hair. Although it is difficult to see in this next photo, this cut is made with the knife held at a lower angle; this side of the hair is quite beveled. If the three cuts have been made correctly, a long and thin triangle of wood will now pop out:
When they are all done, the row should look something like this:
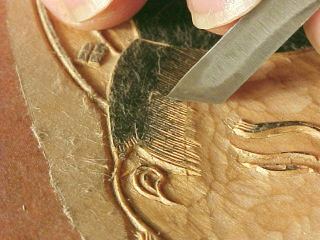
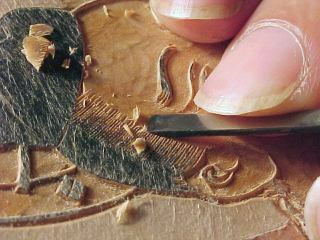
Next, use the 'aisuki' chisel to trim off the waste that lies beyond that first line that you cut:
Slide the chisel along the line, being careful not to nick any of the hairs:
The result should look like this. But I said that it was a five-cut process - there is still an abrupt line at the end of the hairs, and if we were to stop at this point, this would show in the finished print ...
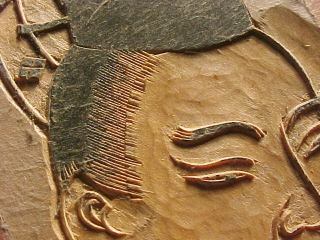
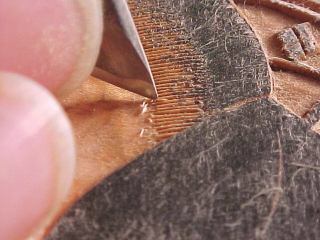
Two more cuts are necessary on each hair - one from each side, to 'feather' the tip. It is difficult to see in this next photo, and difficult to describe in words too ... Don't carve down the entire length of the hair, but start a few millimetres back from the tip. Lay the blade in place against the hair, and then as you start the stroke, gently tip the knife over so that it starts to cut into the hair. As you pull the knife off the end of the hair, you will have tipped over about 10 degrees or so. Doing this from both sides leaves each hair ending in an invisible taper.
The difficulty here is getting these tapers to all end in the same place. Tipping over a bit too much will leave that particular hair too short, compared to the rest. It is not necessary (nor desirable) that each hair be exactly the same length, but wide variations are not so good ...
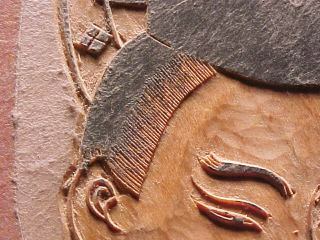
When you're done, the result should look something like this:
Oh, and did I forget to mention, don't bother trying this on something like pine ... A hard cherry is the wood of choice here in Japan, and for particularly fine work, a piece of boxwood (tsuge) is inlaid.
Photos by Fumi Bull ...