Wood Engraving
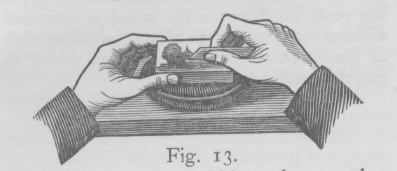
The tool has to be held in such a way that none of the fingers nor the thumb is underneath it. The handle rests in the lower part of the hand, the fourth finger in the groove of the inner part of the handle and the third finger by its side; these two fingers touch the handle and keep it in position within the hand. Following the third and fourth, the two forefingers rest on the outer side of the blade while the thumb, extending beyond the fingers almost to the point, is on the inside. The thumb is the only part of the right hand that touches the block. The fingers touch each other in natural order: there need be no space between any.

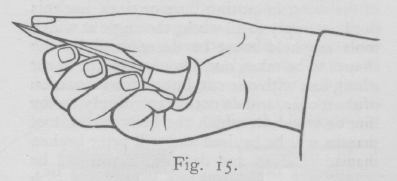
The tool should be laid flat upon the table, and may be taken up in one movement (Fig. 14). Seen from below it should then show as Fig. 15. Held in this way the tool will pass flat over the wood without any obstruction from any part of the fingers or hand.
The block is held on the sandbag by the left hand, generally towards the corners, which allows the greatest freedom for turning. When cutting straight lines the block is held stationary, the tool-hand cutting forward; when cutting curves the block is turned round, the tool-hand remaining in one position. There is no hard rule in this, the hands acting flexibly for each other, but it can be seen at once when engraving that a circle cannot be cut unless the block is turned round in precise ratio to the cuts of the tool, while to cut a straight line the wood cannot advance to the tool's point.
Engrave the lines one under the other, not one above the other; for circles it is much more easy to start the cut at the top than to start underneath, though to be able to start underneath is sometimes useful. The flat part of the handle should be just above the surface of the wood in cutting lines or tints, but this does not apply to all work; the angle at which tools are held must be determined by the shapes to be taken out. Do not attempt to cut a long line with one cut, but with a succession of short ones, and do not cut too deeply, or the line or wood on which the belly of the tool presses will be bruised and will print broken instead of clean and definite. If the tool be sharp the wood will chip out crisply at each cut; the lines should be cut out, not pushed or pressed out. Blunt tools are more responsible for slips than anything else except perhaps a disturbed mind.
Should there be any danger of rubbing the drawing during engraving, cover the block with a piece of thin paper after the manner of a tracing, first making a small hole where work is to commence.
The craftsman is advised to practise by engraving something definite,something that can be used. Aimless cutting and digging about on bits of wood leads nowhere, for it is a very simple matter to cut a line that need not be cut in any particular place, whereas to cut the lines exactly to the subject, to produce something that is required is not only getting experience, but the result is known at once in success or failure.
Roughly speaking there are four different kinds of engraving, of which any variations and combinations can be made. The first and most natural is to cut white lines on black, and in many cases the subject will be sufficiently expressed without further work; Fig. 16 is cut in this way.
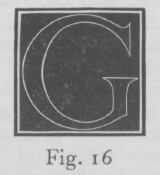
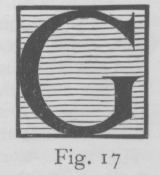
Fig. 17 shows the background tinted or shaded, that is, lines cut one under the other. Fig. 18 is the black letter cleared (scauped) away leaving it white, while Fig. 19 shows all wood cleared away except outlines.

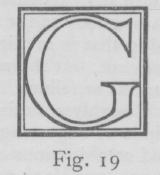
Bold simple lettering is an excellent subject to begin with. See that the corners are joined cleanly: little jagged bits left in look slovenly and print in a dirty manner.
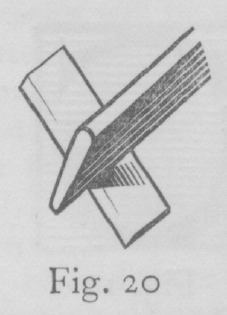 The
larger tint-tools and scaupers are used for scauping or clearing,
that is, for clearing a wide line round the work and cutting away all
wood not wanted. While doing this it is essential to protect the
surrounding work from the belly of the tool by a thin piece of card
(Fig. 20). It must be thin yet of sufficient substance to withstand
the pressure of the tool, for the work is done by levering out the
wood as well as cutting it. Card soon wears out. A thin piece of hard
wood or bone will do well if smoothed and bevelled off a little on
the edge to be used under the tool. The thickness should be about
that of a penny. When scauping start the cut a little away from the
work gradually approaching until the tool has cleared away all
unnecessary wood. Smaller pieces must of course be taken away by the
smaller tools. It is a good plan to extend the first finger of the
left hand over the block until it presses against the end of the
thumb of the tool hand. This position gives great control and
prevents much slipping.

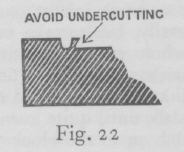
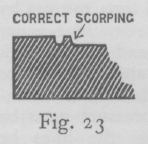
With the scauper clear a line round the work a little more than its own width. This is sufficiently wide to enable a proof to be taken. If all the wood is taken away it is almost impossible to proof some subjects (thin lettering, Fig. 23 for instance) without a handpress, for this wood supports the roller and burnisher and gives protection to the work while proofing.
