
DIY iPod Hard Drive Replacement
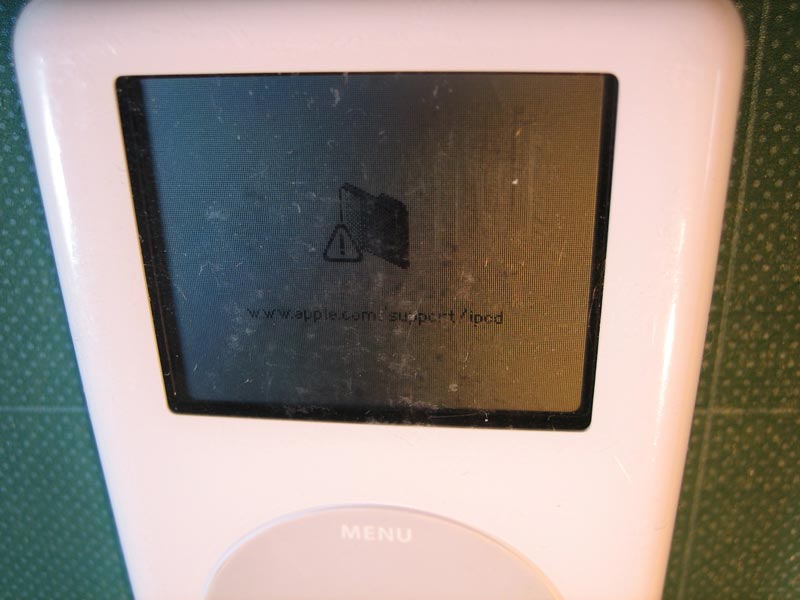
My daughter is a good kid, and certainly doesn't abuse her stuff, but she did have an accident with her iPod; I guess it happens to the best of us! She turned it on one day with her headphones already in place, and apparently had left the volume at a loud level the day before. She was so startled by the sudden loud volume that she dropped the thing ... All she could get on the screen was the triangle exclamation mark with the folder, and the hard drive kept making grinding, clicking noises (photo one):
I tried all the standard reboot, restore options, but nothing worked. The drive wasn't visible to Disc Utility either, so it seemed like the hard drive was done for ... When I looked around for replacement drives (I live in Tokyo), they didn't seem too expensive, so I thought it might be worth taking a gamble that a drive replacement would indeed bring the pod back to life. I picked up a factory-sealed 20Gb drive on a Yahoo Auction (for 7500 yen - currently around $60), and had a go at installing it.
Here, for the benefit of anybody who is thinking about replacing one of these drives, is a photo sequence showing how it went in. The iPod model is a click-wheel iPod with a colour screen. (These photos are clickable for enlargements)
Photo two: I used a butter knife to get into the iPod. That tool is a tiny bit on the thick side, but at least nobody gets hurt! You have to gently push the plastic inwards, and try to avoid 'prying' the metal bottom shell outwards too far. Slide along and try to release the five plastic tabs holding the parts together (more about this below).
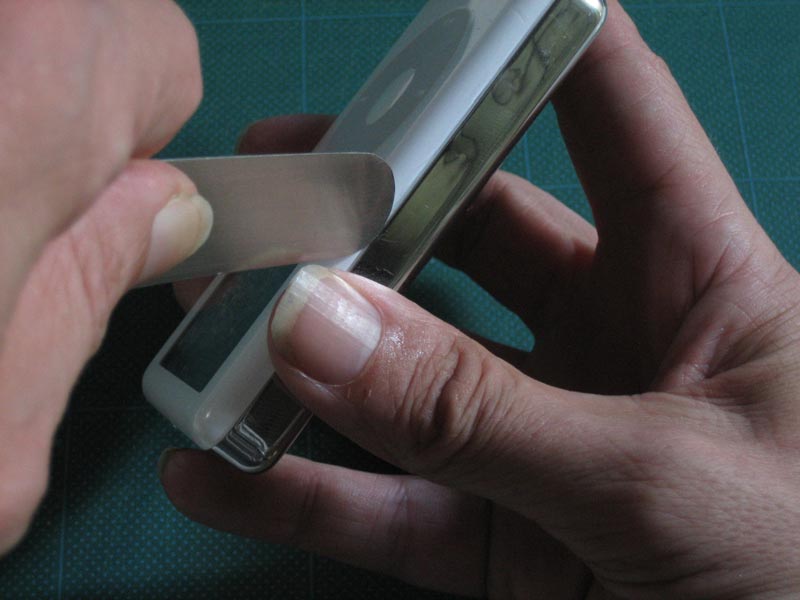
Photo three: here she comes ... it suddenly starts to open up.
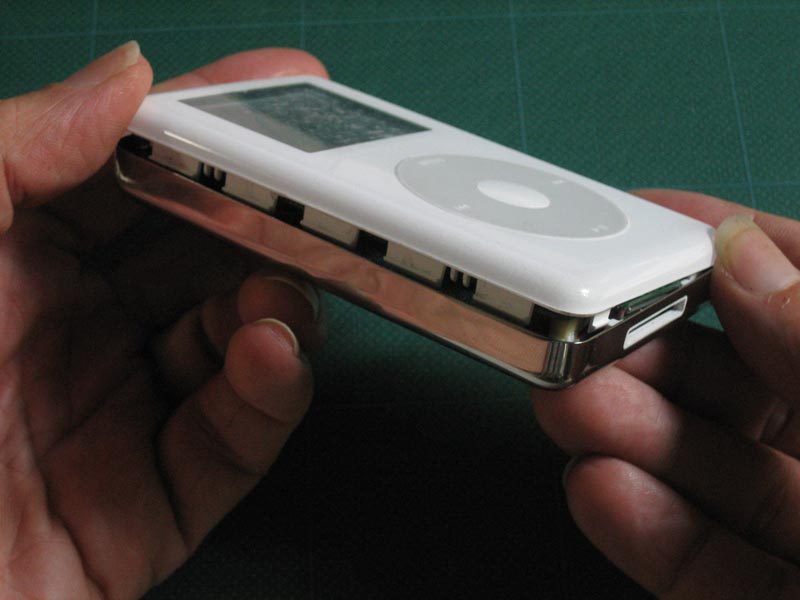
Photo four: you may need to release the two little tabs at the base of the iPod, but once they are free, the top and base can gently be teased apart. Pull them apart carefully, as there are cables connecting them. Lay the pod down, and 'open' it up ...
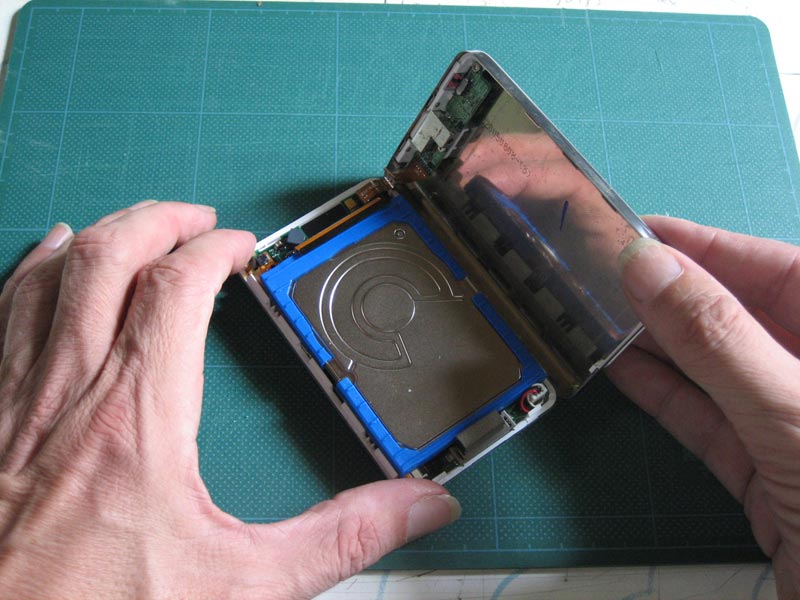
Photo five: the metal component you see on 'top', with the blue rubber bumpers, is the hard drive. Lift it up, and gently ...
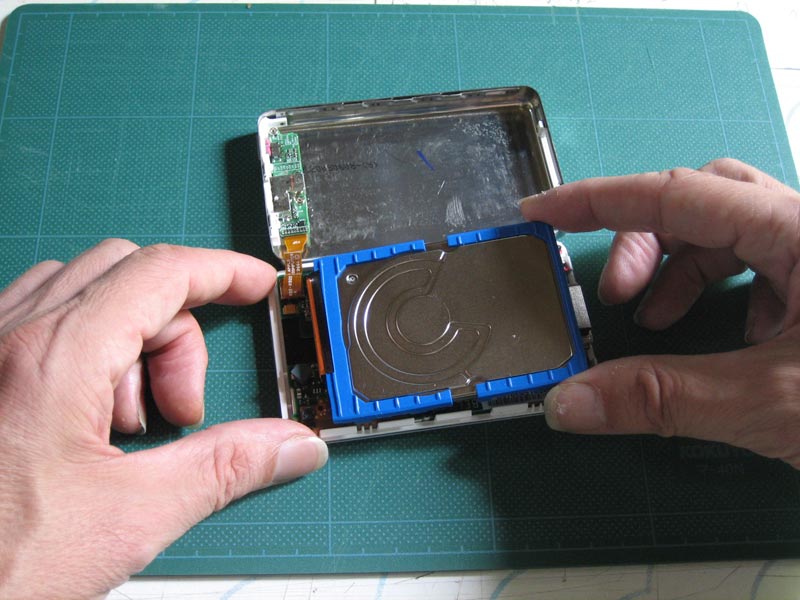
Photo six: ... slide off the connector.
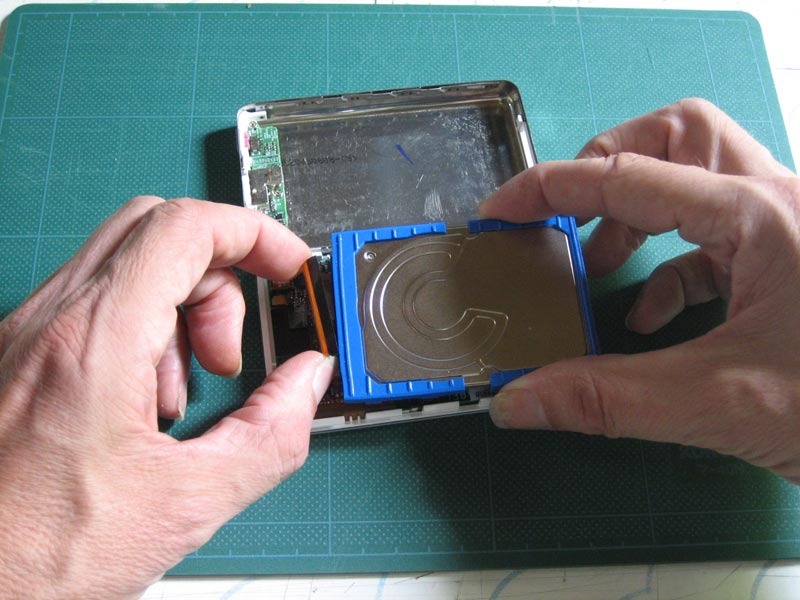
Photo seven: On the other side of the hard drive is a layer of thin foam padding.
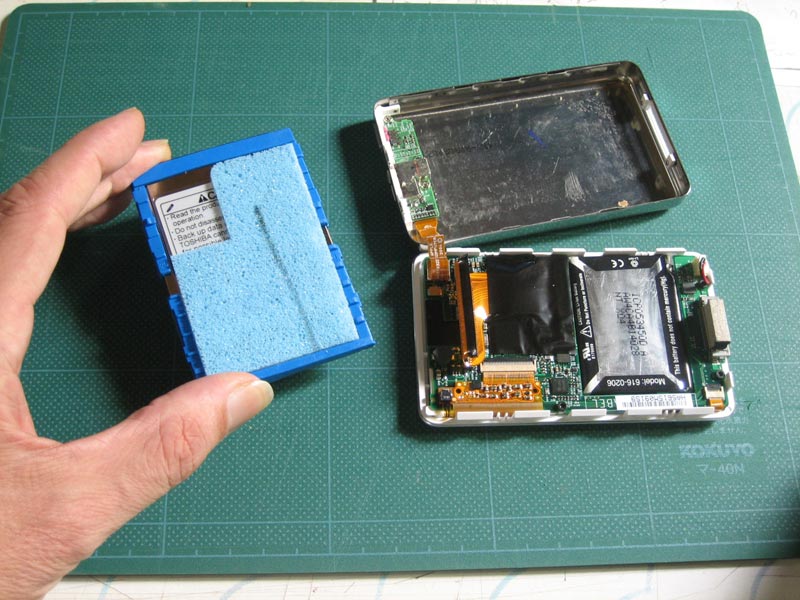
Photo eight: Slice this off carefully (so you can use it for the new drive), and also pull off the rubber bumpers. Keep track of which way round these go, so that you can replace them in the same orientation.

Photo nine: Here's the new drive, in its pack. It's raining and muggy here today, so there is no danger of static electricity, but I guess on cold winter days there could be. Get grounded if you suspect there might be a problem.
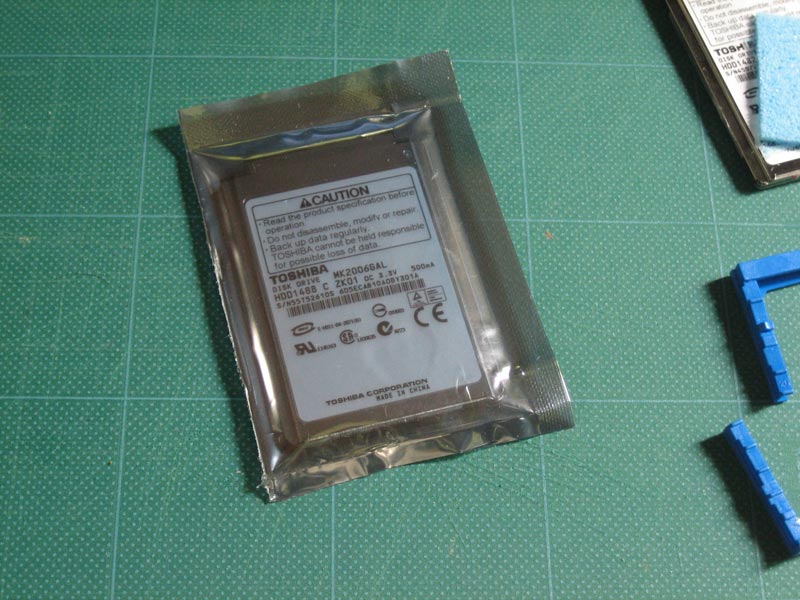
Photo ten: Here are the old and new drives side-by-side. The old one has a part ID of MK2006GALC, and the new one is MK2006GAL. I don't know if that is an important difference, but it didn't seem to matter in the end ...
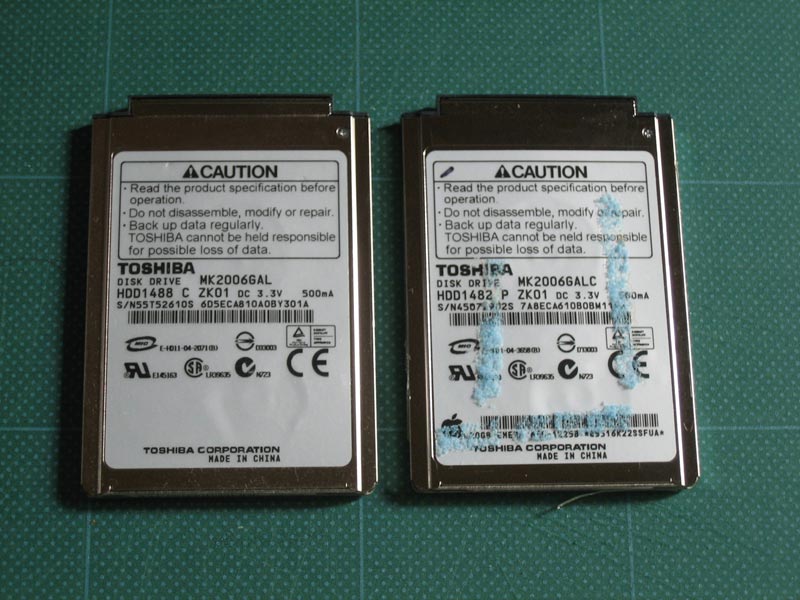
Photo eleven: Put the bumpers and foam onto the new drive, and replace the connector. It will only go on one way ...
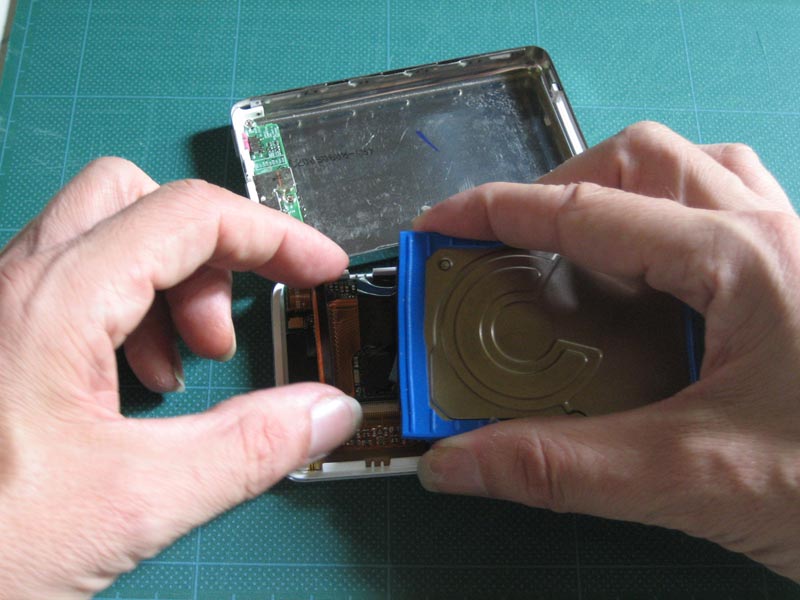
Photo twelve: The drive should slide back into place, and the two parts of the cover will easily click back together. Over to the computer, plug it in, and yes ... iTunes comes alive and thinks that there is a new iPod connected. Tell it to 'Restore' the system software, and you're back up and running!
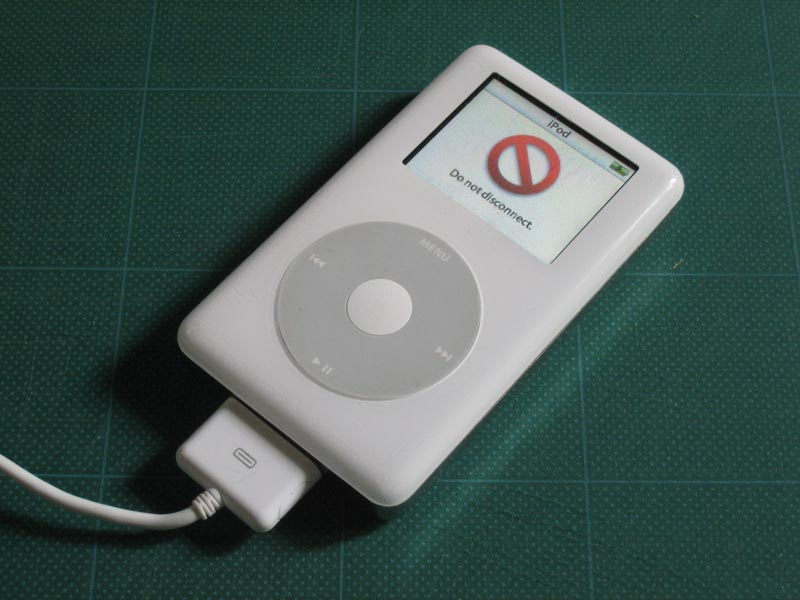
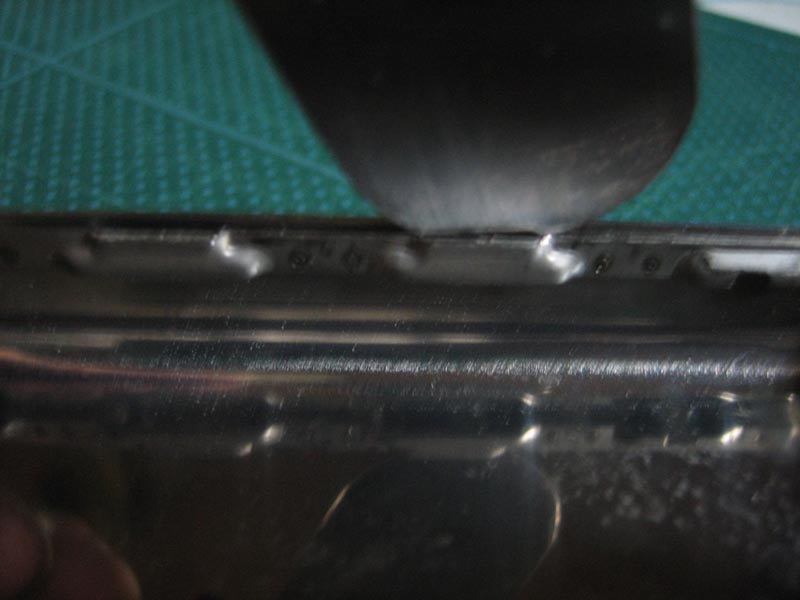
Photo thirteen: Here's a bit of important detail about taking the iPod apart. There are small metal strips riveted inside the metal case, into which the five plastic clips snap. When you are using your tool (knife, etc.) to pry the case apart, made sure you don't mistakenly pry inside these metal slots!

Photo fourteen: This photo shows you what you want to avoid - don't let your knife do this! Of course, from outside, you can't see what's going on, but 'feel' carefully while you are prying, and keep your tool moving back and forth along the entire length of the iPod body ...
That's the end of the iPod story. But while you're here on my web site, maybe you might like to take a look at a couple of pages: my 'Steal These Prints' page, where you can download free high-quality images of my Japanese prints, or the 'Gifts' page, where you can find the perfect item for solving the problem of what to get your mother for Xmas! :-)
